Managing Computers
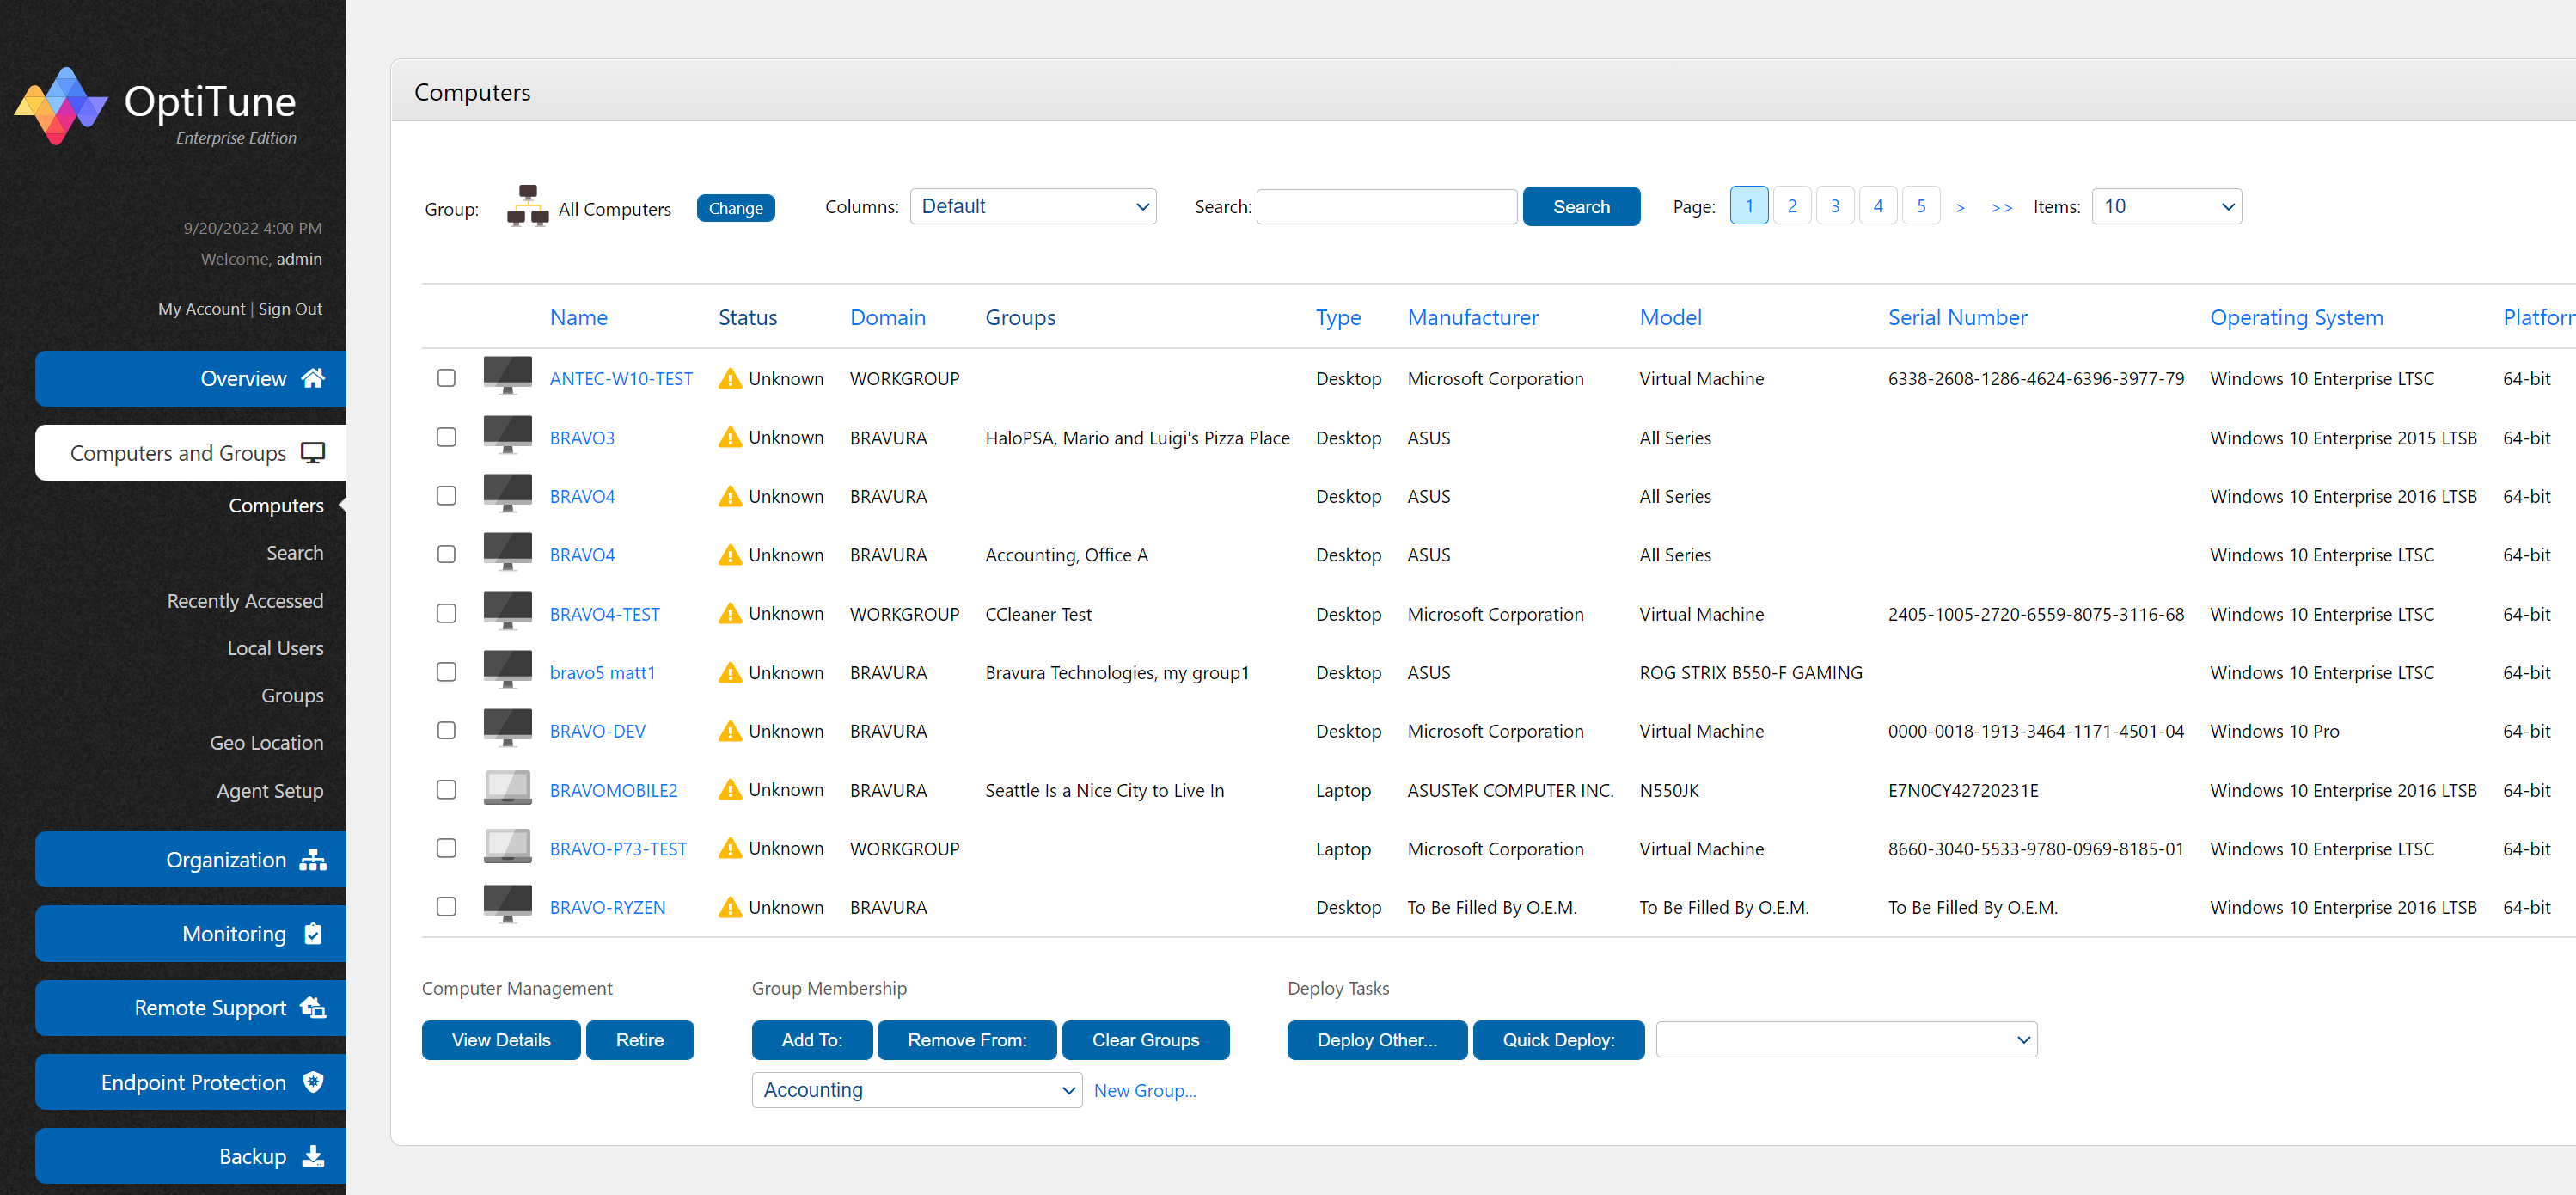
To view the computers currently managed by OptiTune, click on the "Computers and Groups" tab, then select "Computers".

On this screen, you will find a list of the computers in your organization.
Filtering by Group
At the top left of the list, you can filter the computers by group by selecting a group next to the "Group:" label.
Changing the View
At the top middle of the list, you can select the view (which columns
are displayed) by selecting one of the options in the "Columns:" drop
down list.
Choices include:
Default - The default view
Simple - A simplified view which only shows essential information
Malware - Shows the type of protection and threats detected on each computer
Windows Updates - Shows the number of updates available and installed on each computer
Applications - Shows the number of applications installed on each computer
Benchmarks - Show Windows Performance scores for each system component
Network/Location - Shows network information such as IP Addresses, and Physical Locations of each computer
Cloudberry Backup - Shows backup information specific to Cloudberry Backup
Searching
To search for computers with a specific name, or other attributes, enter some text in the search box at the top of the page, and click "Search".
Paging and Sorting
If the number of computers won't fit on one page, you will be able to page through the list of computers by clicking on one of the page numbers at the top right of the screen, or by using the paging arrows.
You can also sort the list of computers by clicking on any of the column headers.
Viewing Computer Details
To view the details of a particular computer, simply click on the computer's name, or select its checkbox and click on "View Details". This will bring you to a page with a detailed view of the computer in question.
Retiring Computers
If you no longer wish to manage a computer using OptiTune, or the computer has reached the end of its useful life, you can retire a computer by clicking on its checkbox, and then click on "Retire". Note that the computer does not need to be on or active to retire it from OptiTune management.
If you wish to reset the retired computers (and allow them to be managed by OptiTune again), go to the "Server Settings" tab, select "Advanced Settings". Under the "Retired Computers" section click "Clear All".
Assigning Groups
To assign a computer or multiple computers to a group:
Create the group if needed by visiting the "Groups" page, under "Computers and Groups".
Select the group from the drop down list below "Add To:".
Select one or more computers by clicking on their check boxes. You can also hold down the shift key while clicking on a checkbox to select a range of computers.
Click on "Add To:"
Removing Assigned Groups
To remove an existing assigned group:
Select the group from the drop down list below "Remove From:".
Select one or more computers by clicking on their check boxes. You can also hold down the shift key while clicking on a checkbox to select a range of computers.
Click on "Remove From:"
Clearing Groups
To remove a computer from all assigned groups:
Select one or more computers by clicking on their check boxes.
Click on "Clear Groups"
Note that this will not remove the computer from the built in groups, such as "All Computers", "Desktops", "Laptops", etc...
Quick Deploy a Task
To quick deploy a task to multiple computers, which will be run immediately:
Select one or more computers by clicking on their check boxes.
Select a task name next to "Quick Deploy"
Click on "Quick Deploy"
This is useful for running a favorite task on a selection of one or more computers, such as "Restart" or "Shutdown".
Deploy a Task
To deploy a task to multiple computers, which will be run according to a schedule you specify:
Select one or more computers by clicking on their check boxes.
Click on "Deploy Other..."
This is useful for running any task you have created, for which you want to specify a custom schedule.