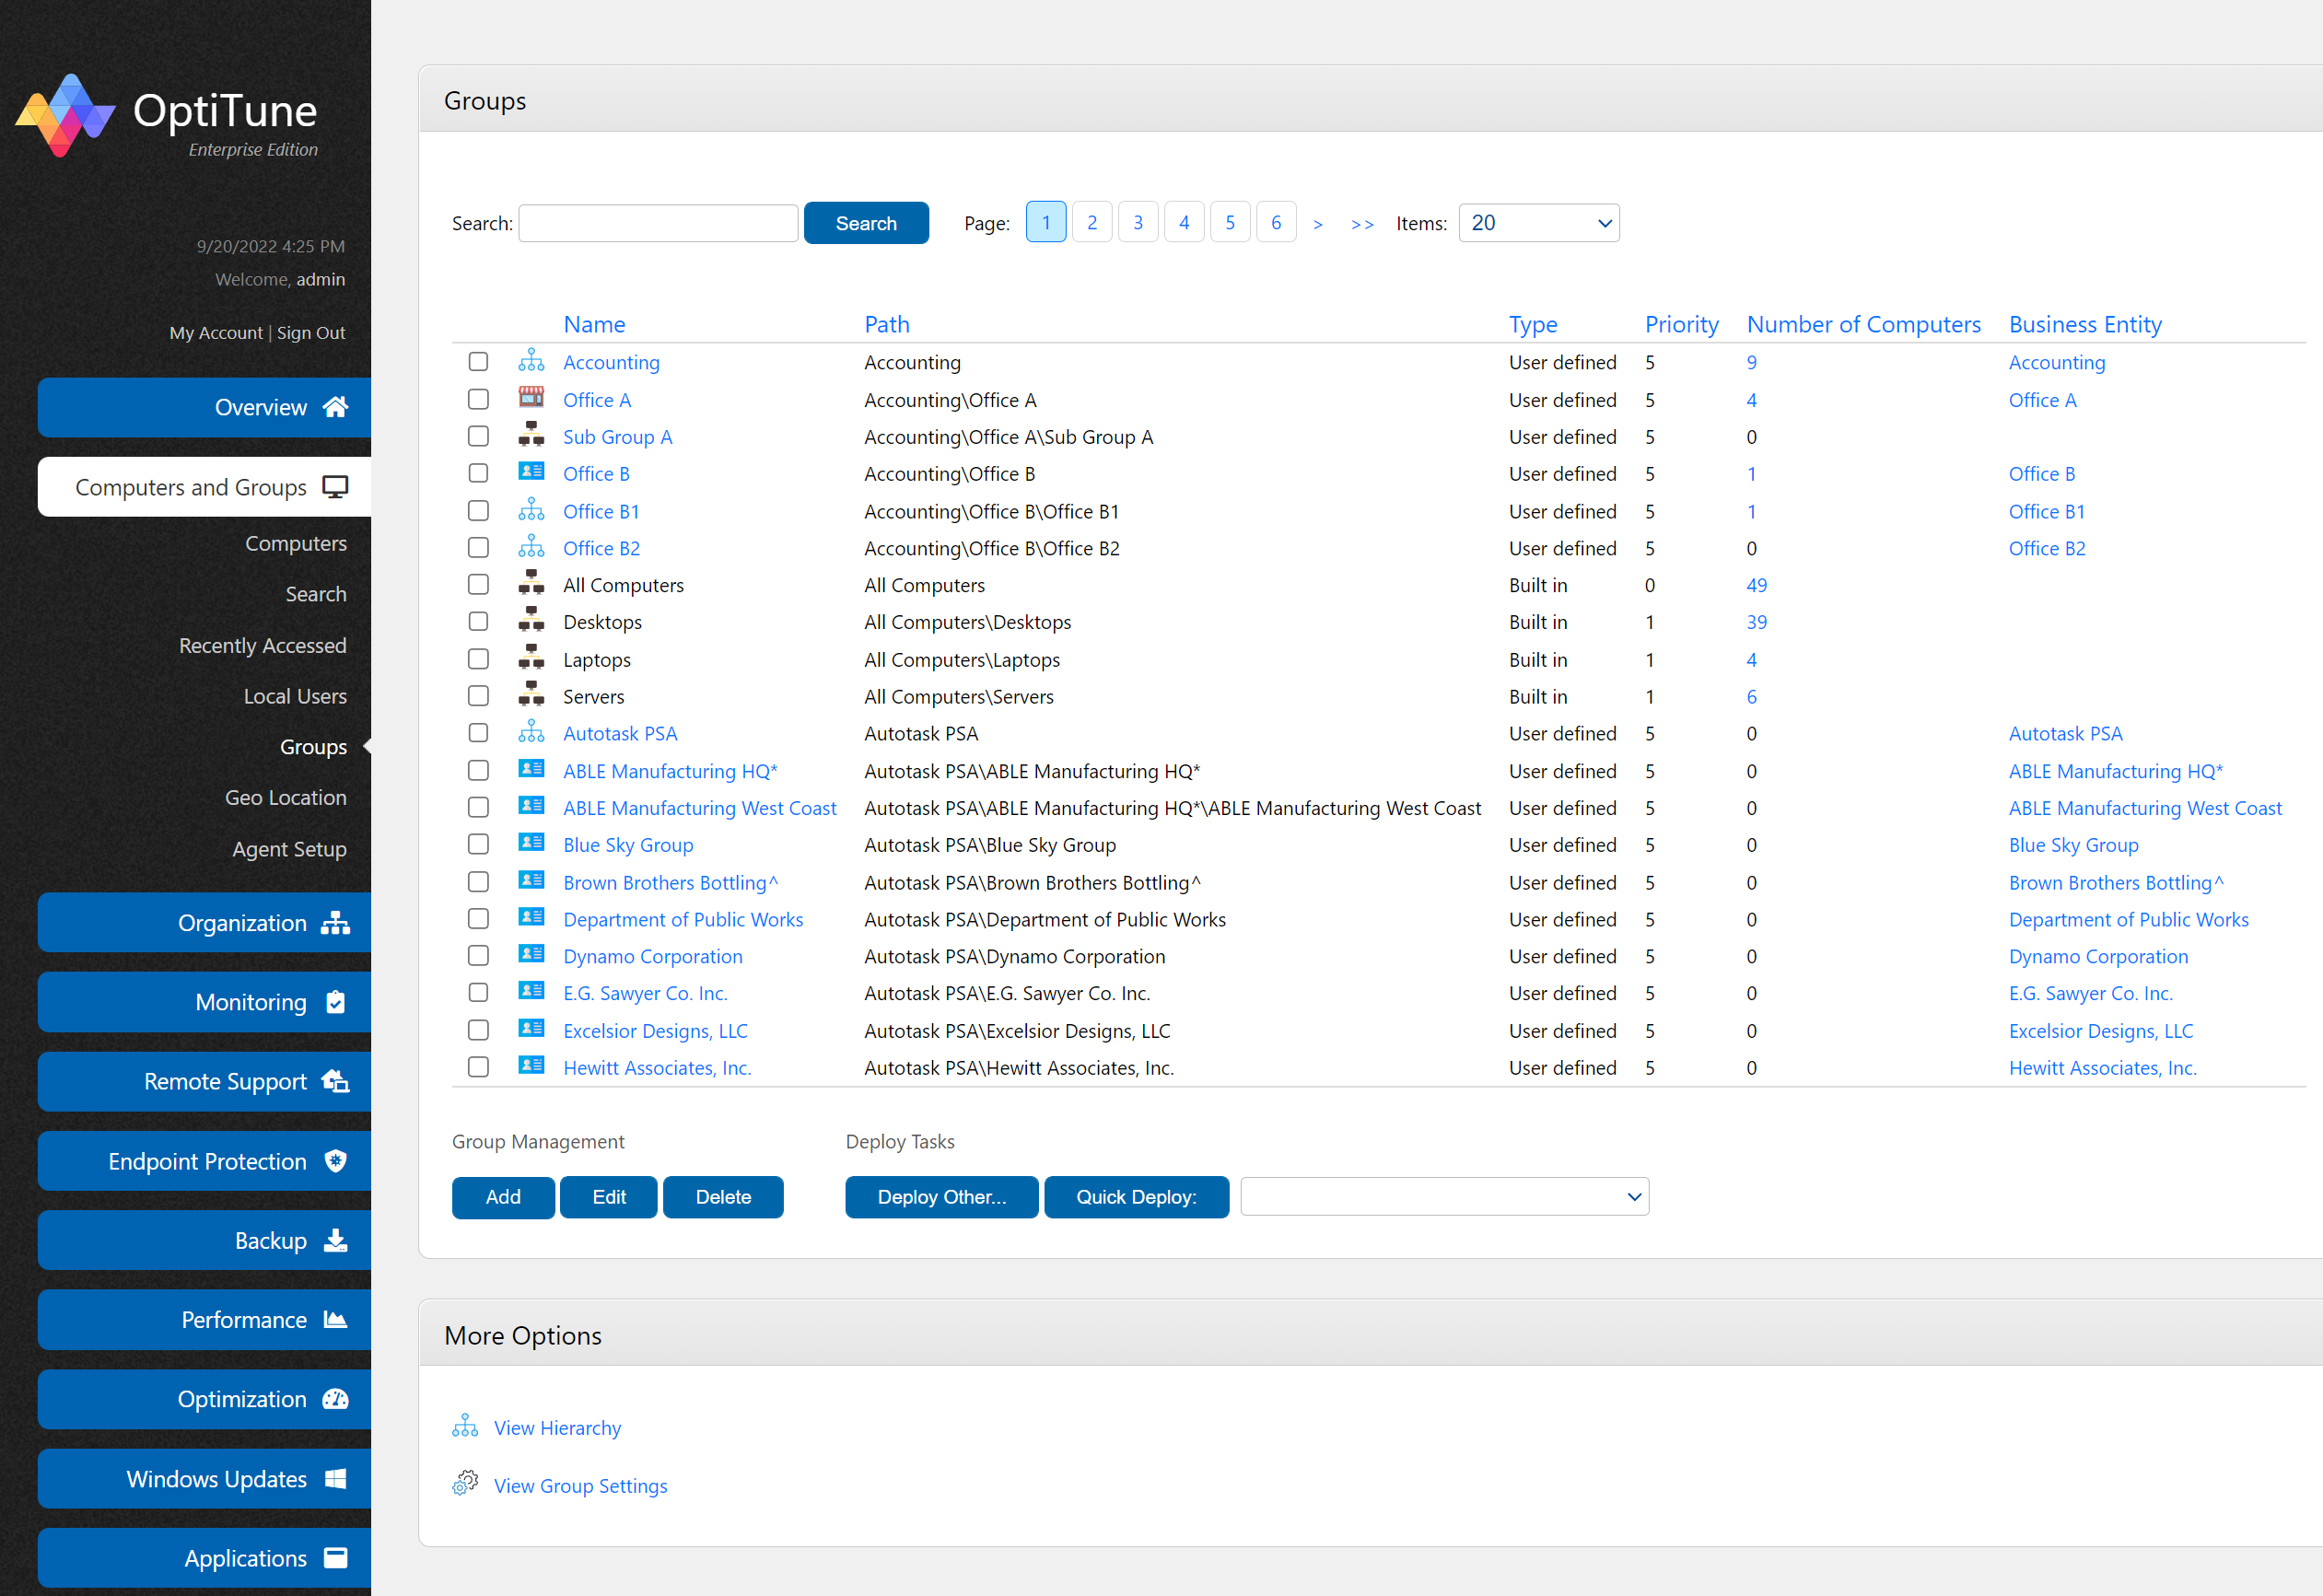
Managing Groups
To view the groups currently defined, click on the "Computers and Groups" tab, then select "Groups".

On this screen, you will find a list of the groups in your organization.
Columns
On this page, you will find the following columns:
Name - The name of the group.
Path - The complete path of the group in the hierarchy of groups.
Type - The type of group.
Priority - The priority of the group. Higher priority groups will override lower priority groups if conflicting settings are specified.
Number of Computers - How many computers belong to the group.
Business Entity - Which business entity is associated with the group, if any.
More about Groups
A group can contain zero or more computers in an organization. Groups cannot contain other groups, only computers.
In OptiTune, you can manage computers individually, or by group. For example, if you want to schedule a "Quick Scan" for malware on several computers, you can schedule the scan for an entire group of computers instead of having to schedule the scan separately for each individual computer.
Importantly, each group has a priority number. If a computer belongs to multiple groups, and the groups have conflicting settings (e.g. group A has "Check for updates" set to TRUE and priority 10, and group B has "Check for updates" set to FALSE and priority 20), the group with the higher priority number will win (e.g. group B would win since its priority number is higher than group A's priority number), and the settings from the winning group will be applied to the computer (e.g. "Check for updates" would be set to FALSE, group B's setting). If two groups have the same priority number, then the group whose sorted name comes first will win, and group names must be unique.
If you have many groups with conflicting settings, you can always check the end result by going to Server Settings > Advanced Settings > Inspect Computer Configuration. This will show the end result of merging the settings for all groups for an individual computer. Typically, you won't need to define conflicting settings for groups.
Relationship with Business Entities
In OptiTune, each group may also be associated with a Business Entity, or it may not.
If you create a Business Entity, a corresponding group will also be created that is tightly coupled with the Business Entity.
If you create a group on this page, then no Business Entity will be associated with the group. In most cases, it is preferable to create Business Entities, since you get a newly created group, and can also specify additional business information in the Business Entity.
Business Entities and Groups also are organized in a Hierarchy. However, once you create a group or Business Entity, you cannot change its position in the hiearchy.
Searching for Groups
To search for a group, enter some text in the search box at the top of the page, and click "Search".
Adding a Group
To add a group to your organization, click "Add".
Editing a Group
To edit a group, click on a group's checkbox, then click "Edit".
Deleting a Group
To delete a group, click on a group's checkbox, then click "Delete". Note that you cannot delete the built in groups.
Quick Deploy a Task
To quick deploy a task to multiple groups, which will be run immediately:
Select one or more groups by clicking on their check boxes.
Select a task name next to "Quick Deploy"
Click on "Quick Deploy"
This is useful for running a favorite task on a selection of one or more groups, such as "Restart" or "Shutdown".
Deploy a Task
To deploy a task to multiple groups, which will be run according to a schedule you specify:
Select one or more groups by clicking on their check boxes.
Click on "Deploy Other..."
This is useful for running any task you have created, for which you want to specify a custom schedule.