Okta Setup Guide
Introduction
This guide will take you through the steps to setup Okta as a single sign on Identity Provider for OptiTune.
Start adding the SAML Configuration
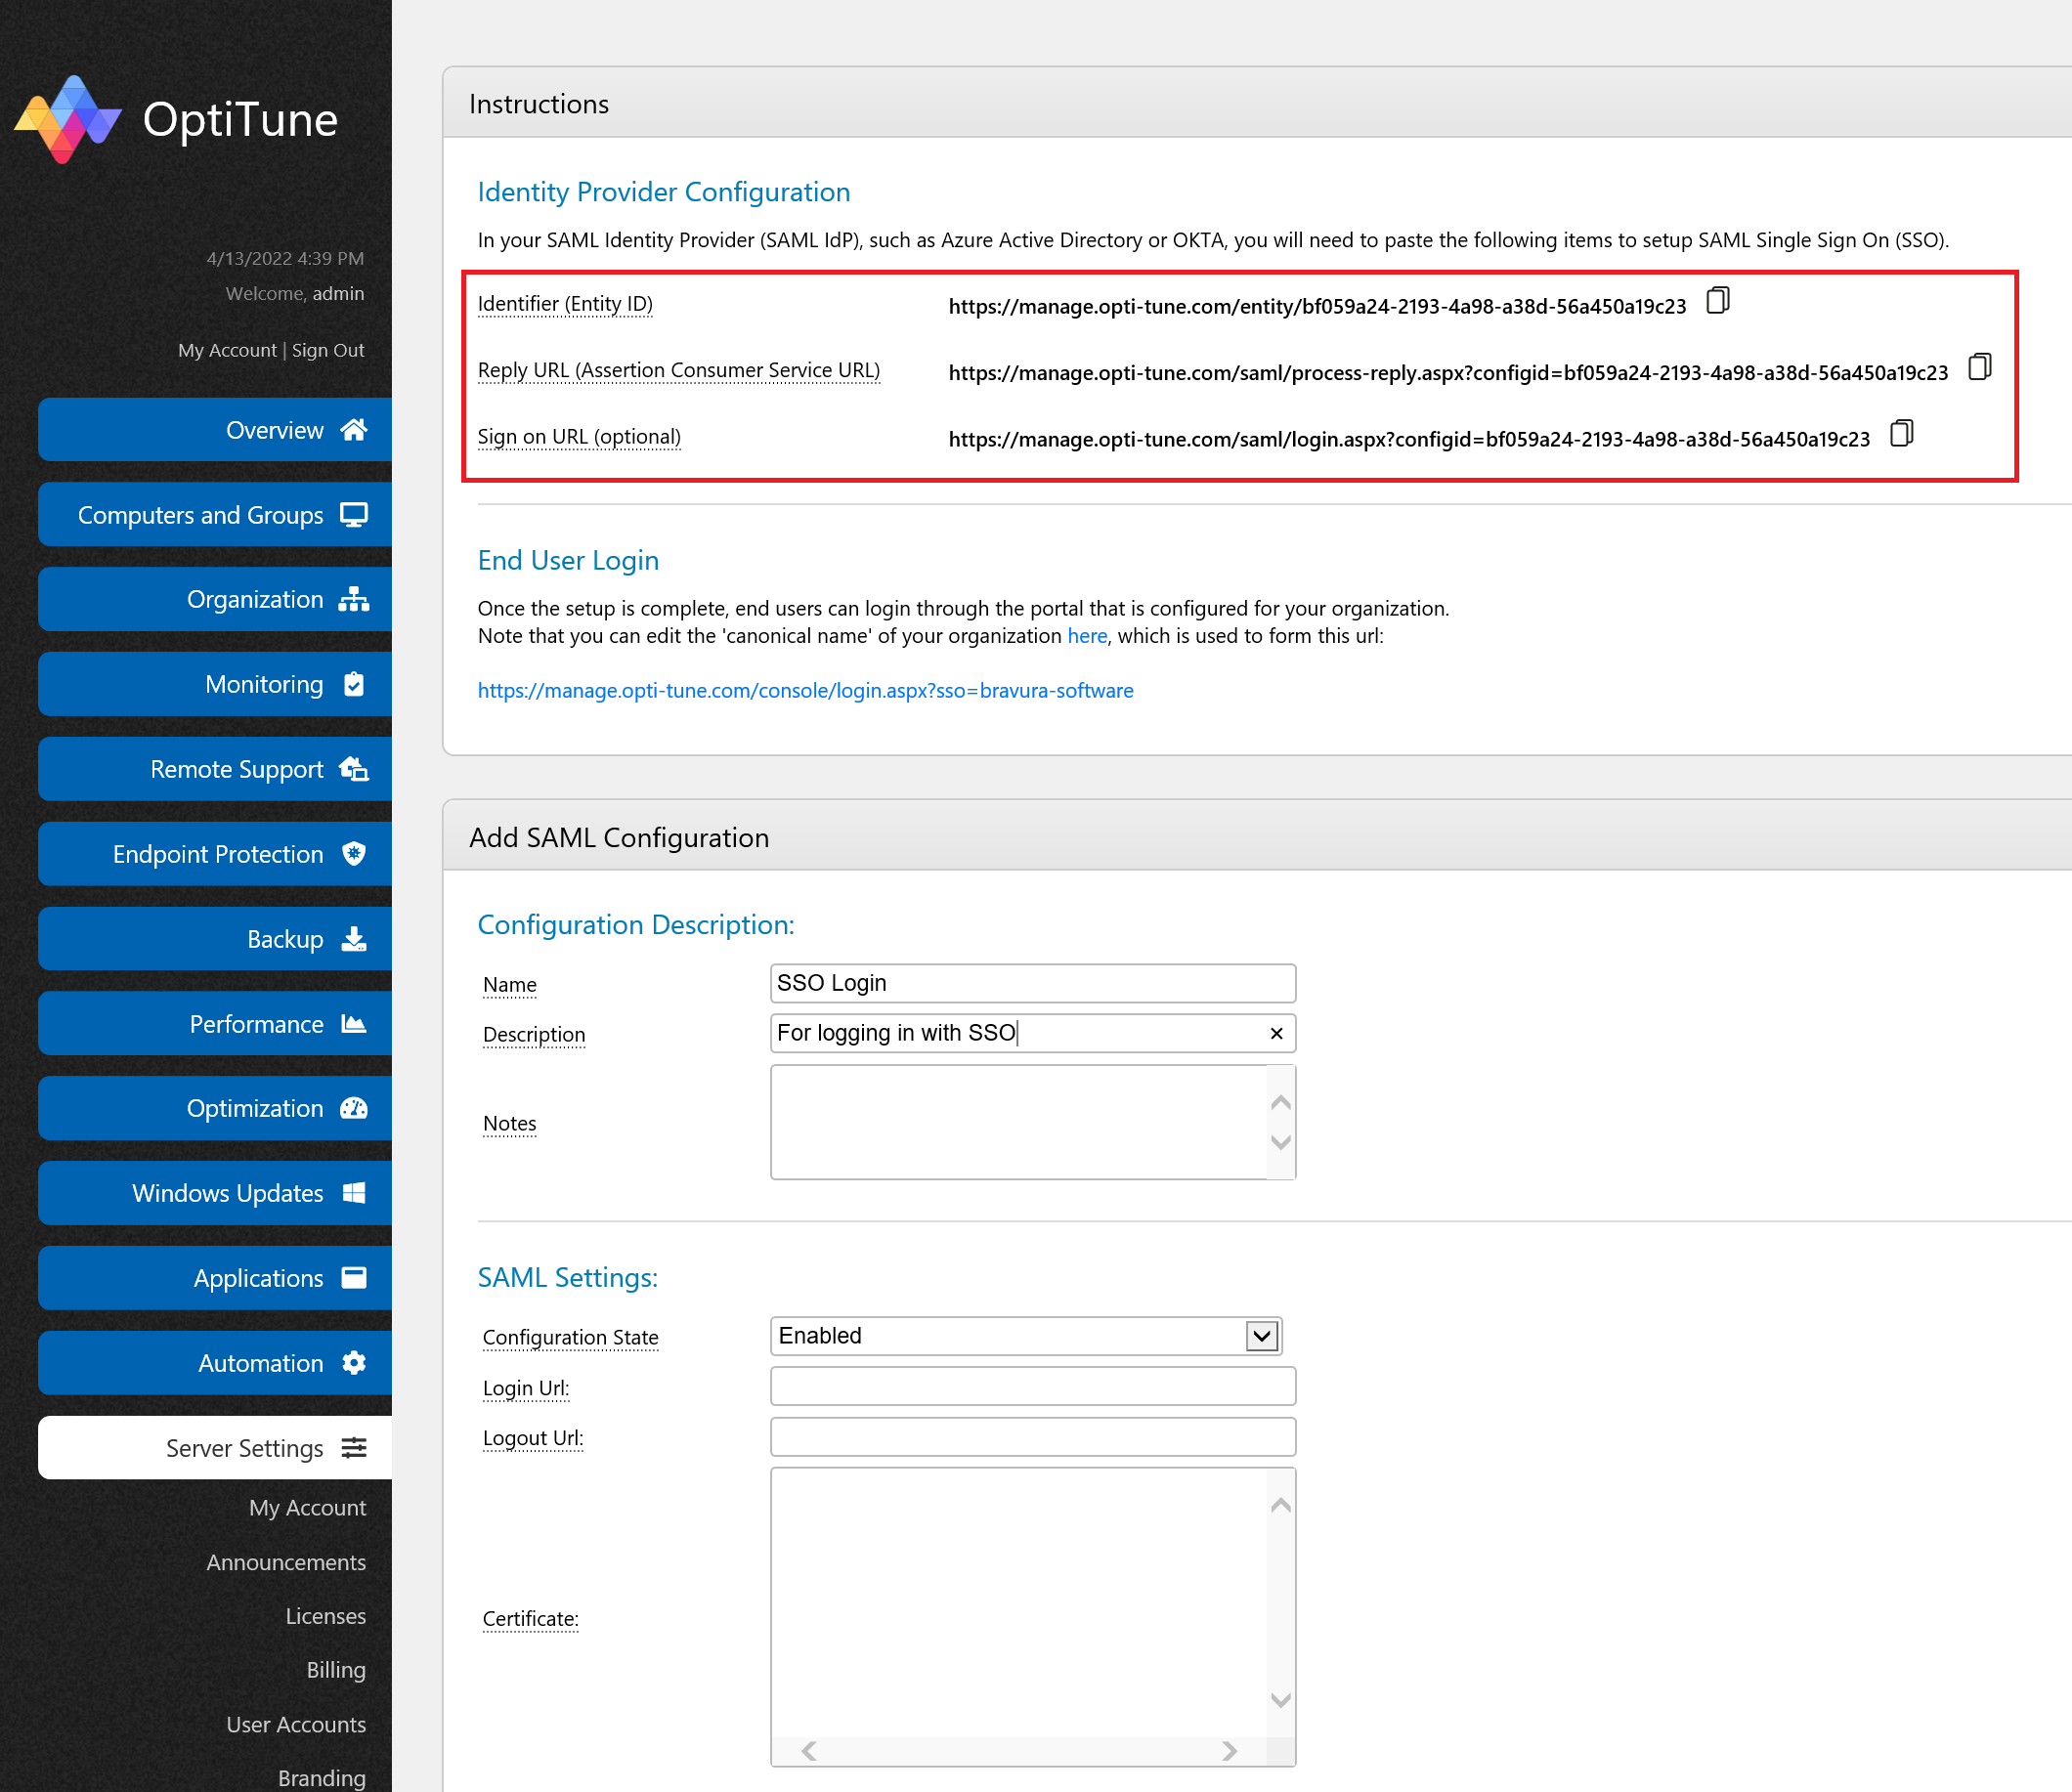
In the OptiTune management console, go to the SAML Configurations page, and click "Add".
Enter in a name and description for the SAML Configuration, as shown below.
You will need to copy the information shown under "Identity Provider Configuration" for the next steps.
Create app integration in Okta
Login to the Okta portal
Login to your Okta portal (which is company specific) and select "Applications" > "Applications".
Click "Create App Integration"

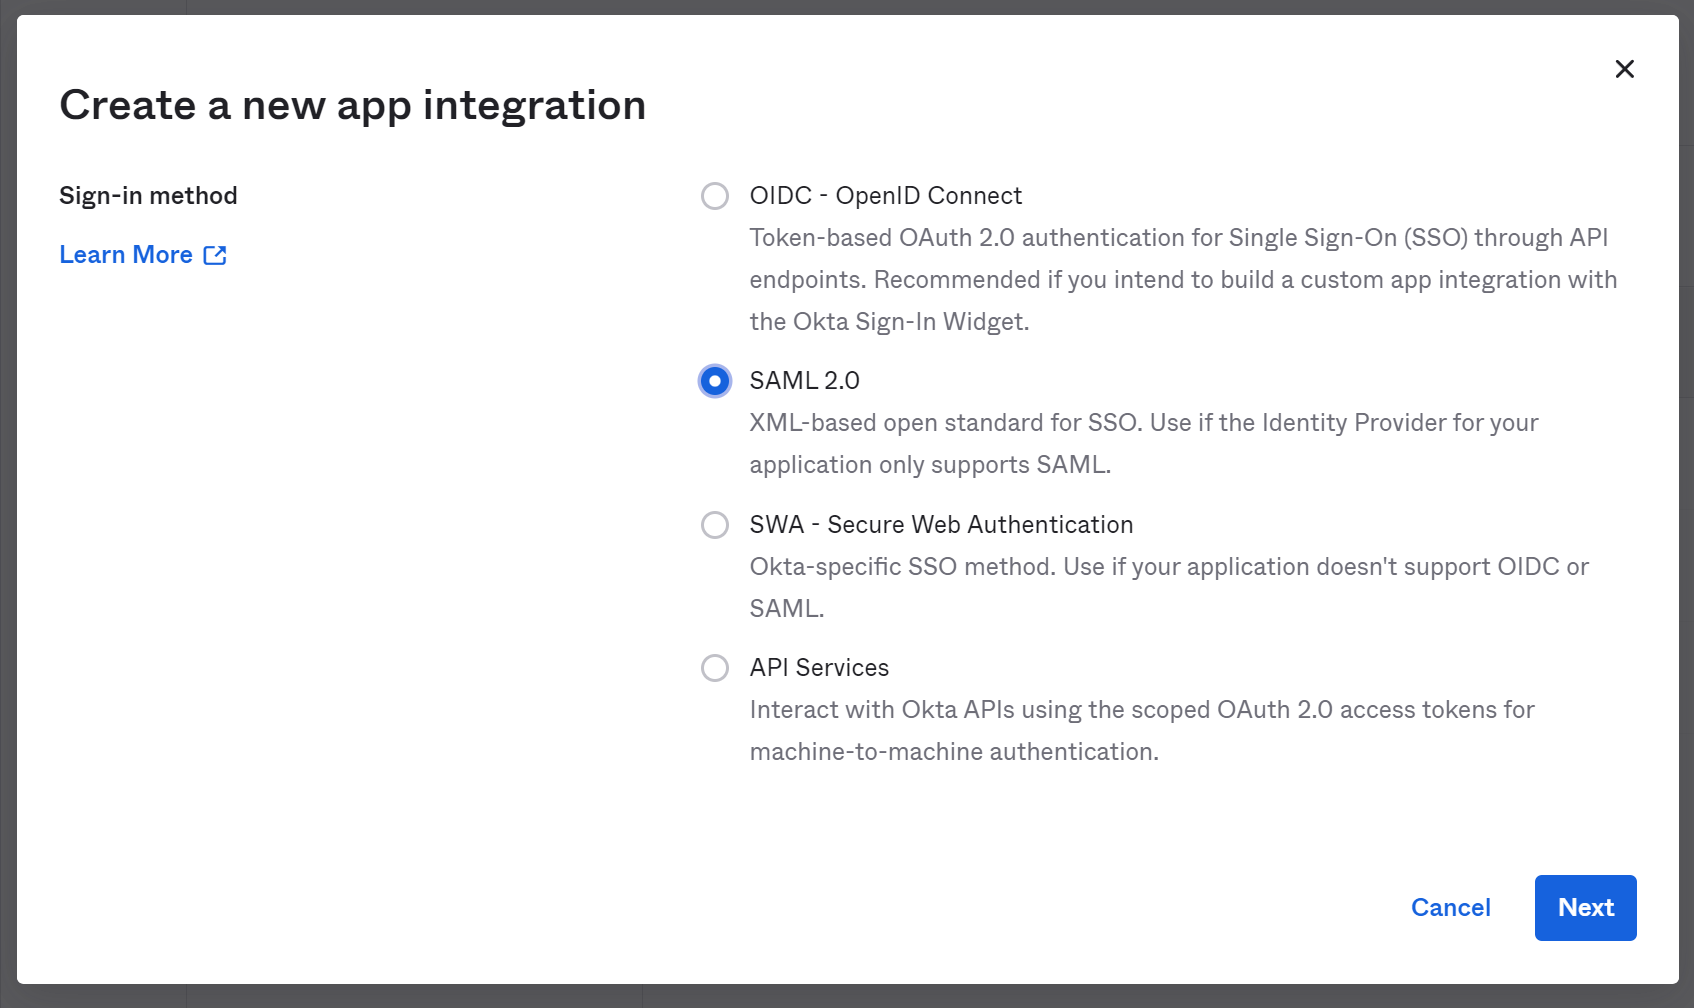
Select SAML 2.0
Select SAML 2.0 as the sign in method, and click "Next"
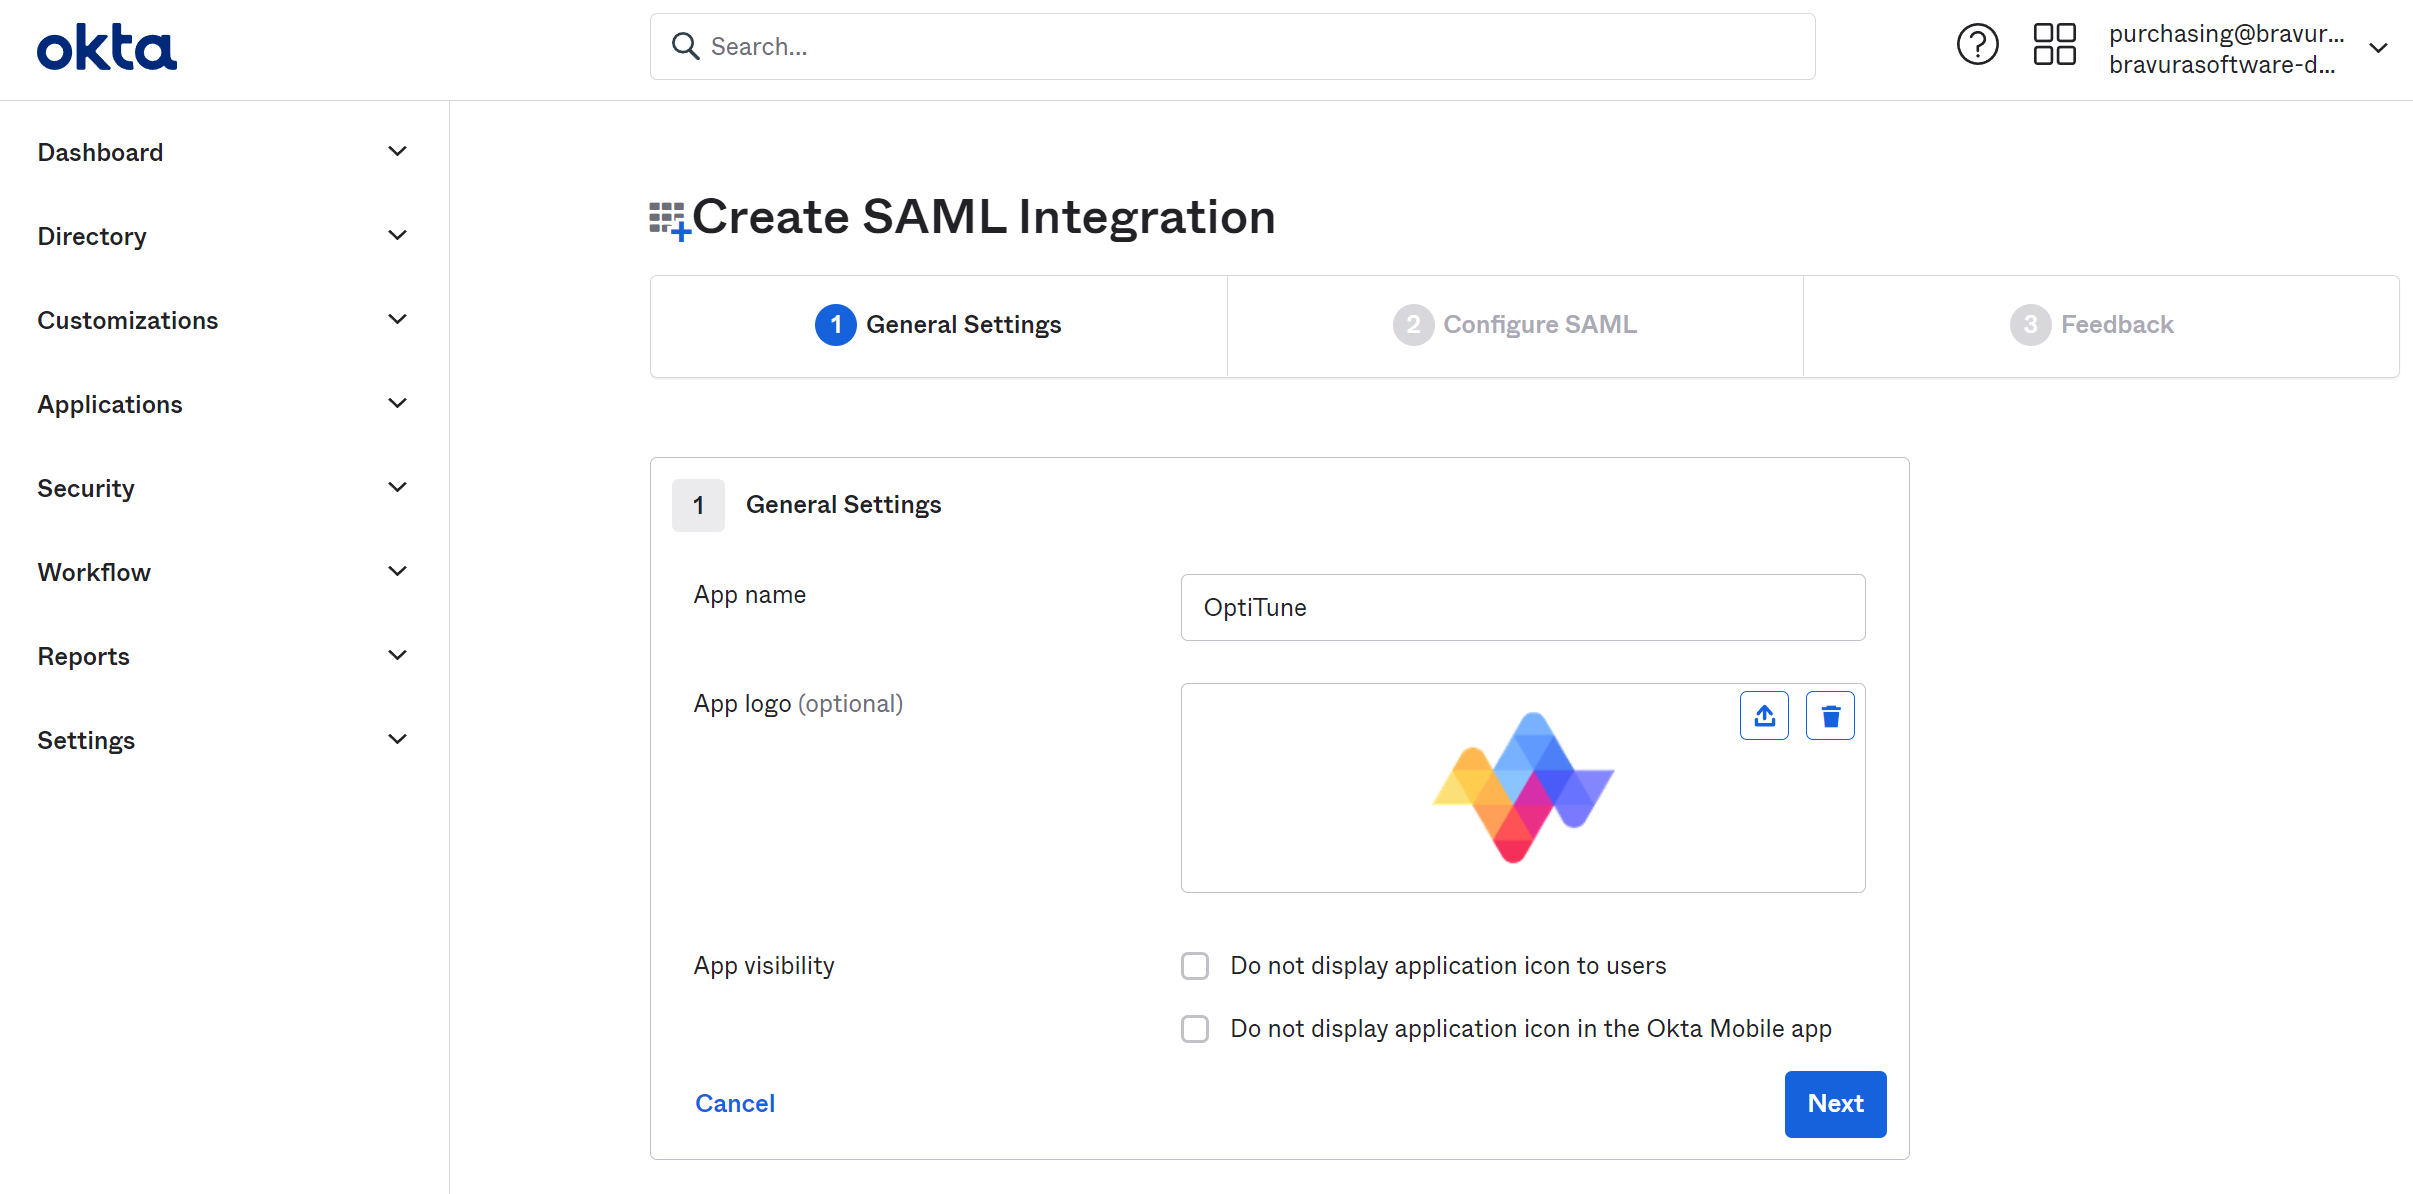
Enter General Settings
Enter a name for the OptiTune application. You can also specify a custom app logo if you like, and it is available here: https://manage.opti-tune.com/style/images/siteicon/logo-256.png
Click "Next"
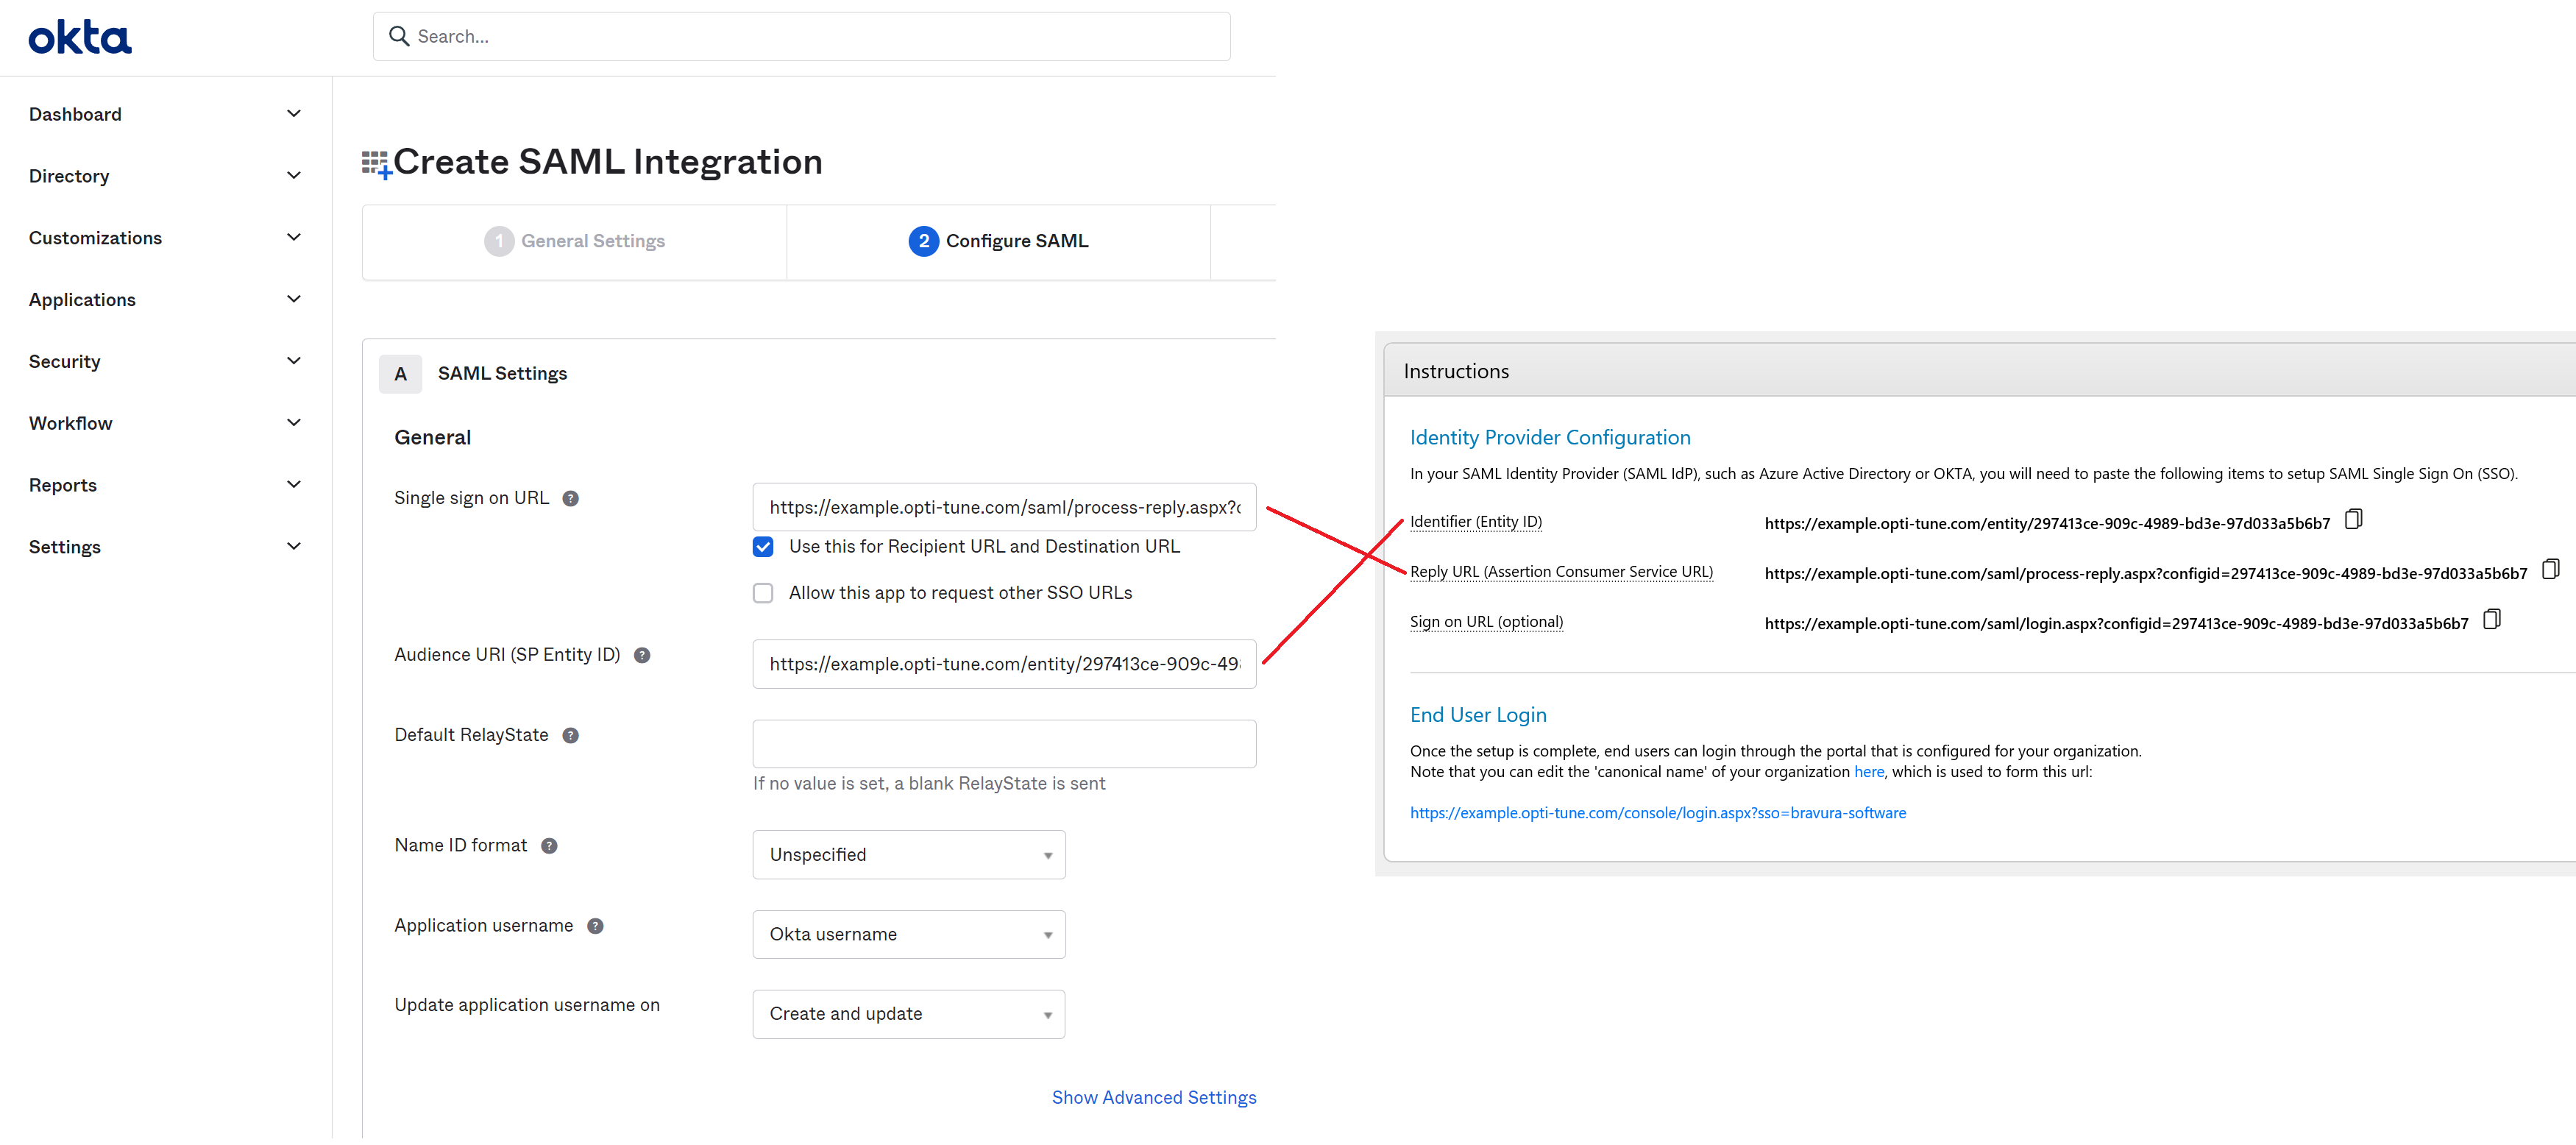
SAML Settings
Copy and paste the following fields from OptiTune to Okta:
- "Reply URL (Assertion Consumer Service URL)" to "Single sign on URL"
- "Identifier (Entity ID)" to "Audience URI (SP Entity ID)"
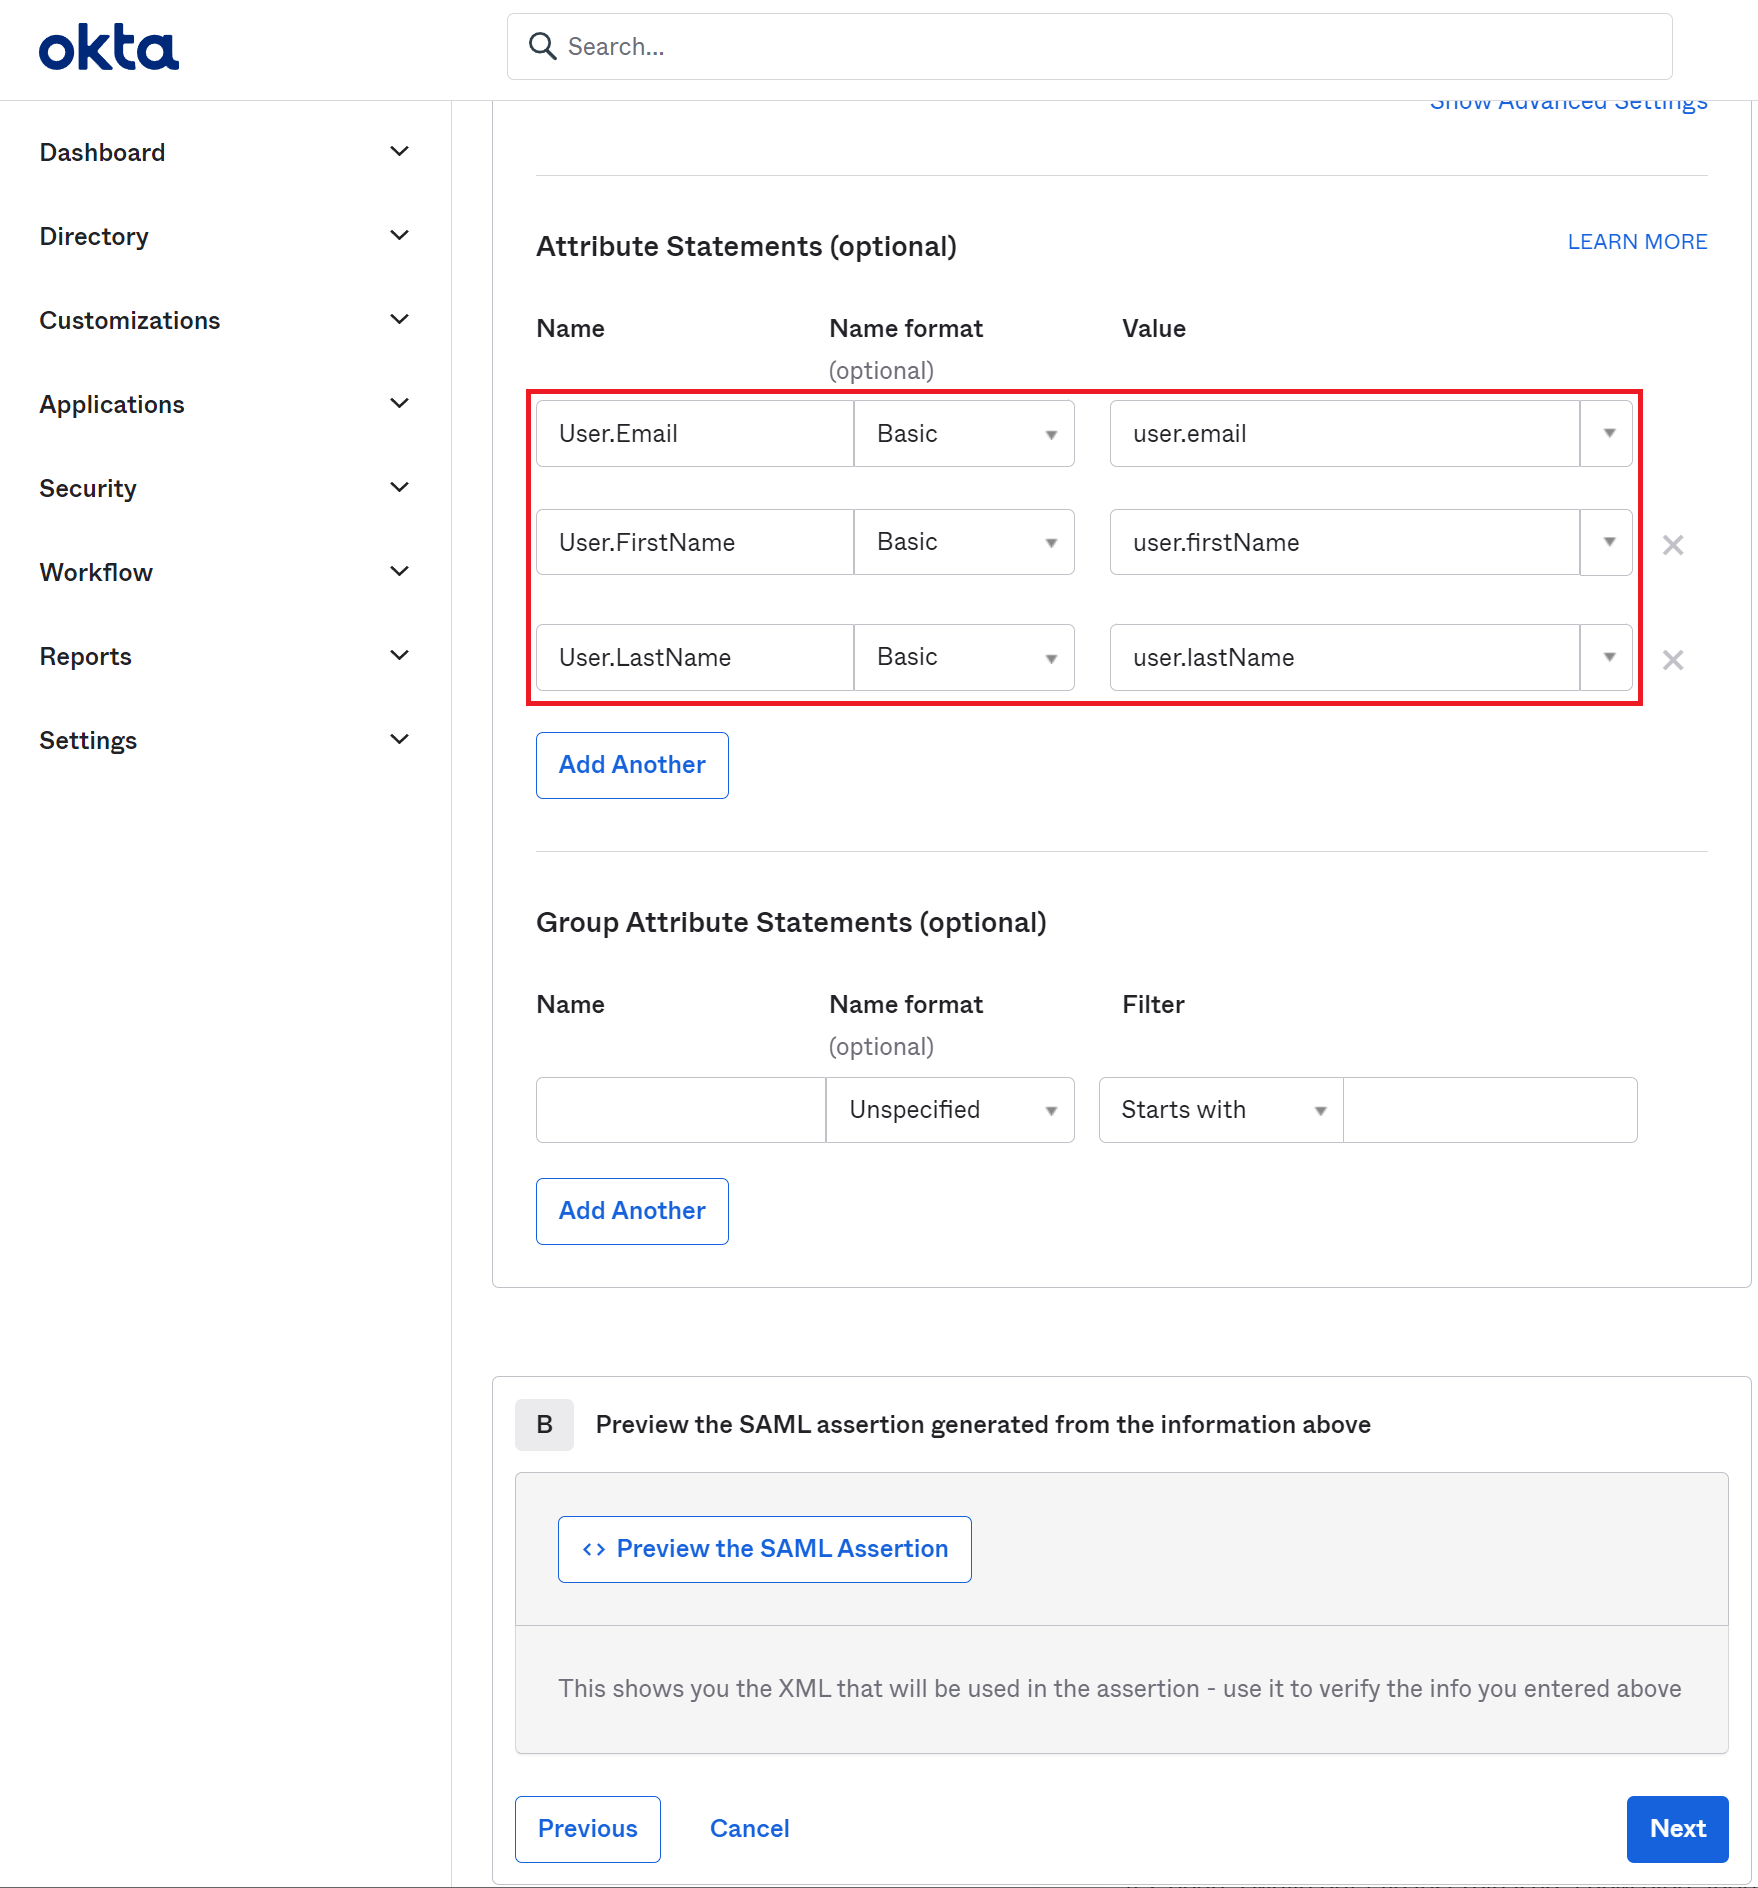
Attribute Statements
Scroll down, and enter the following attribute statements, so that Okta will send the needed information about the user to OptiTune
| OptiTune Field Name | Okta Field Name |
|---|---|
| User.Email | user.email |
| User.FirstName | user.firstName |
| User.LastName | user.lastName |
When you are done, press "Next"
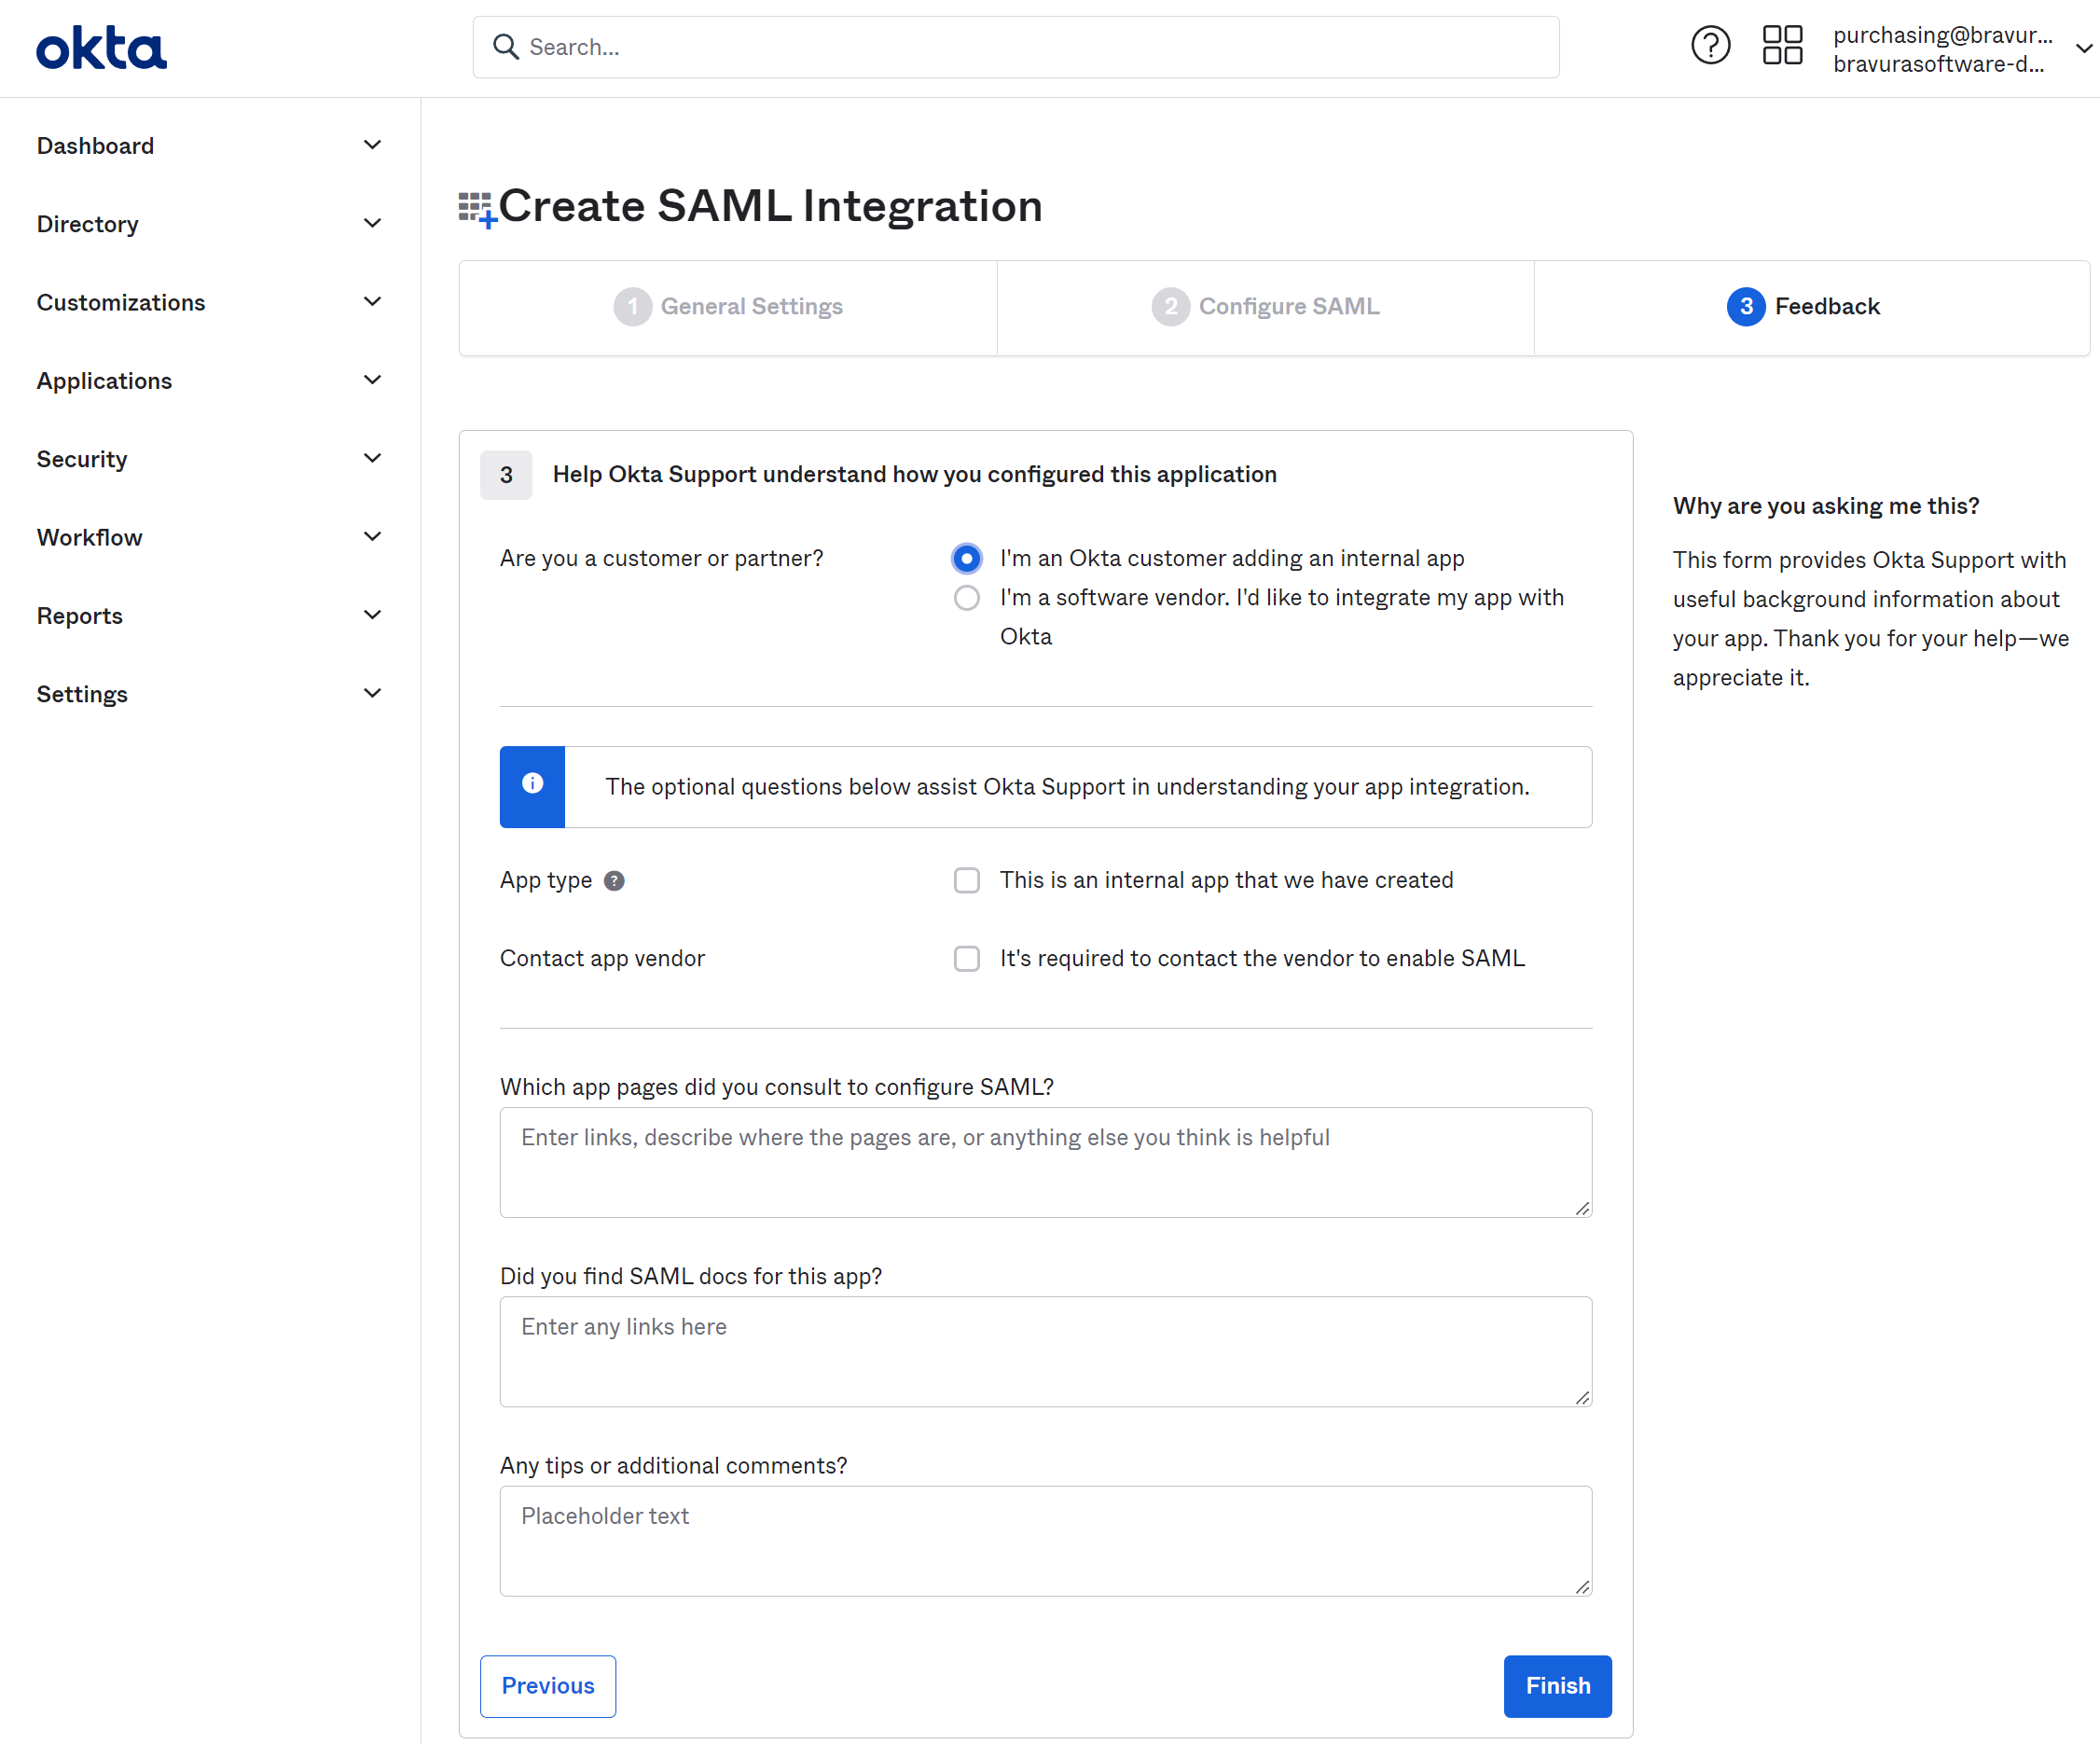
Press Finish
Press Finish
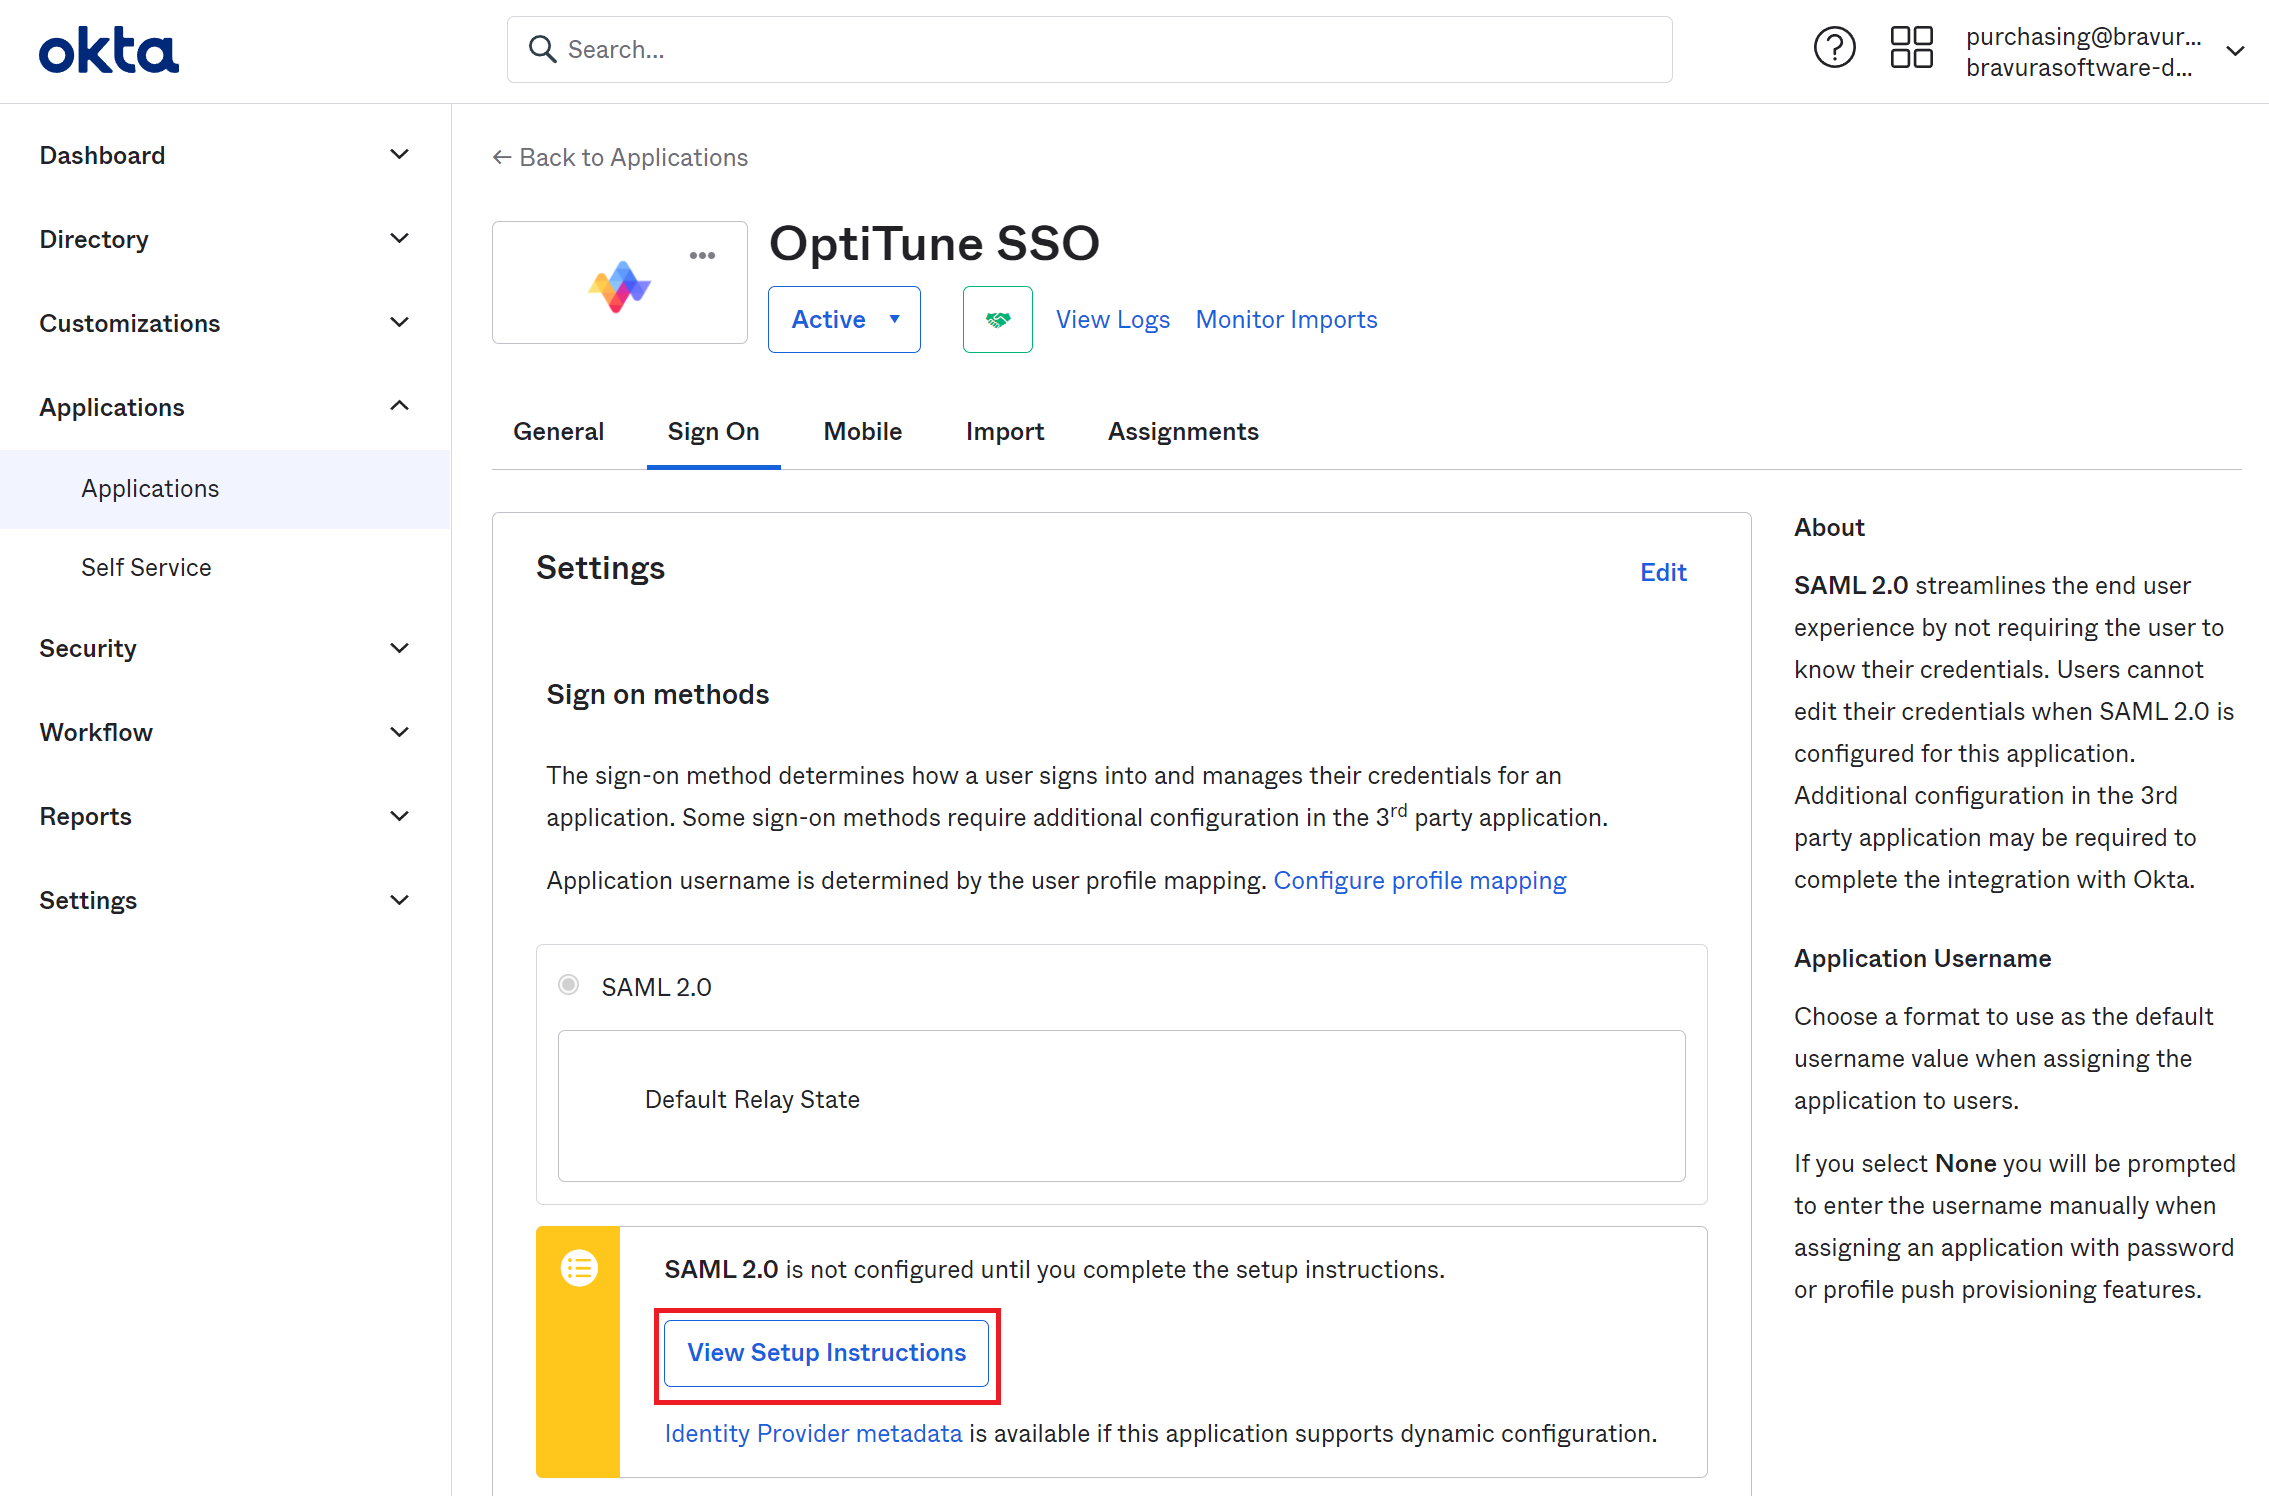
Get the needed information to complete the setup in OptiTune
Press "View Setup Instructions"
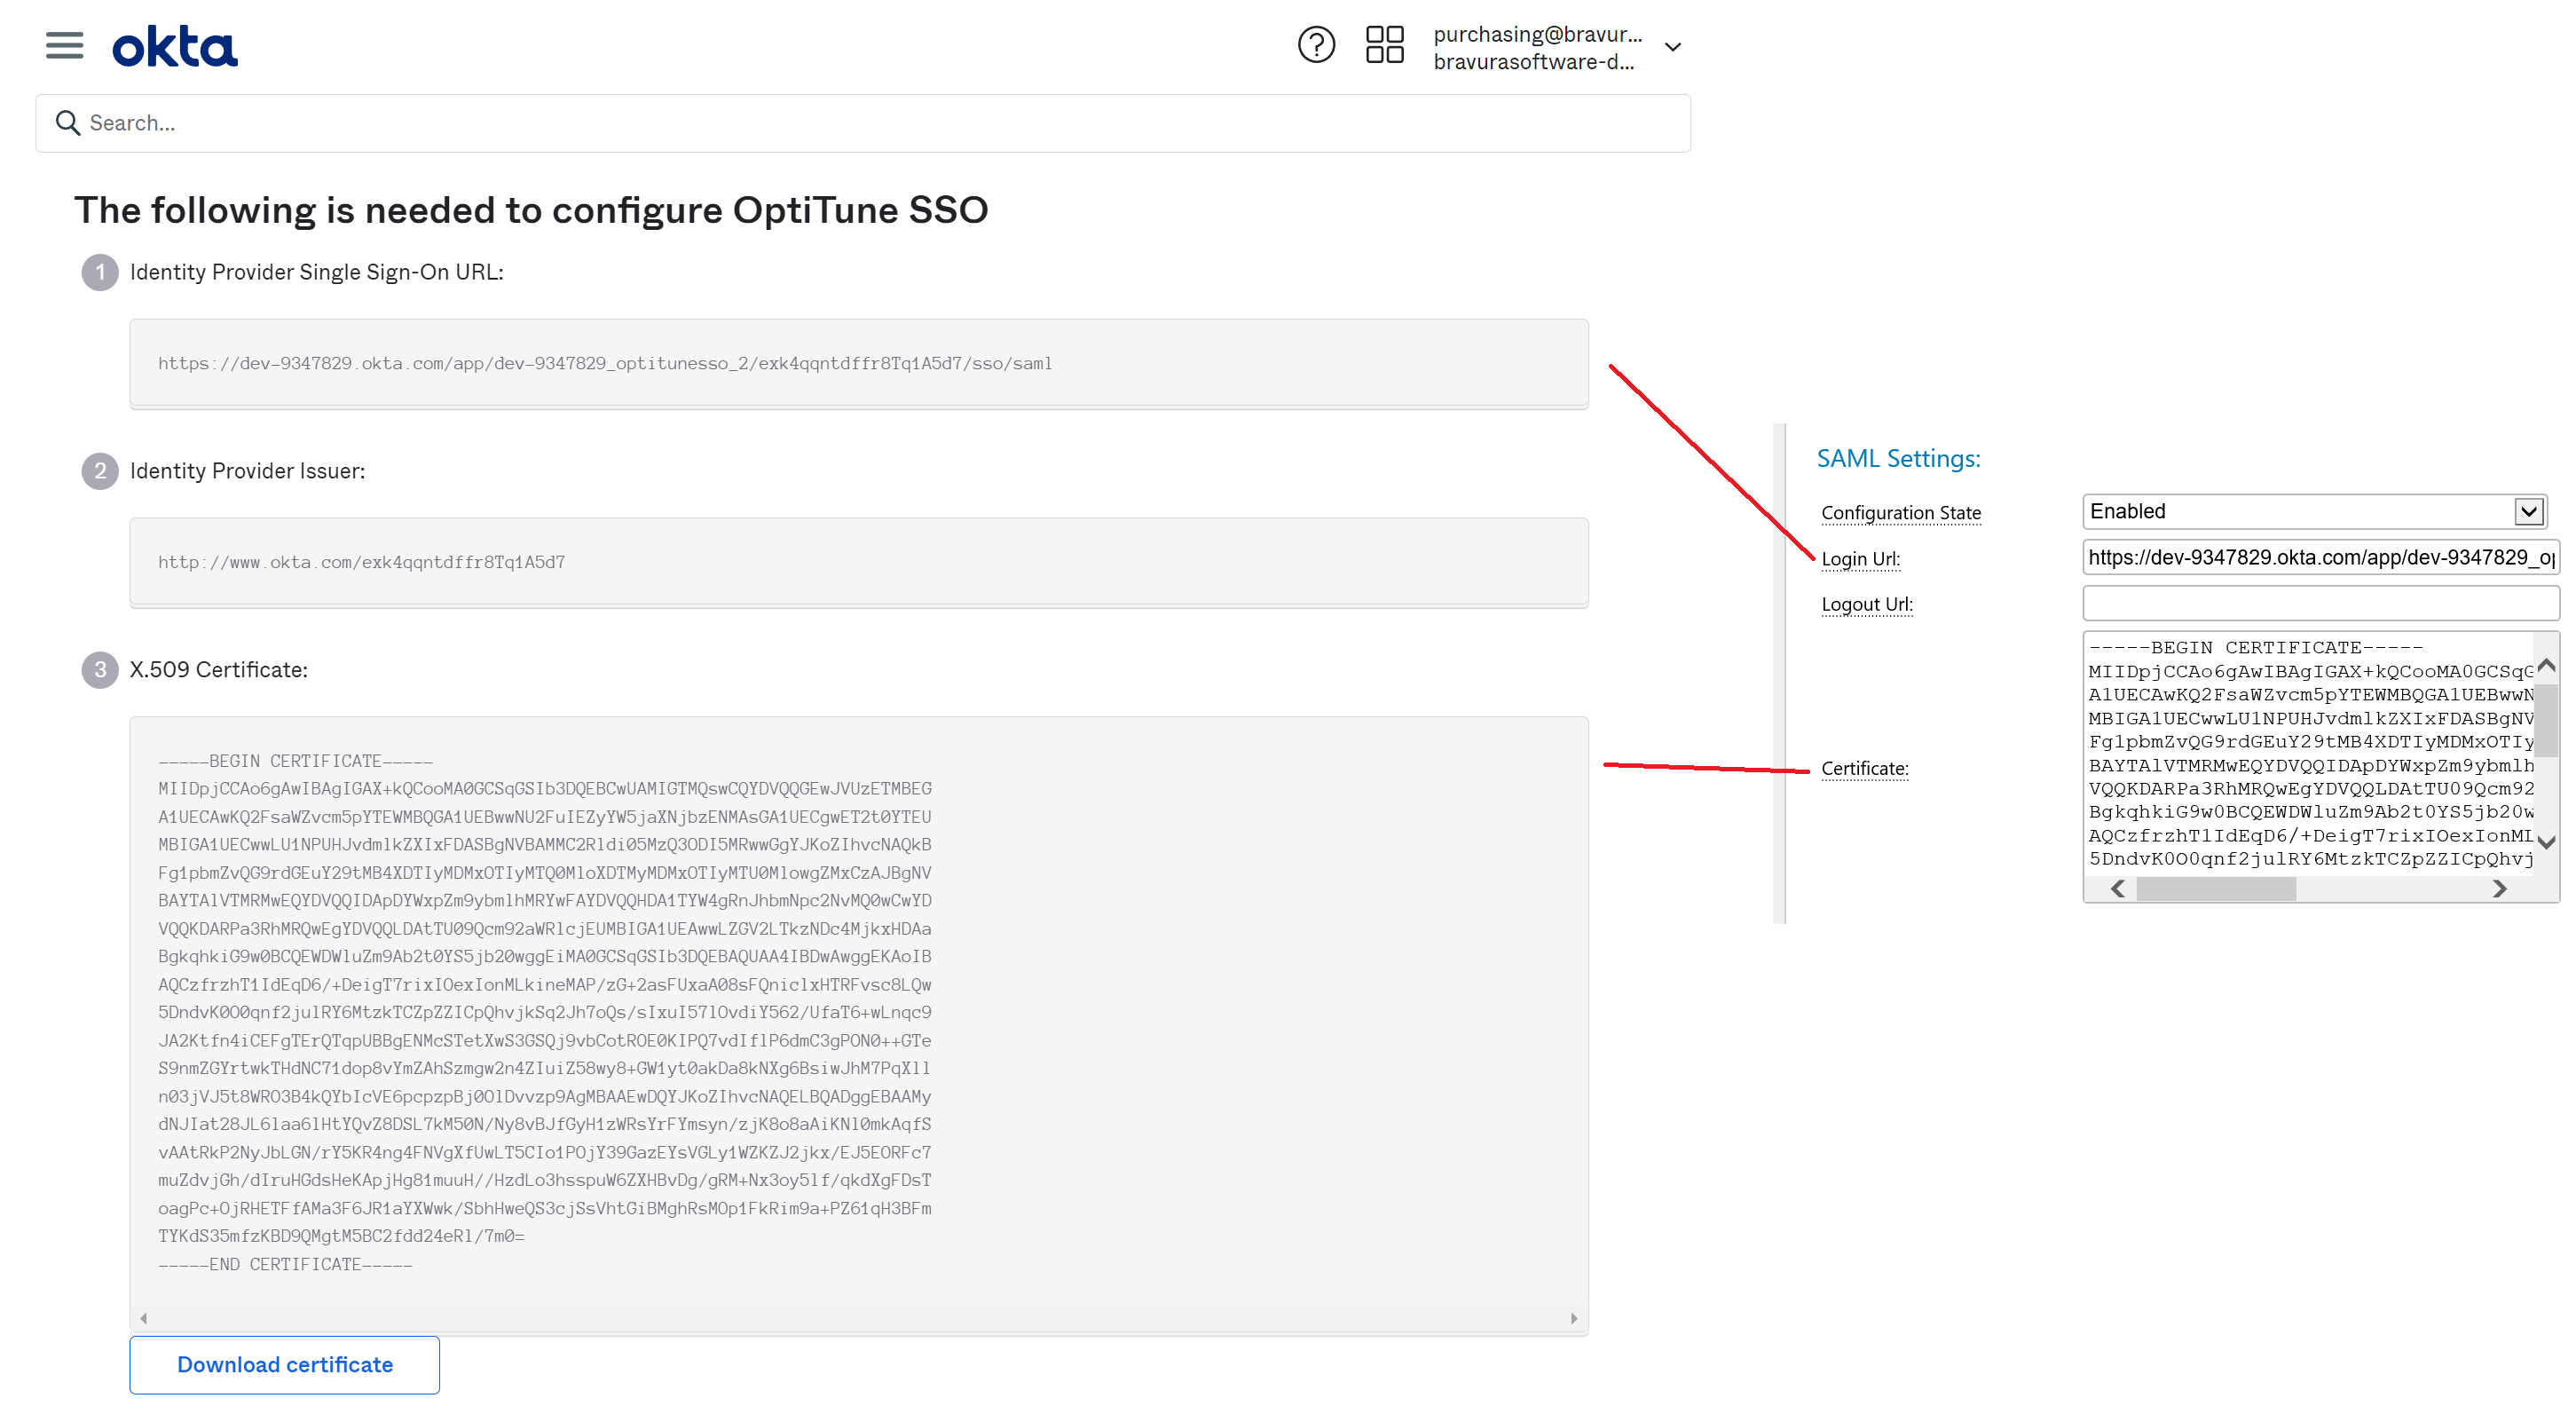
Complete the SAML Configuration setup in OptiTune
Copy and paste the following fields from Okta to OptiTune:
- "Identity Provider Single Sign-On URL" to "SAML Settings" > "Login Url"
- "X.509 Certificate" to "SAML Settings" > "Certificate"
Importantly, press "Save" to save the SAML configuration in OptiTune.
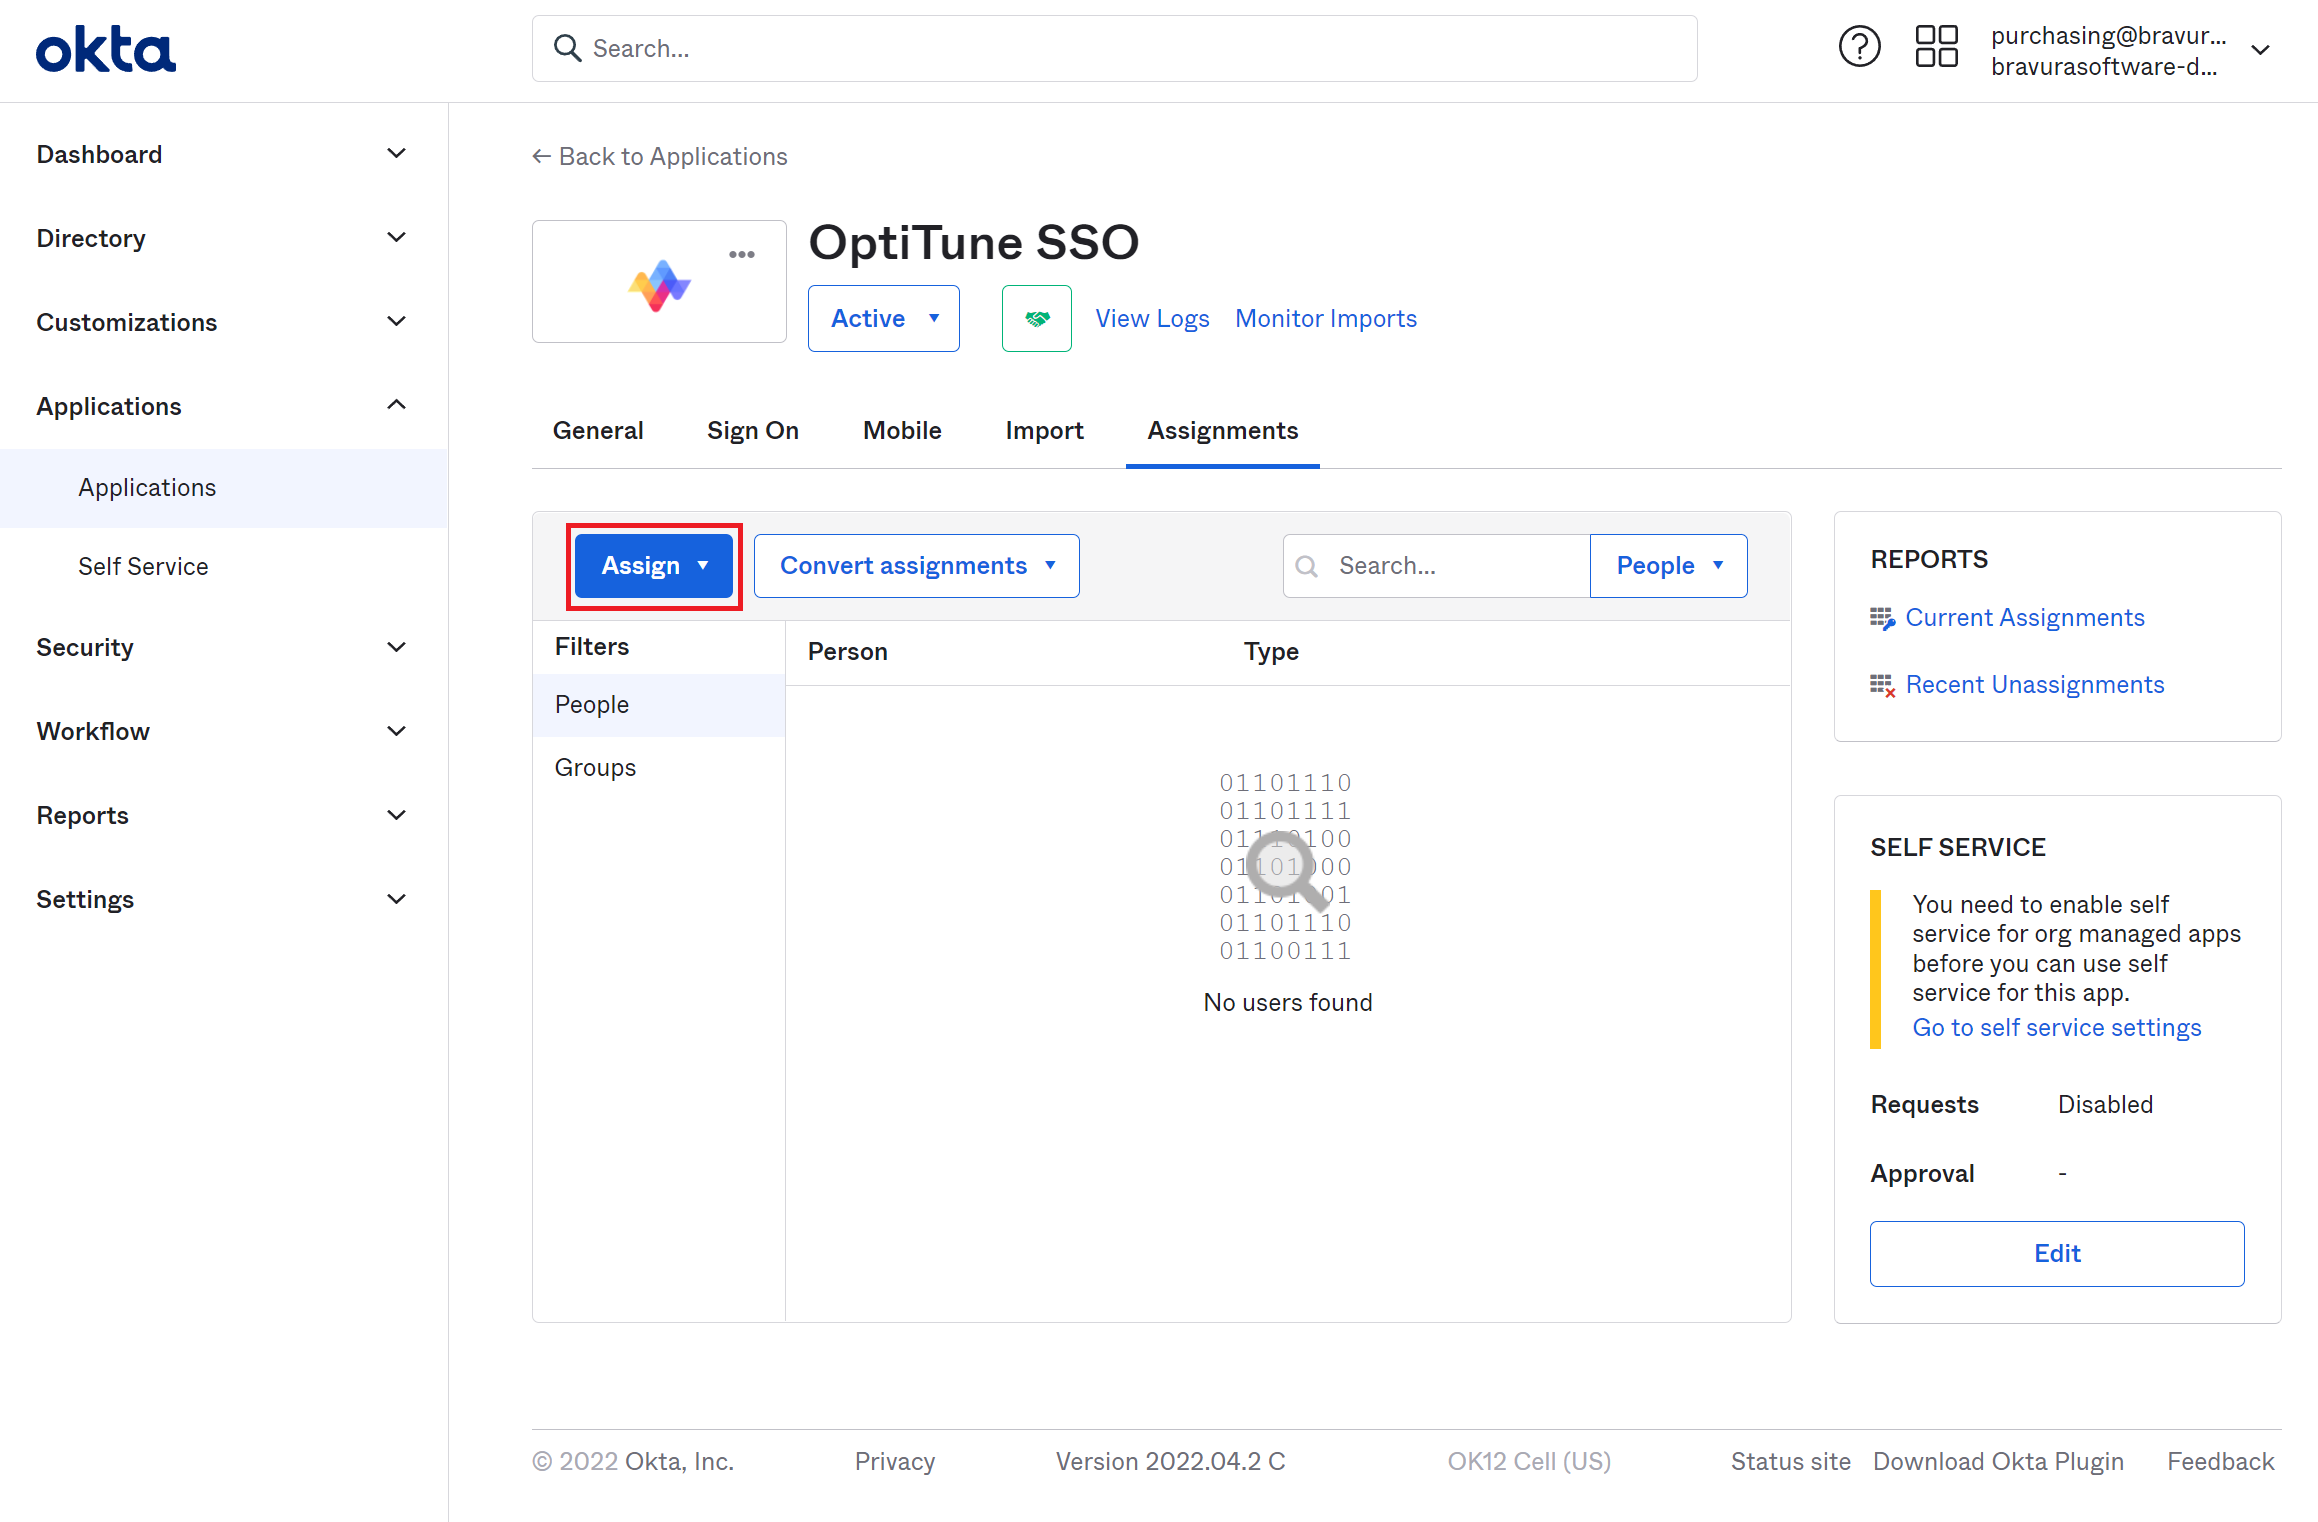
Enable User access to the app in Okta
You will also need to select which users in Okta are allowed to use the app. Click on the "Assignments" tab, and then click on "Assign" to assign the app to users or groups in Okta.
Test the SAML configuration in OptiTune
Back in OptiTune, make sure you clicked "Save" to save the SAML configuration you have setup.
Test that the SSO integration is working by using your organization specific Single Sign On (SSO) link shown in the SAML Configurations page.
Or, you can visit the "Sign On Url" link that is shown at the top of the OptiTune SAML Configuration page, under "Identity Provider Configuration".