Azure AD Setup Guide
Introduction
This guide will take you through the steps to setup Azure AD as a single sign on Identity Provider for OptiTune.
Create the Azure AD Enterprise Application
Login to Azure
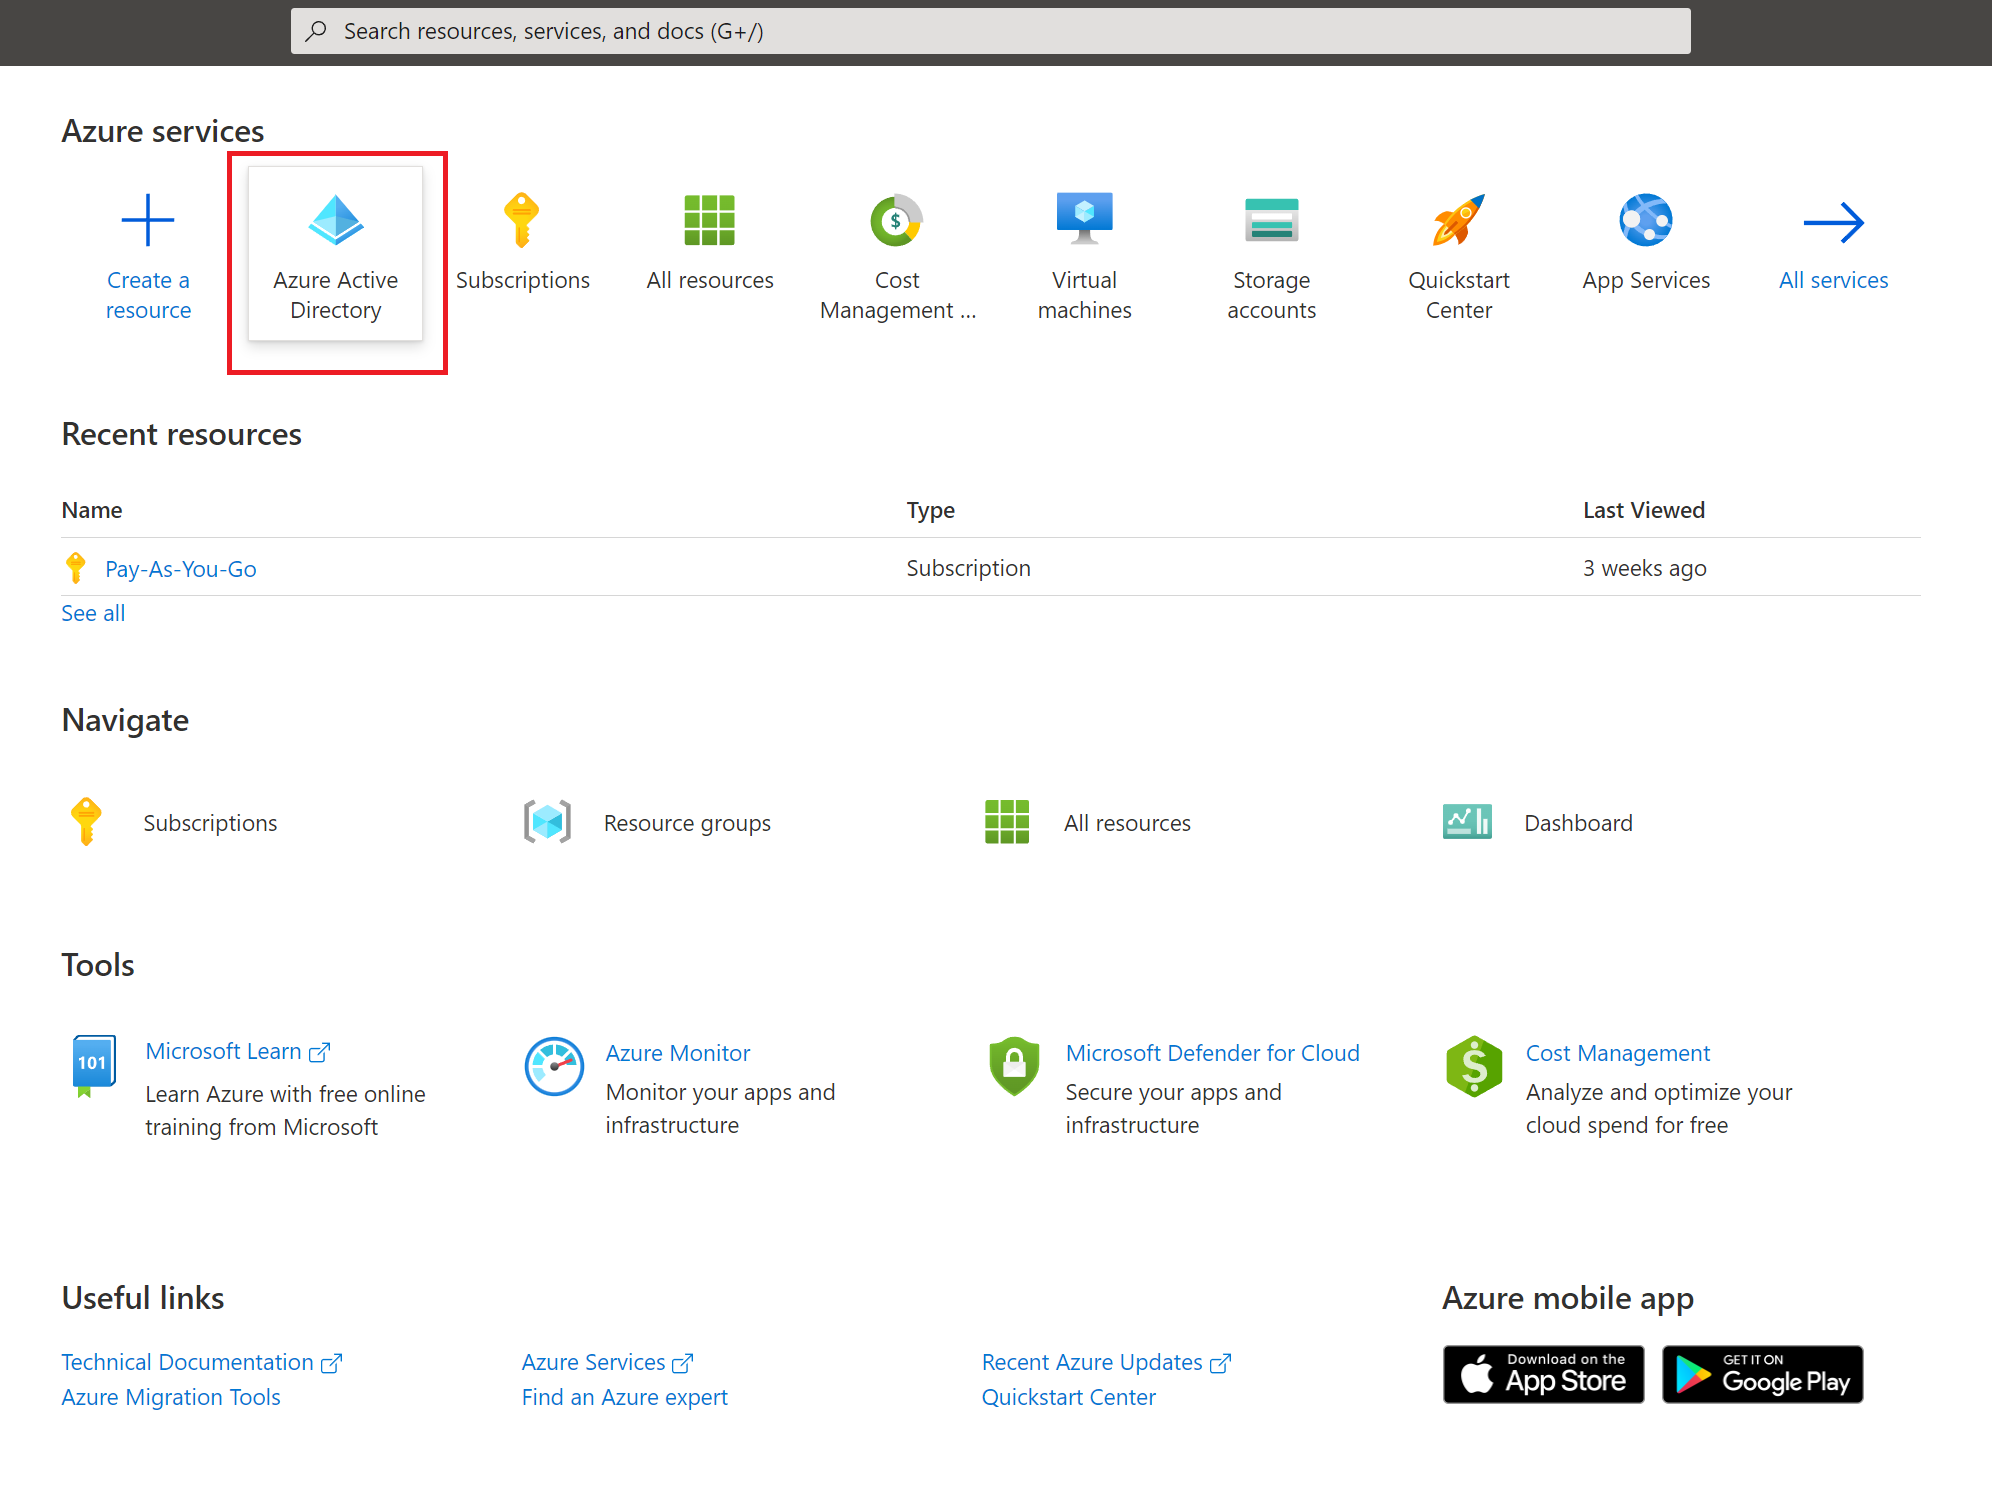
Login to https://portal.azure.com and search for "Azure AD", and select the feature.
Navigate to "Enterprise Applications"
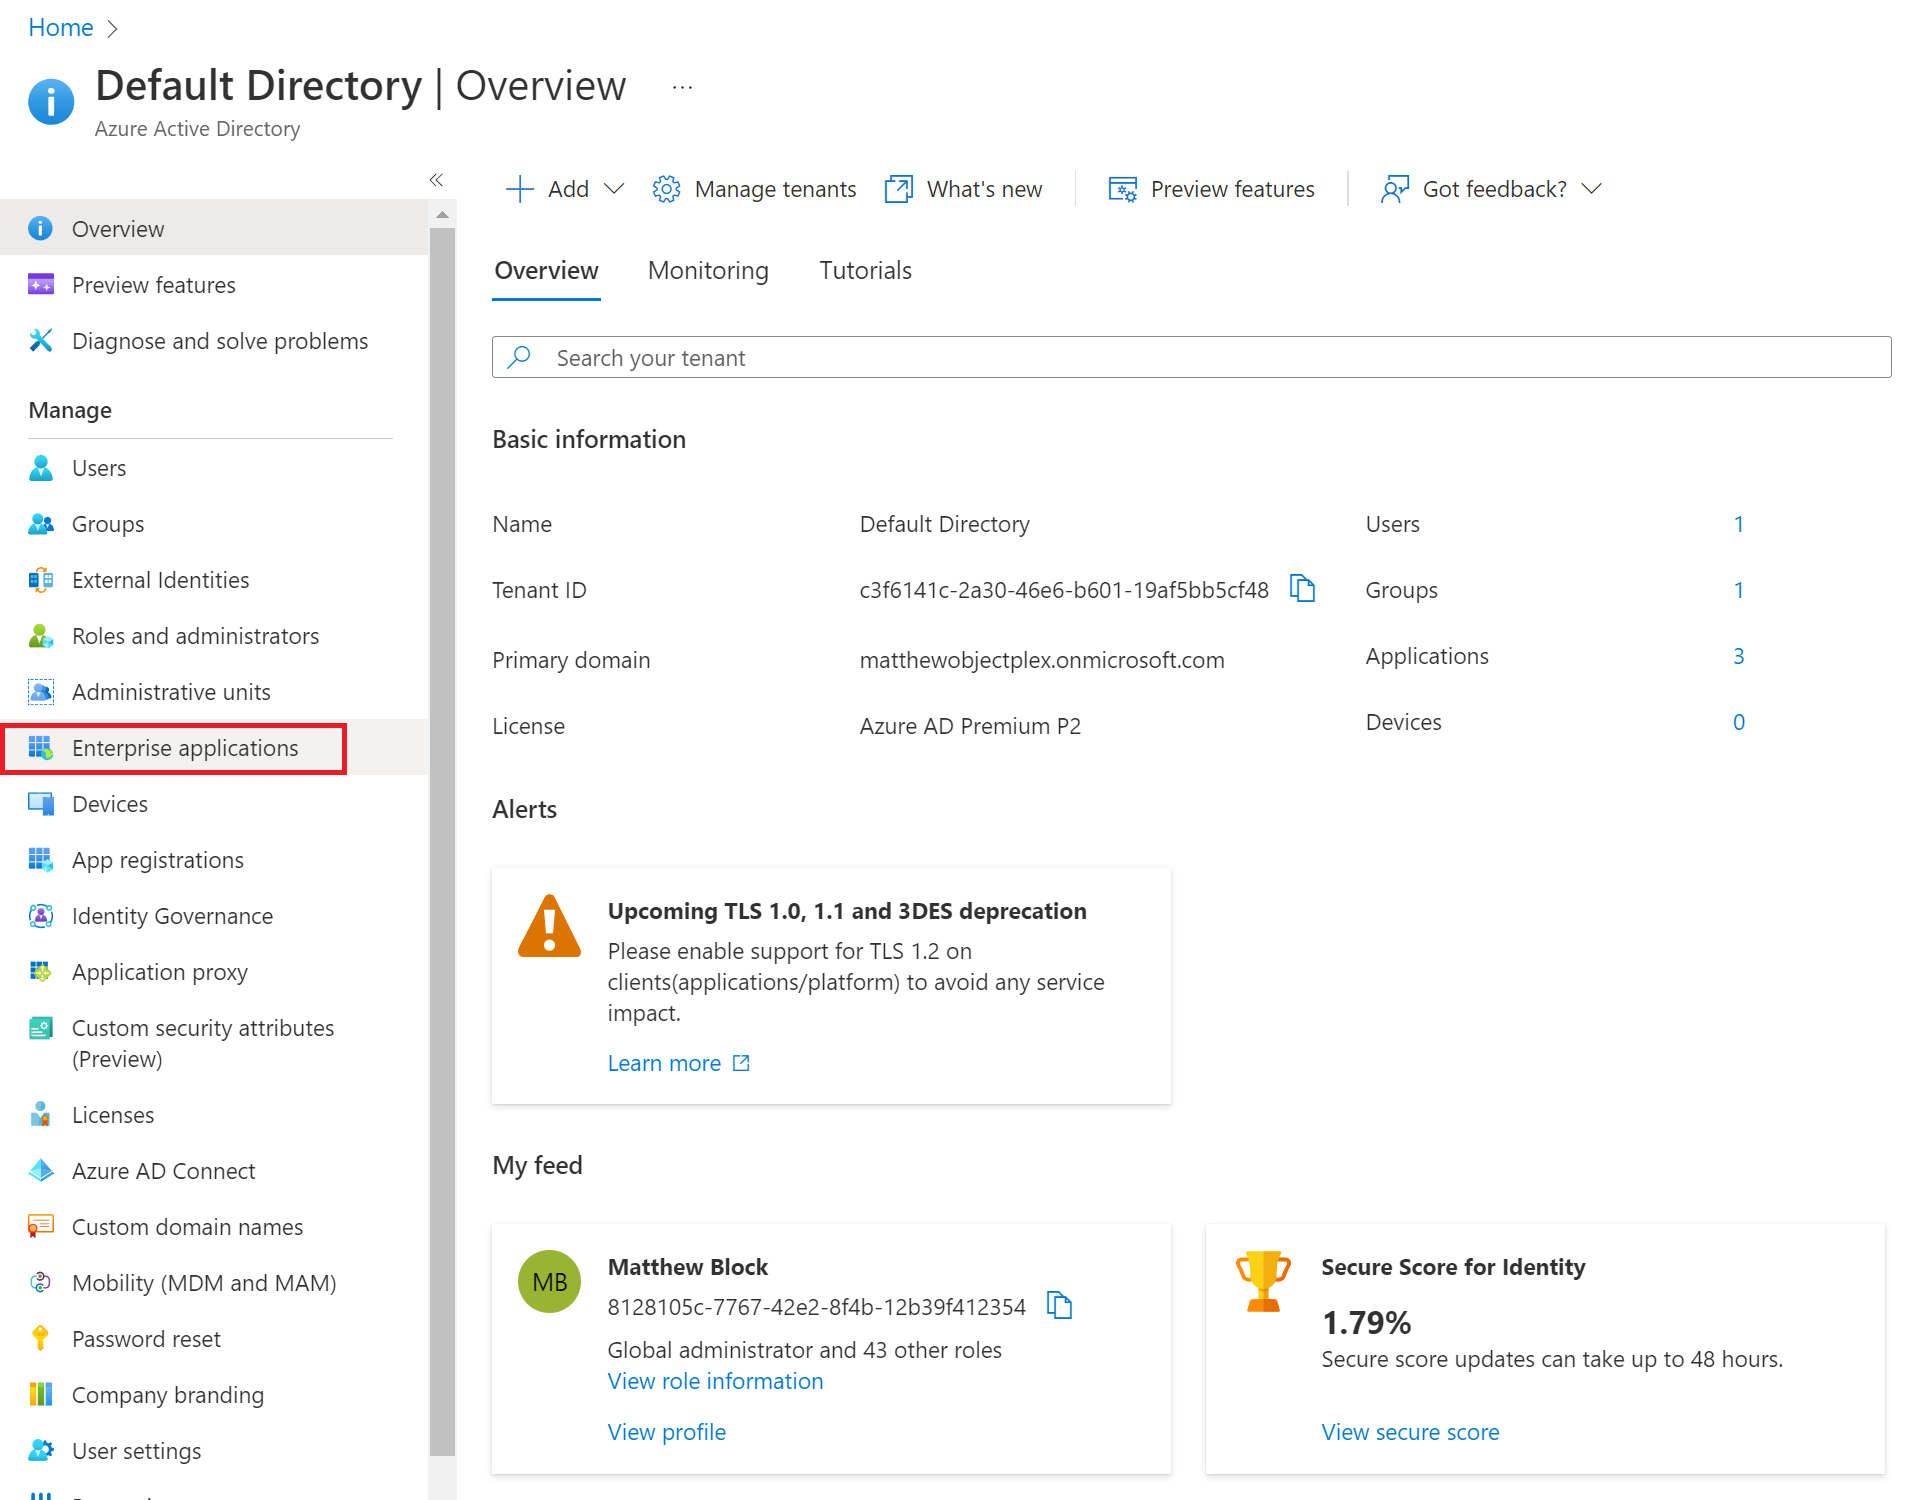
On the left hand navigation section, select "Enterprise Applications"
Select "New application"
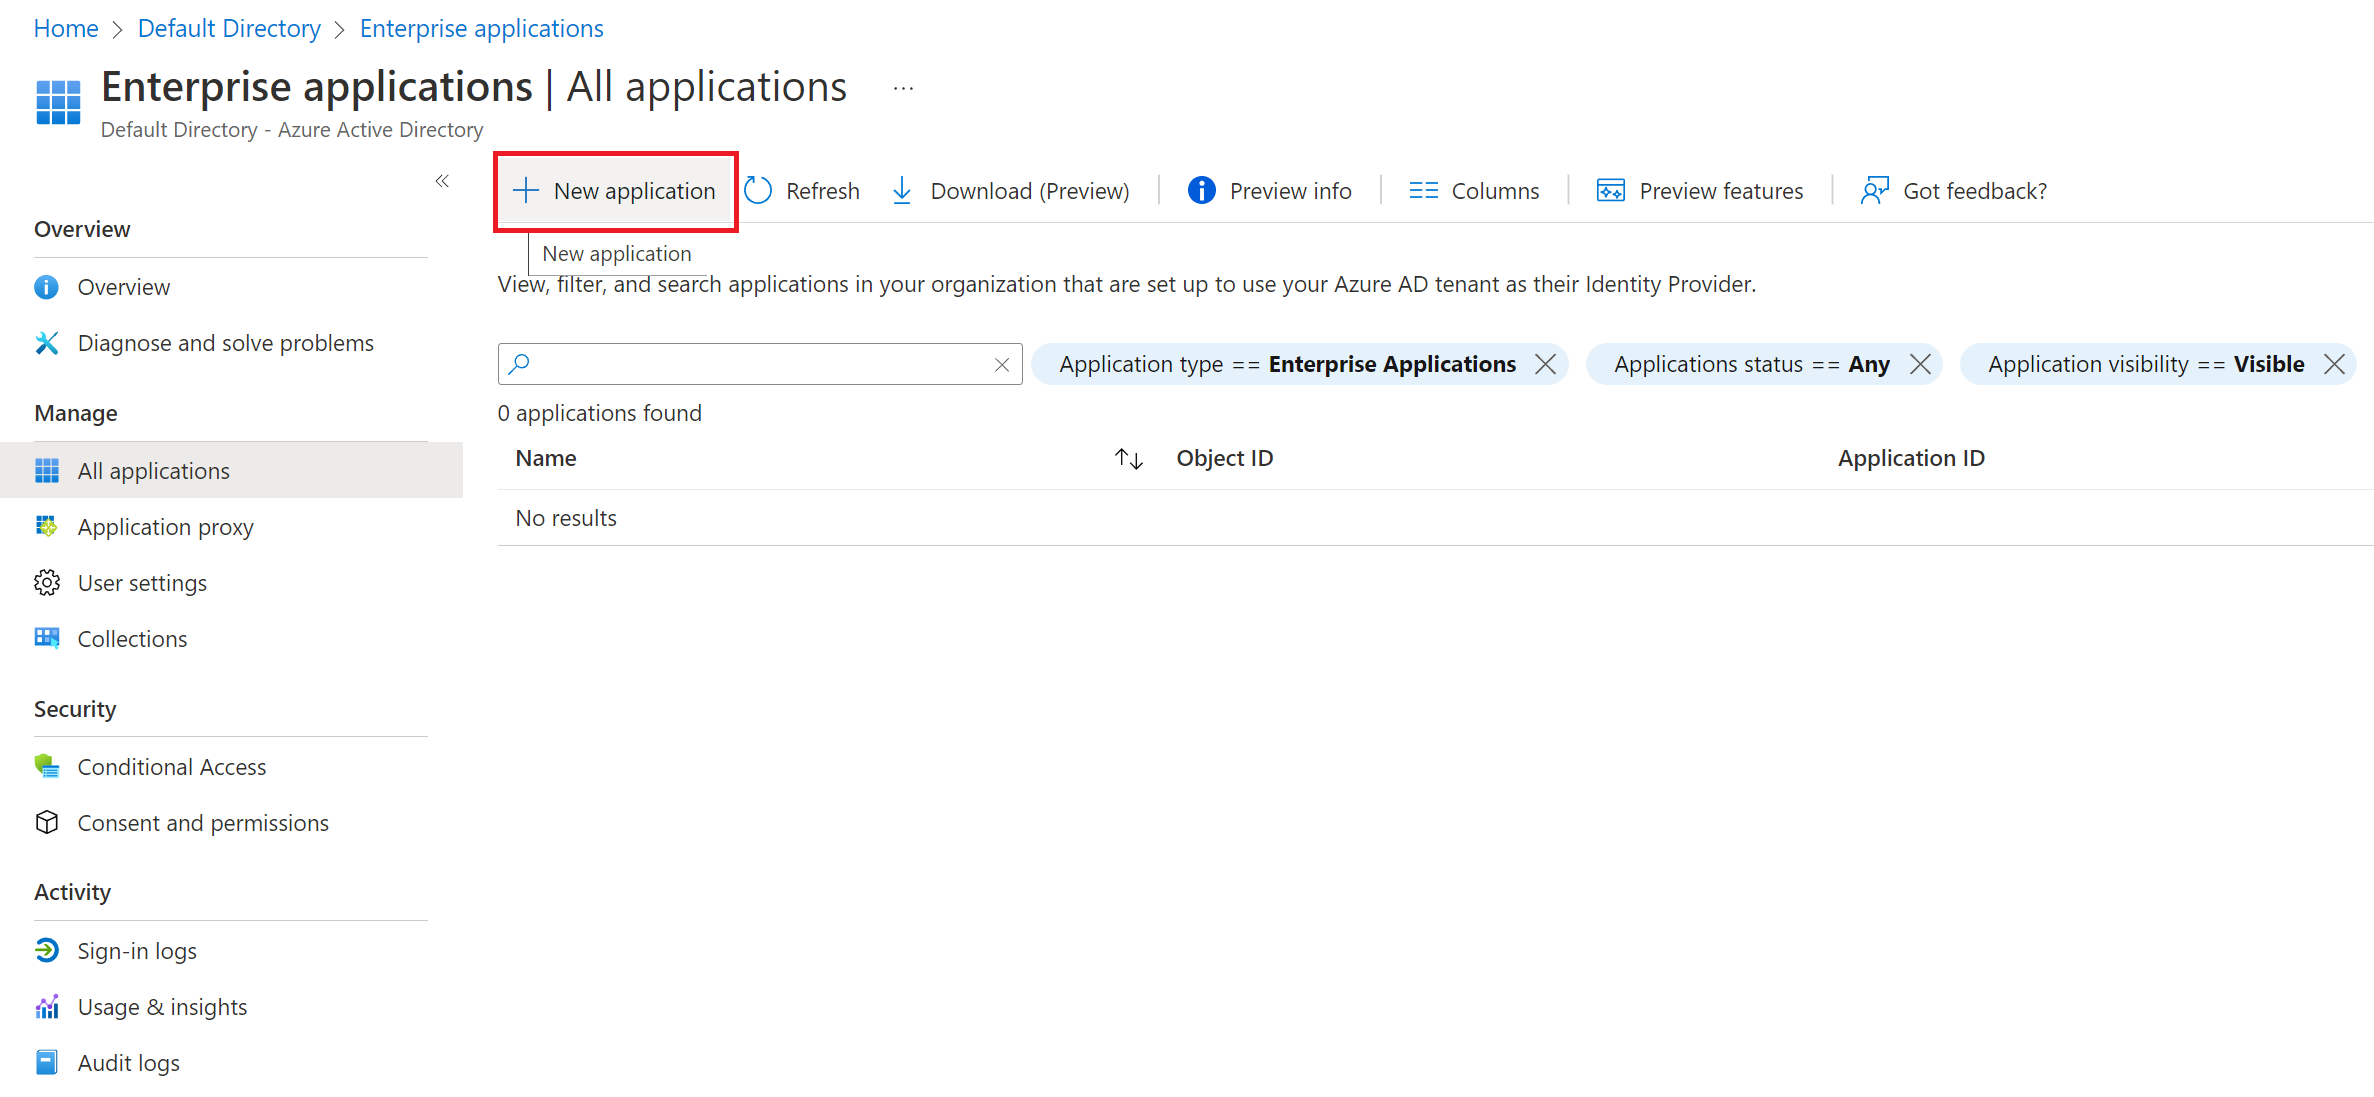
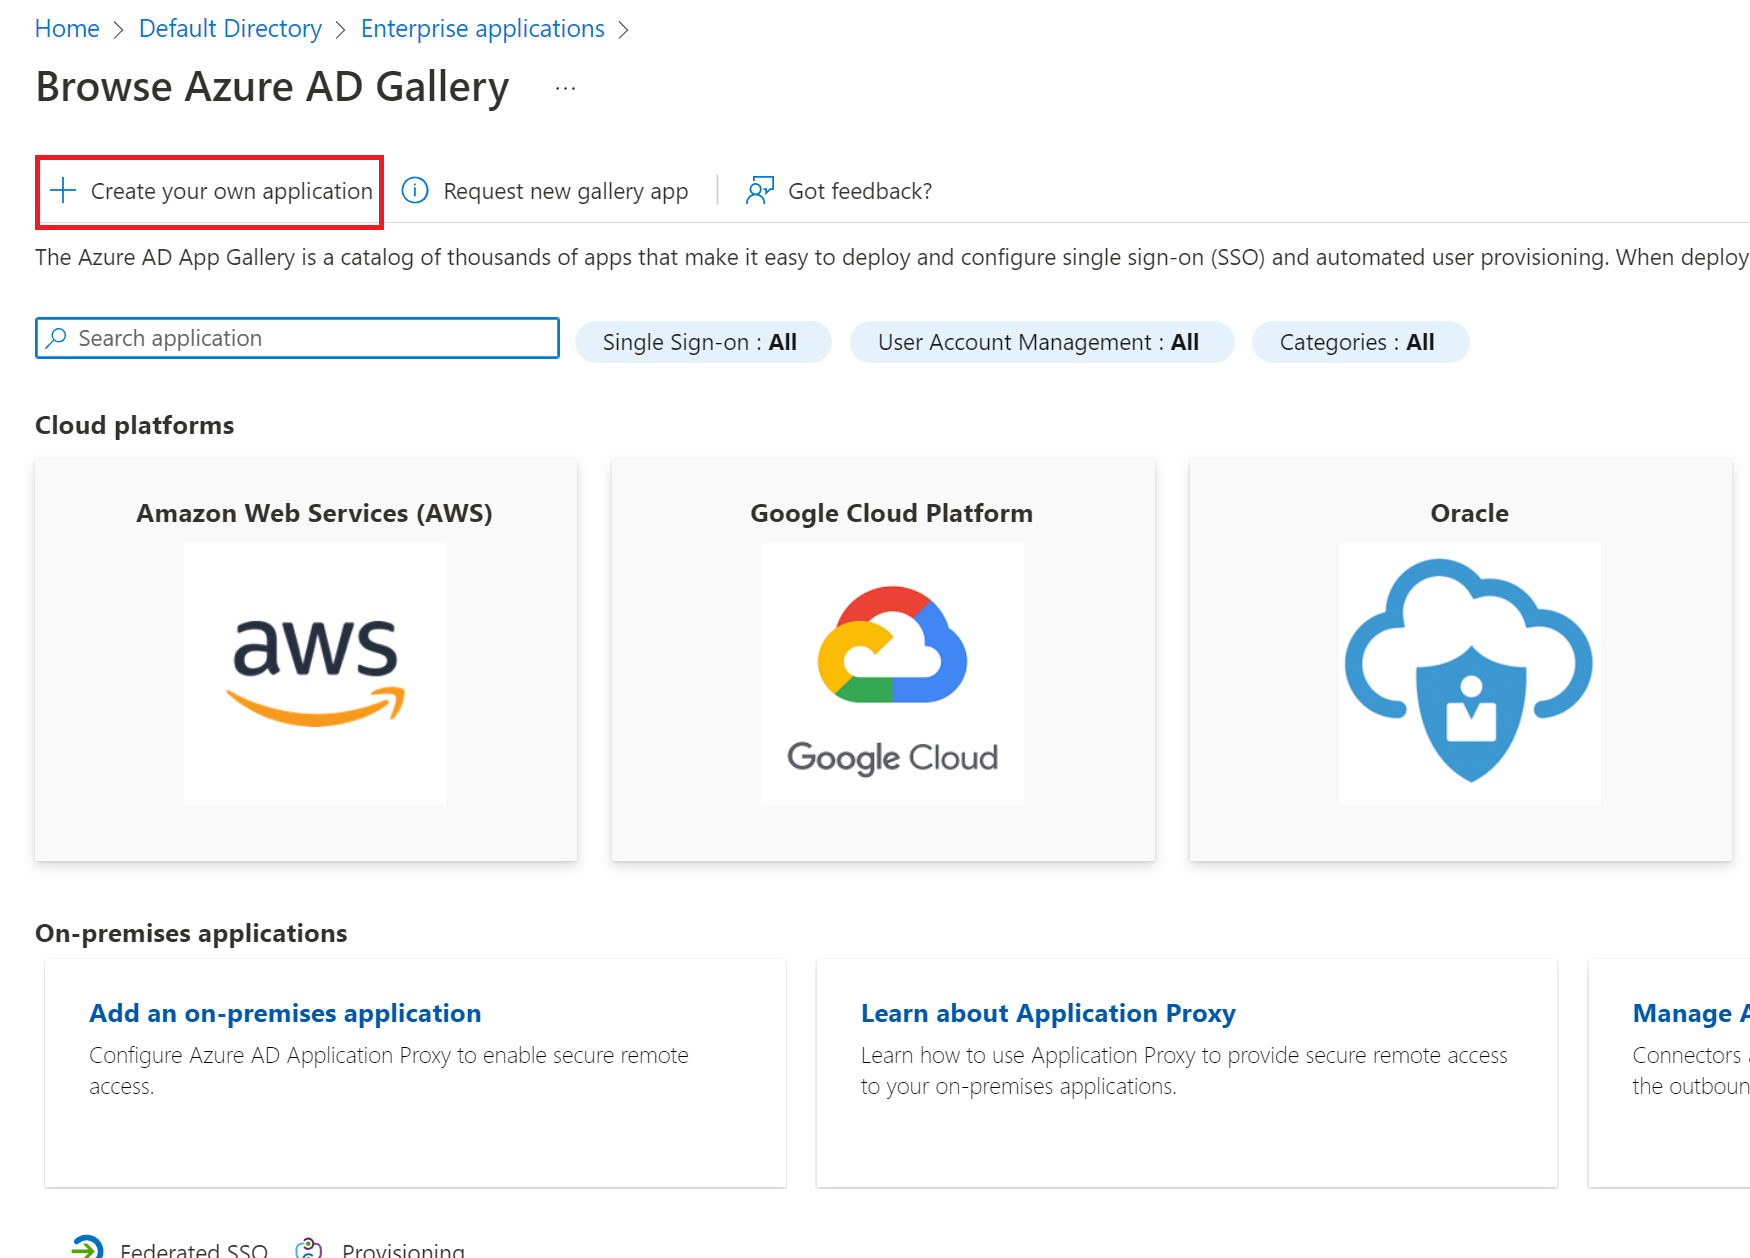
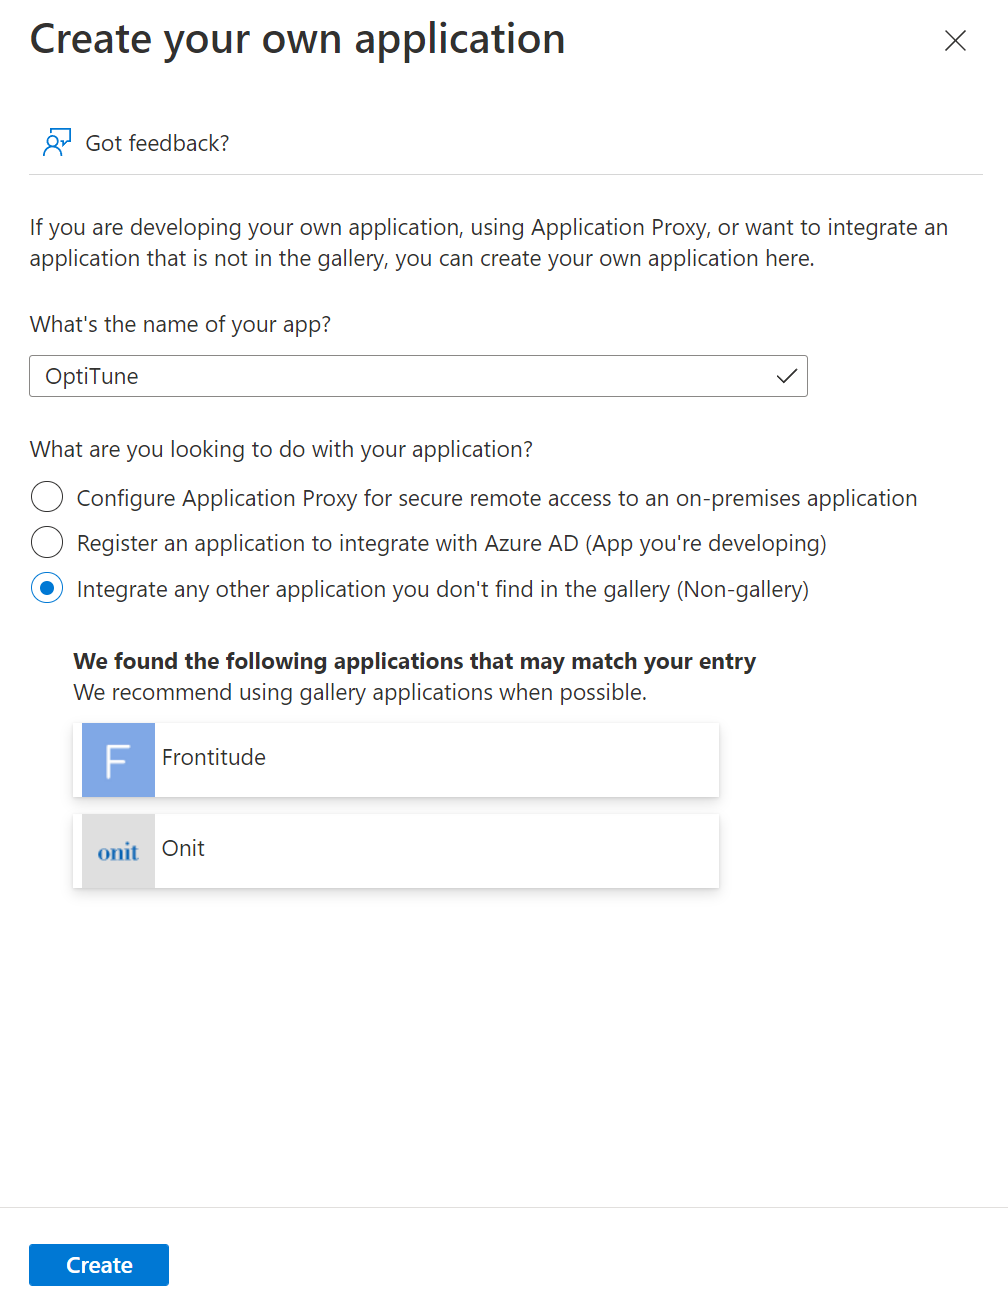
Select "Create your own application"
Create the application
Enter a name for the application, like "OptiTune", and make sure "Integrate any other application you don't find in the gallery (Non-gallery)" is selected, and press "Create".
Enterprise Application Setup
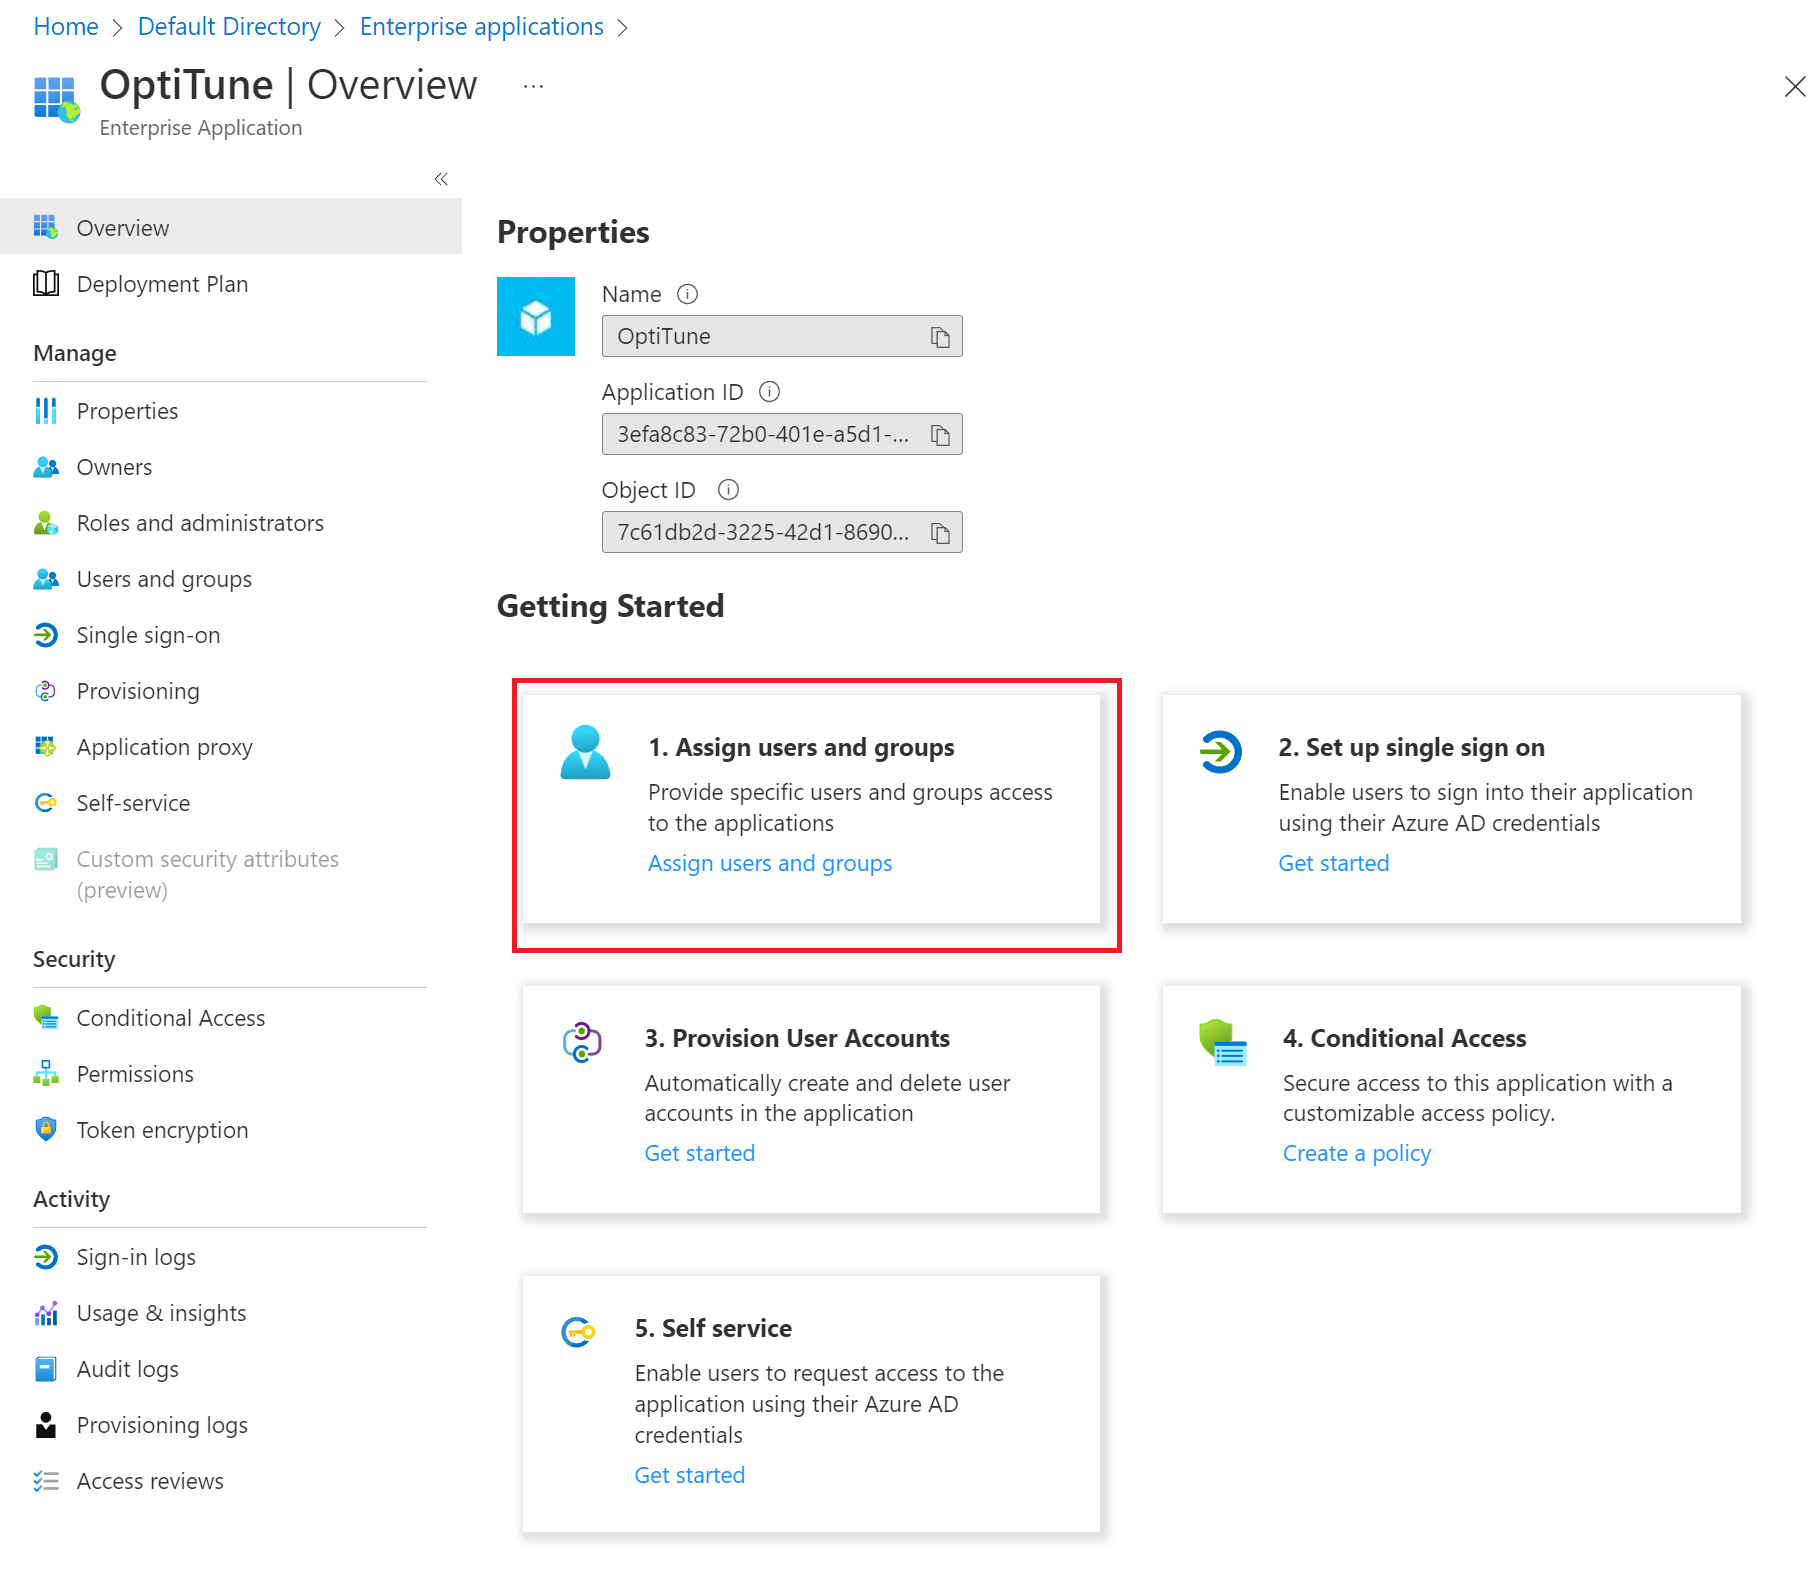
Assign users to the application
Click on "1. Assign users and groups", and add any users or groups in your organization's active directory that you want to be able to access OptiTune using SSO.
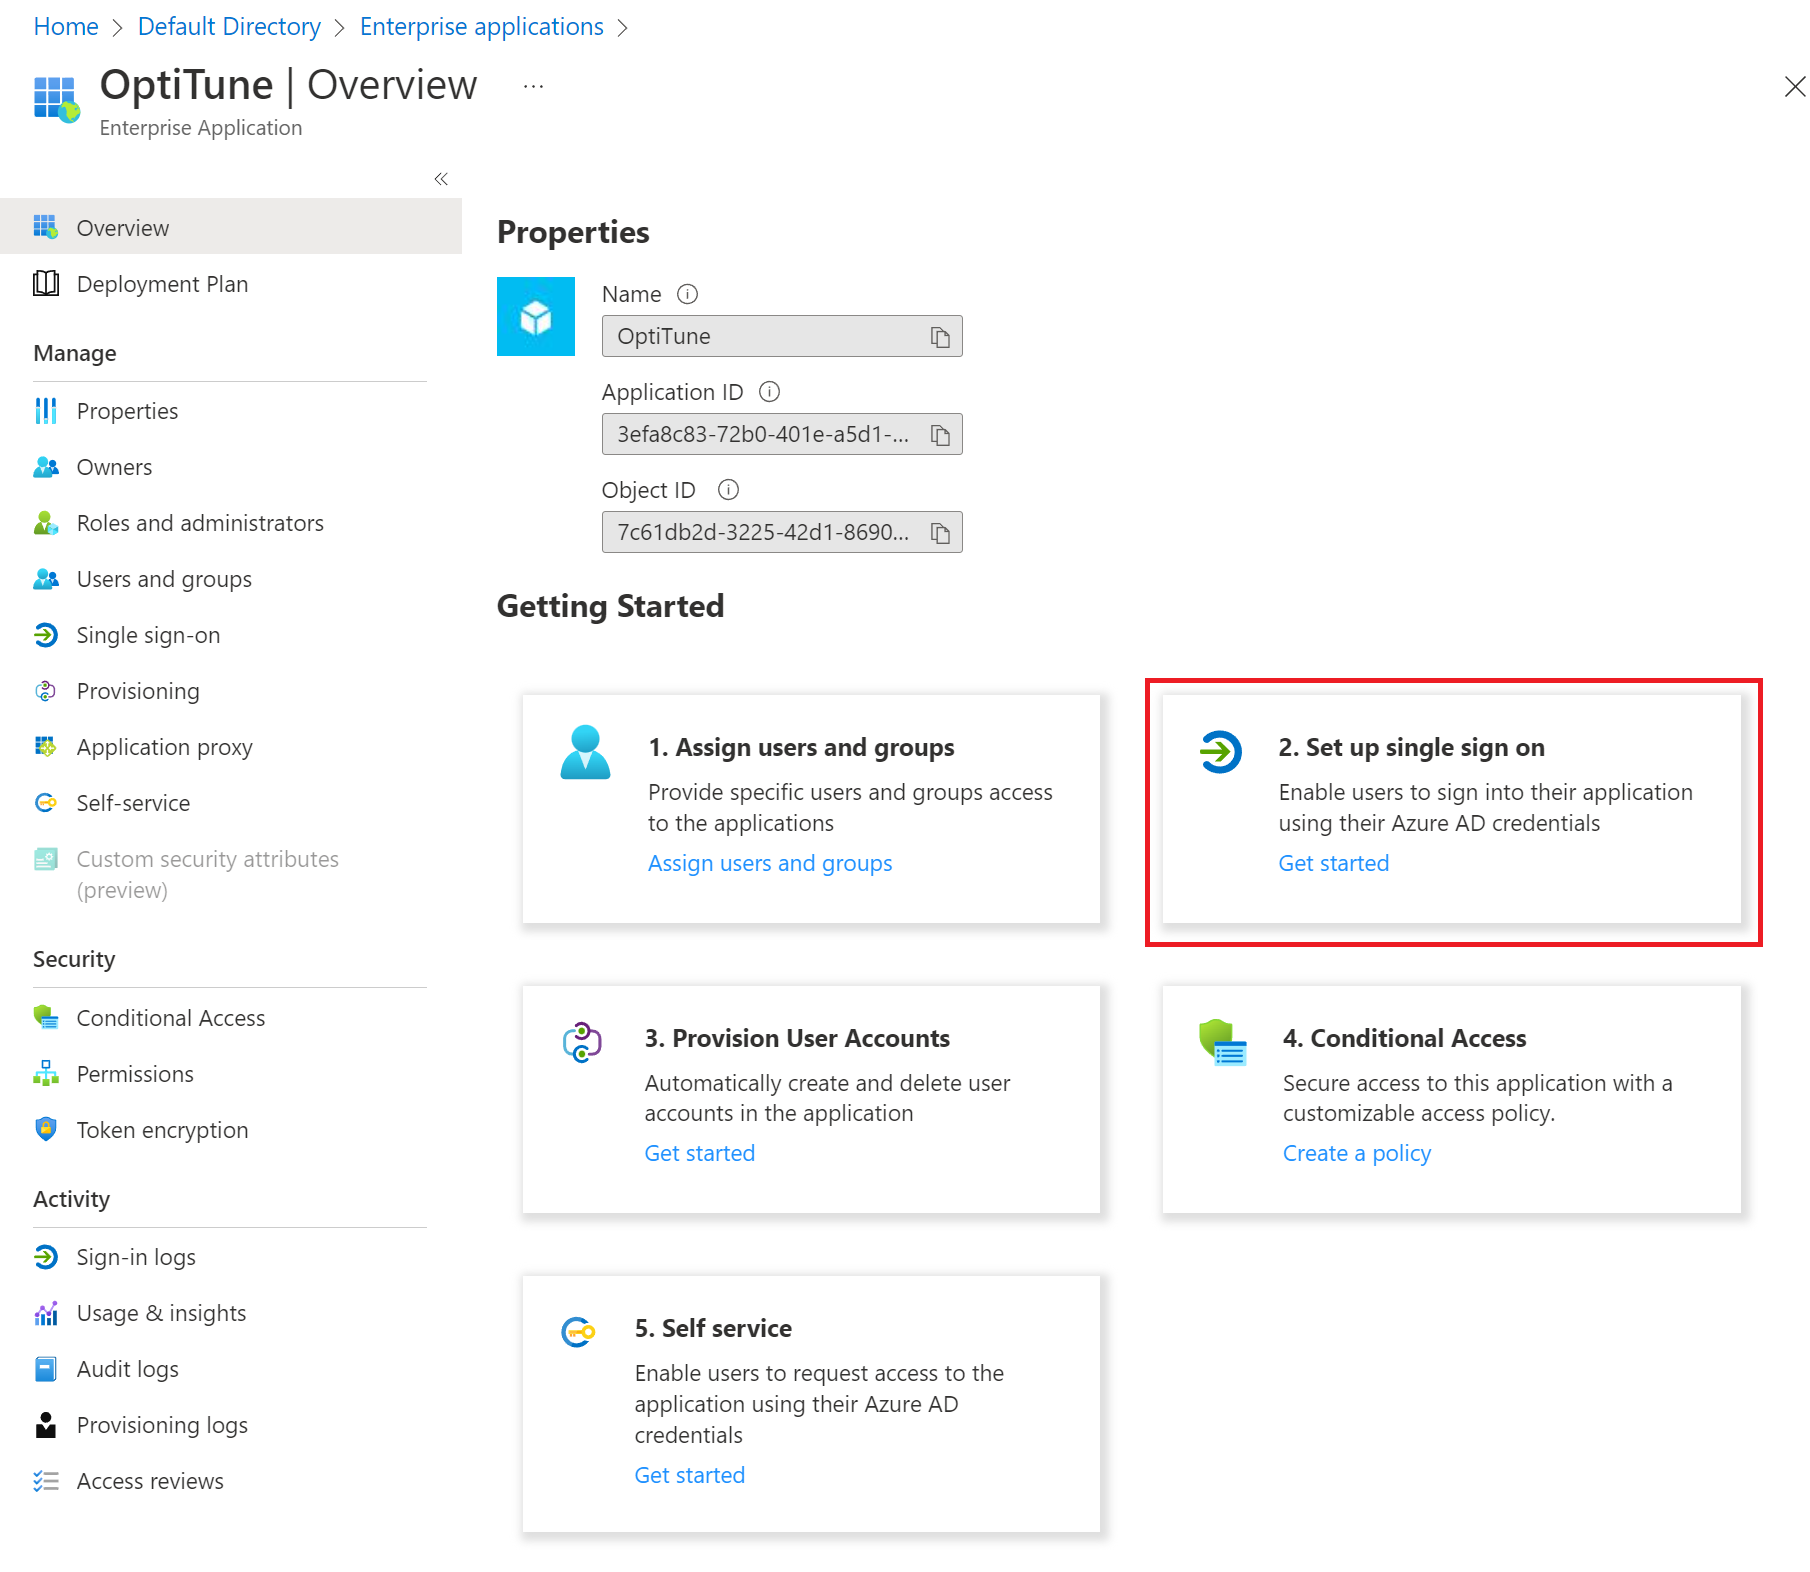
Setup up single sign on
Click on "2. Setup up single sign on"
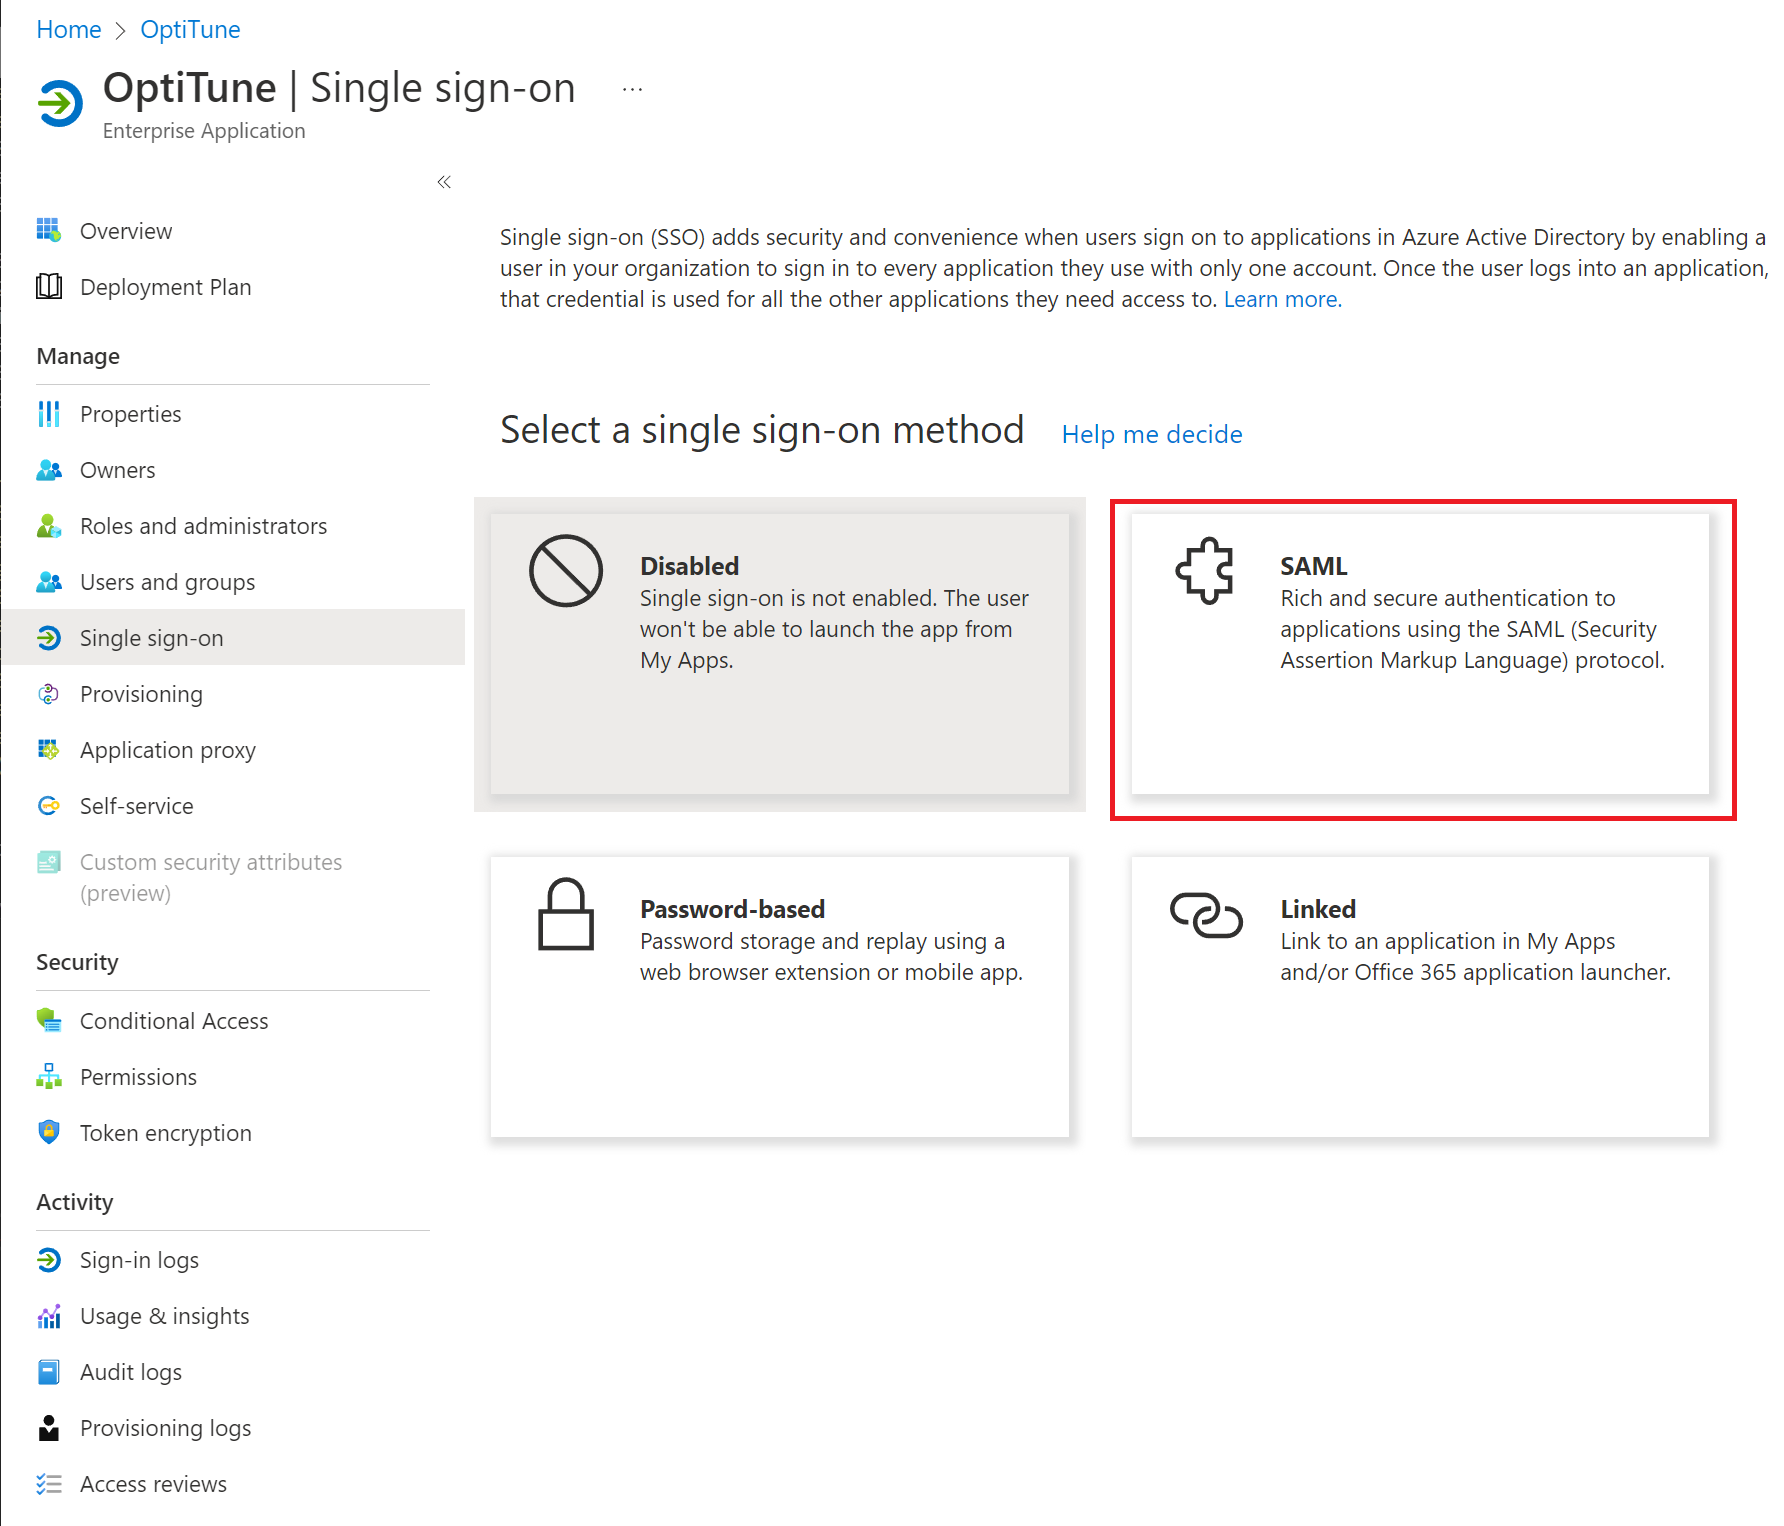
Select "SAML" for the single sign on method
Click on "SAML"
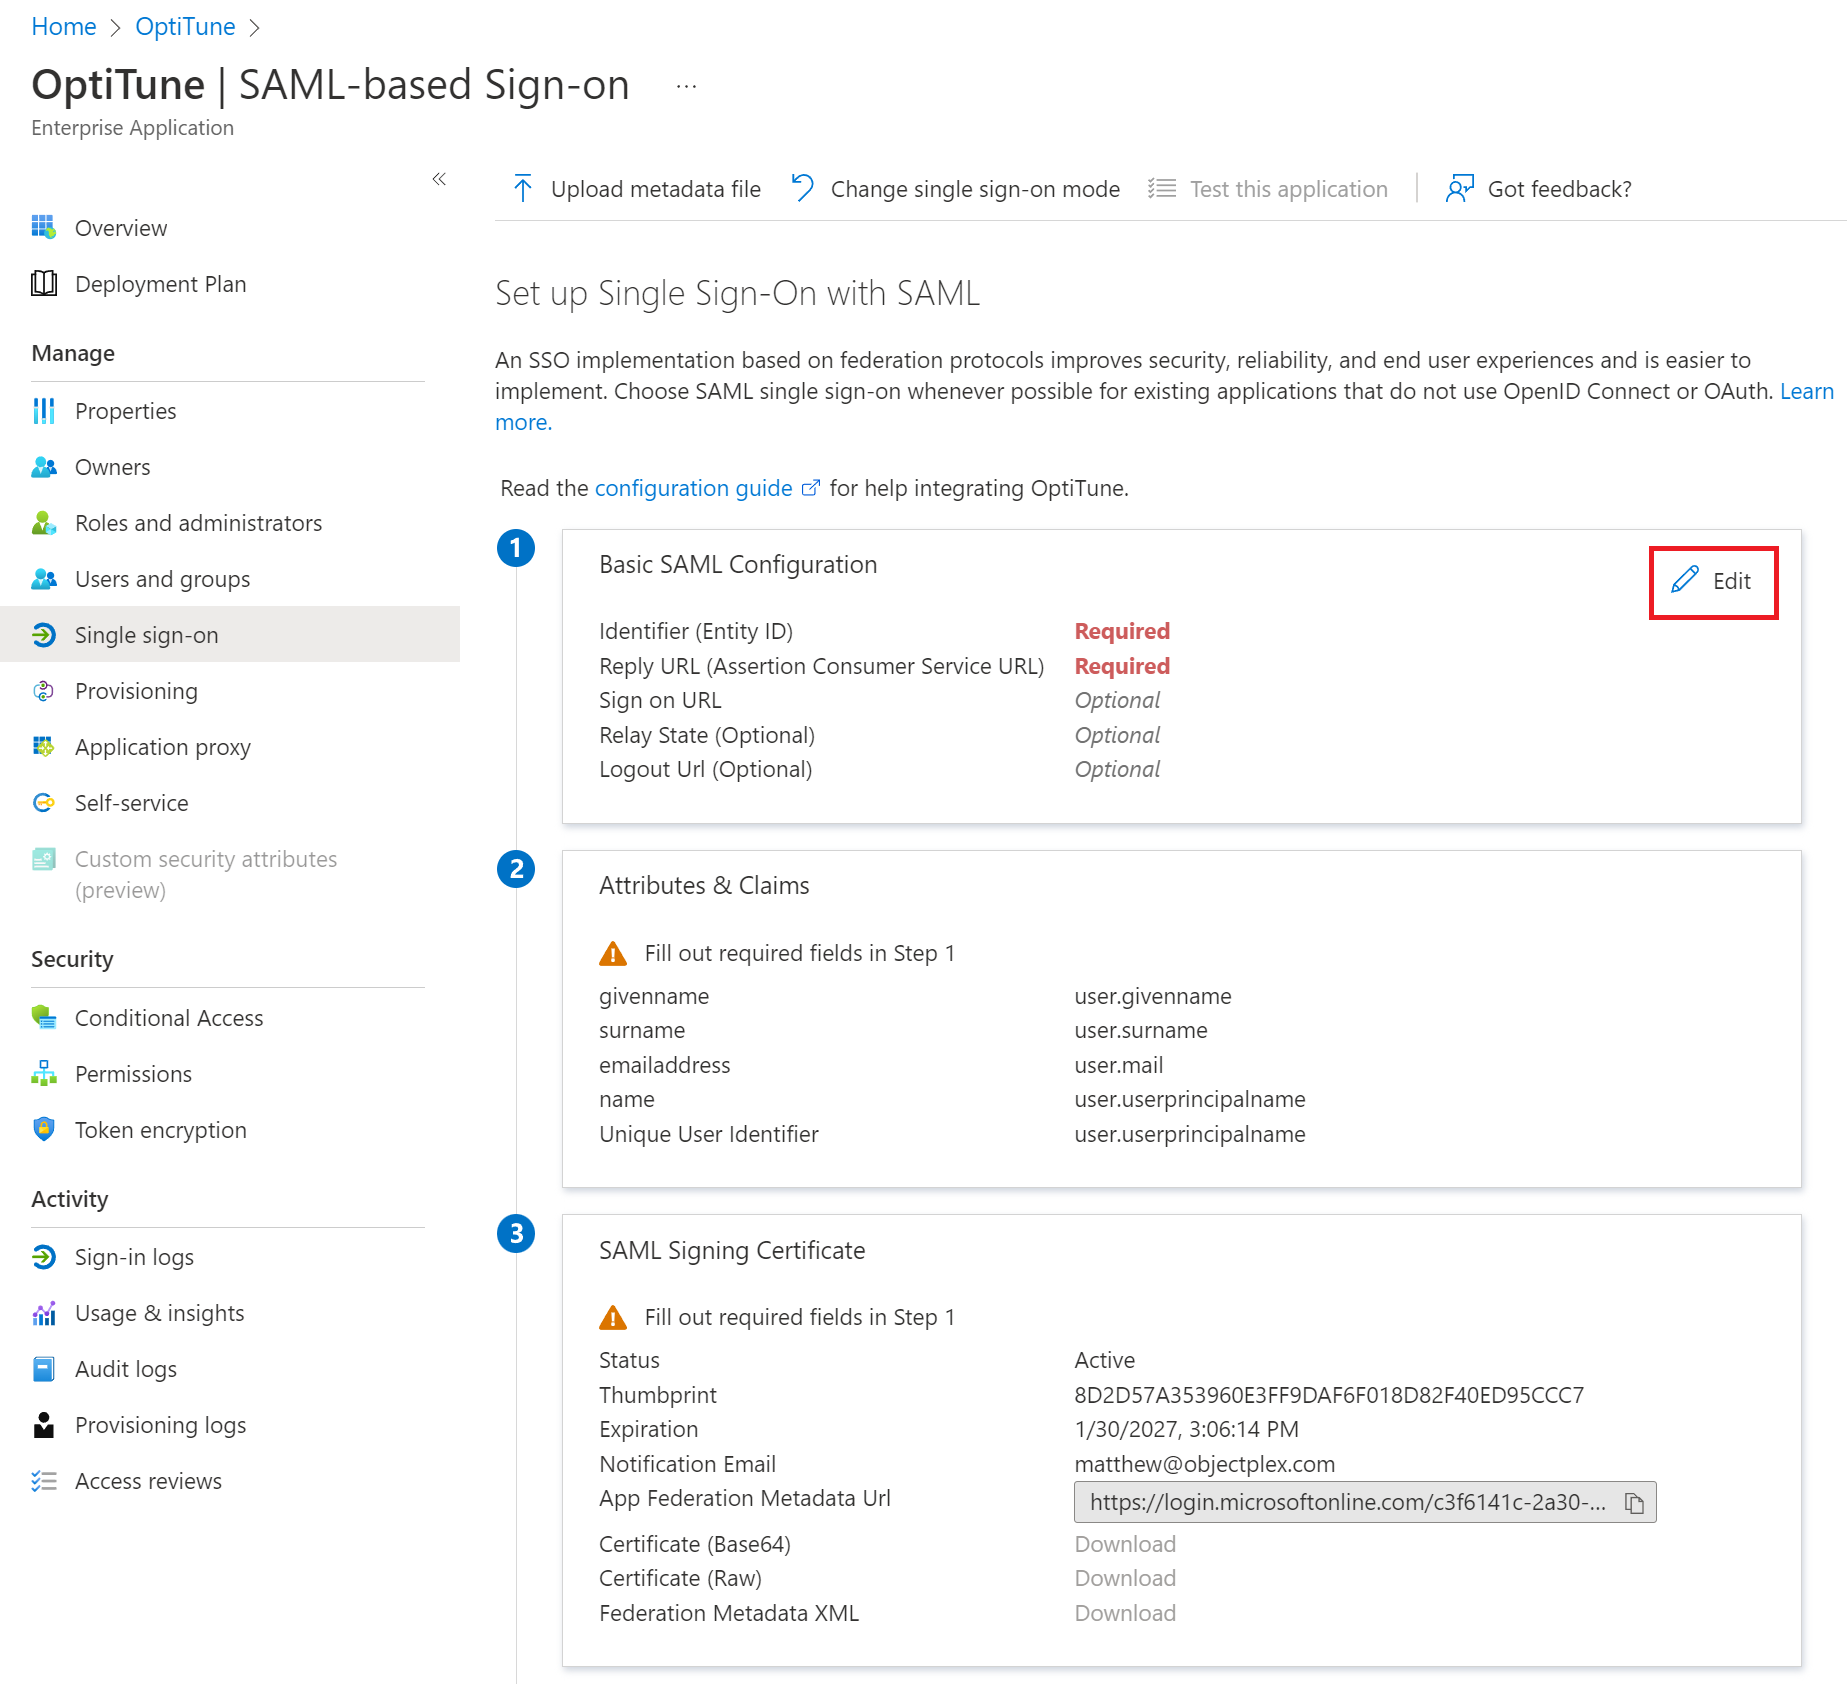
Edit the "Basic SAML Configuration"
Press "Edit" under section 1, "Basic SAML Configuration"
Back in OptiTune, start adding the SAML Configuration
Back in the OptiTune management console, go to the SAML Configurations page, and click "Add".
Enter in a name and description for the SAML Configuration, as shown below.
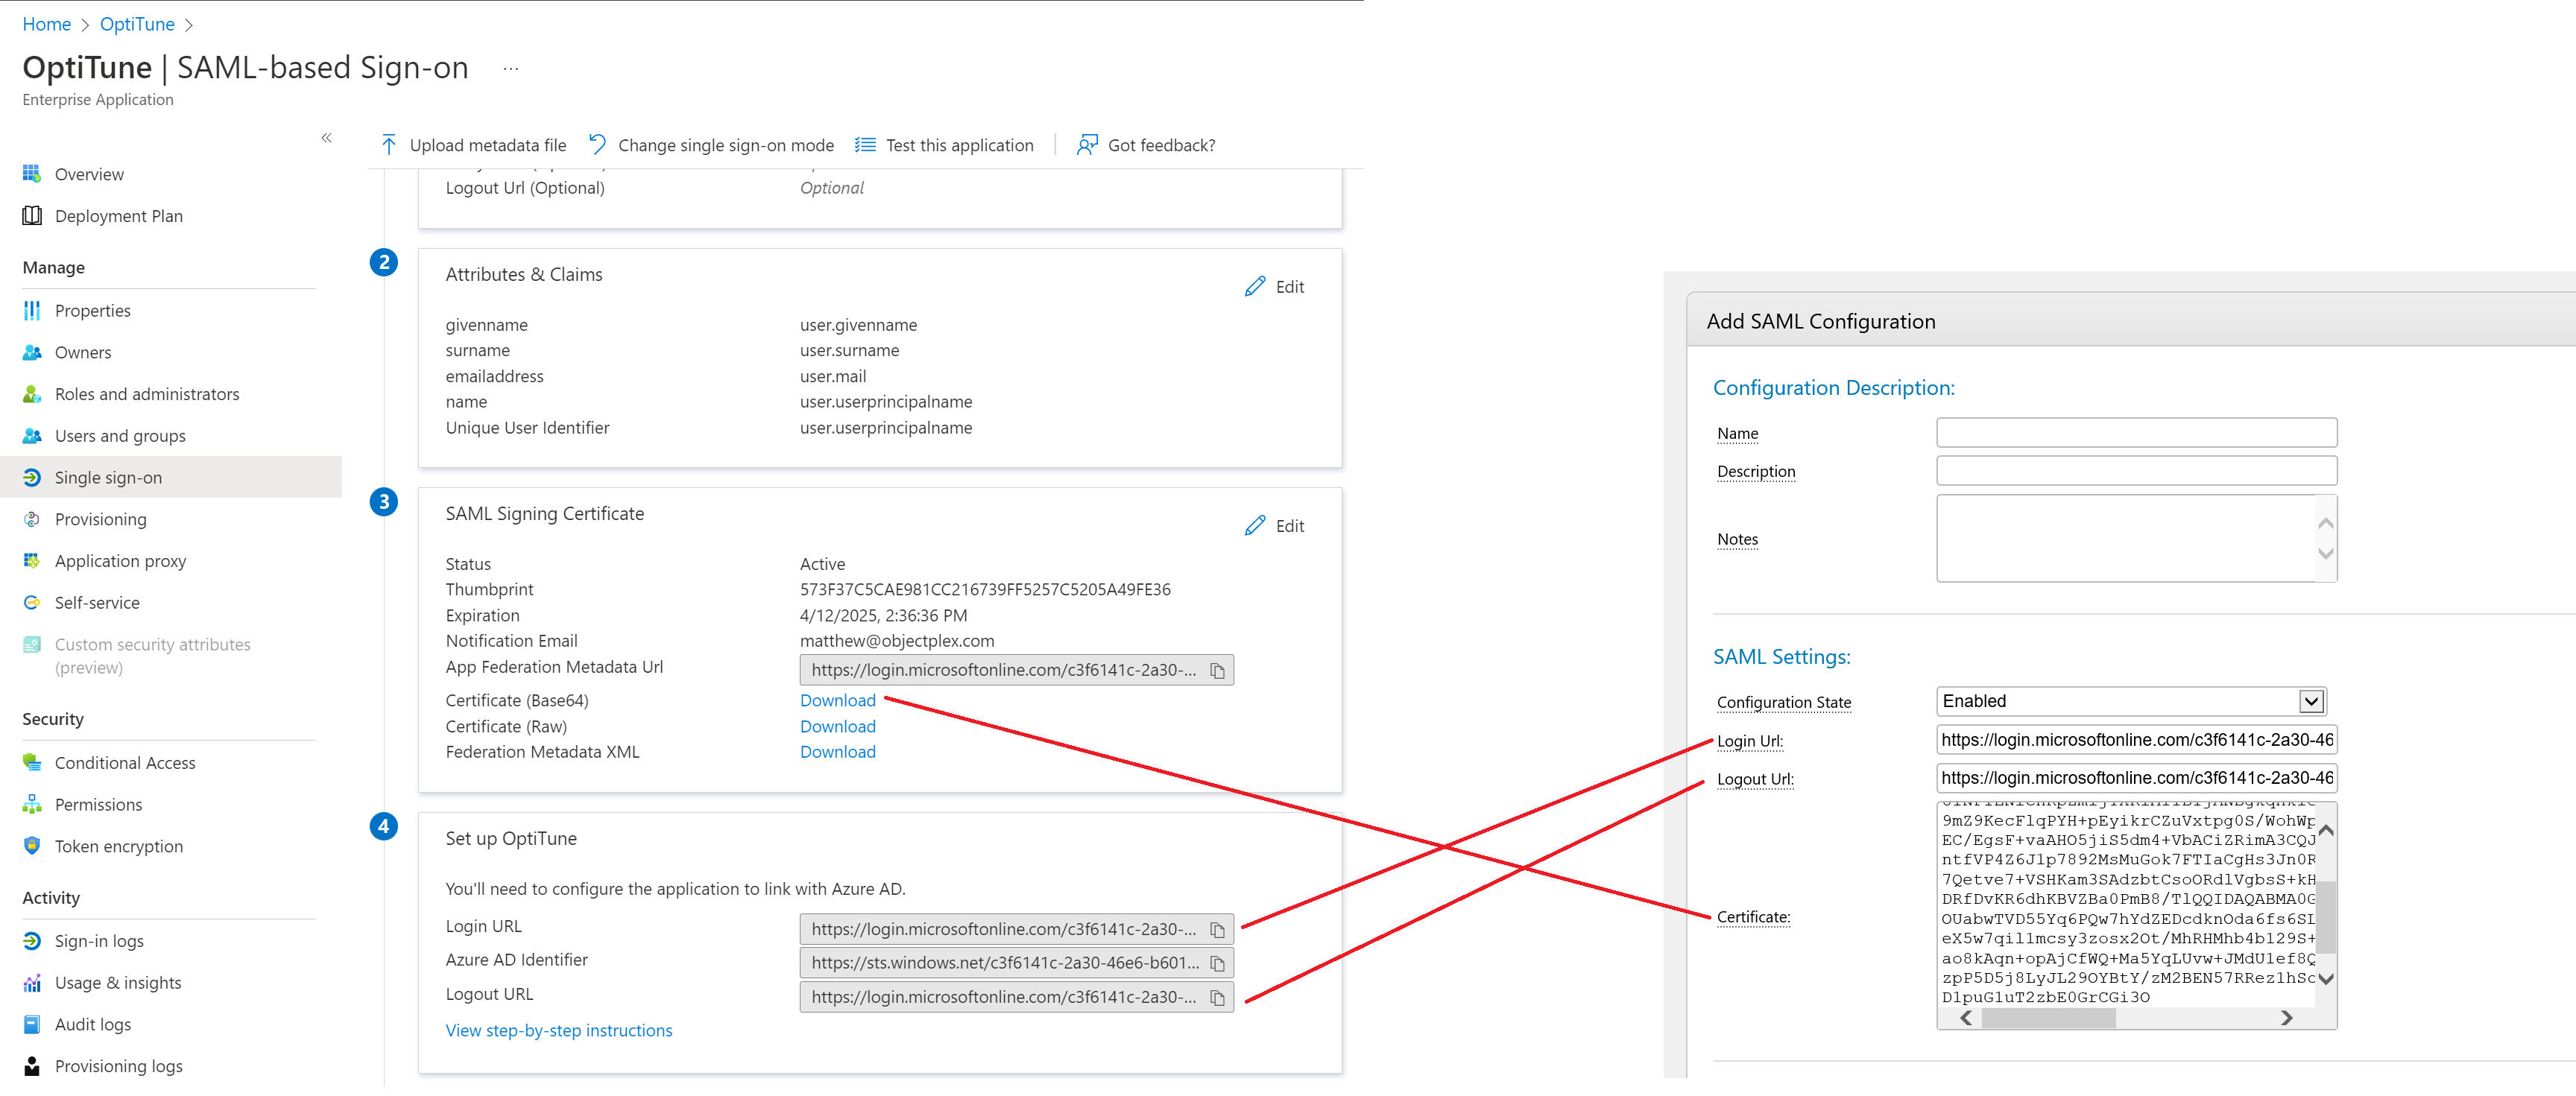
You will need to copy the information shown under "Identity Provider Configuration" into the Enterprise Application in Azure AD.
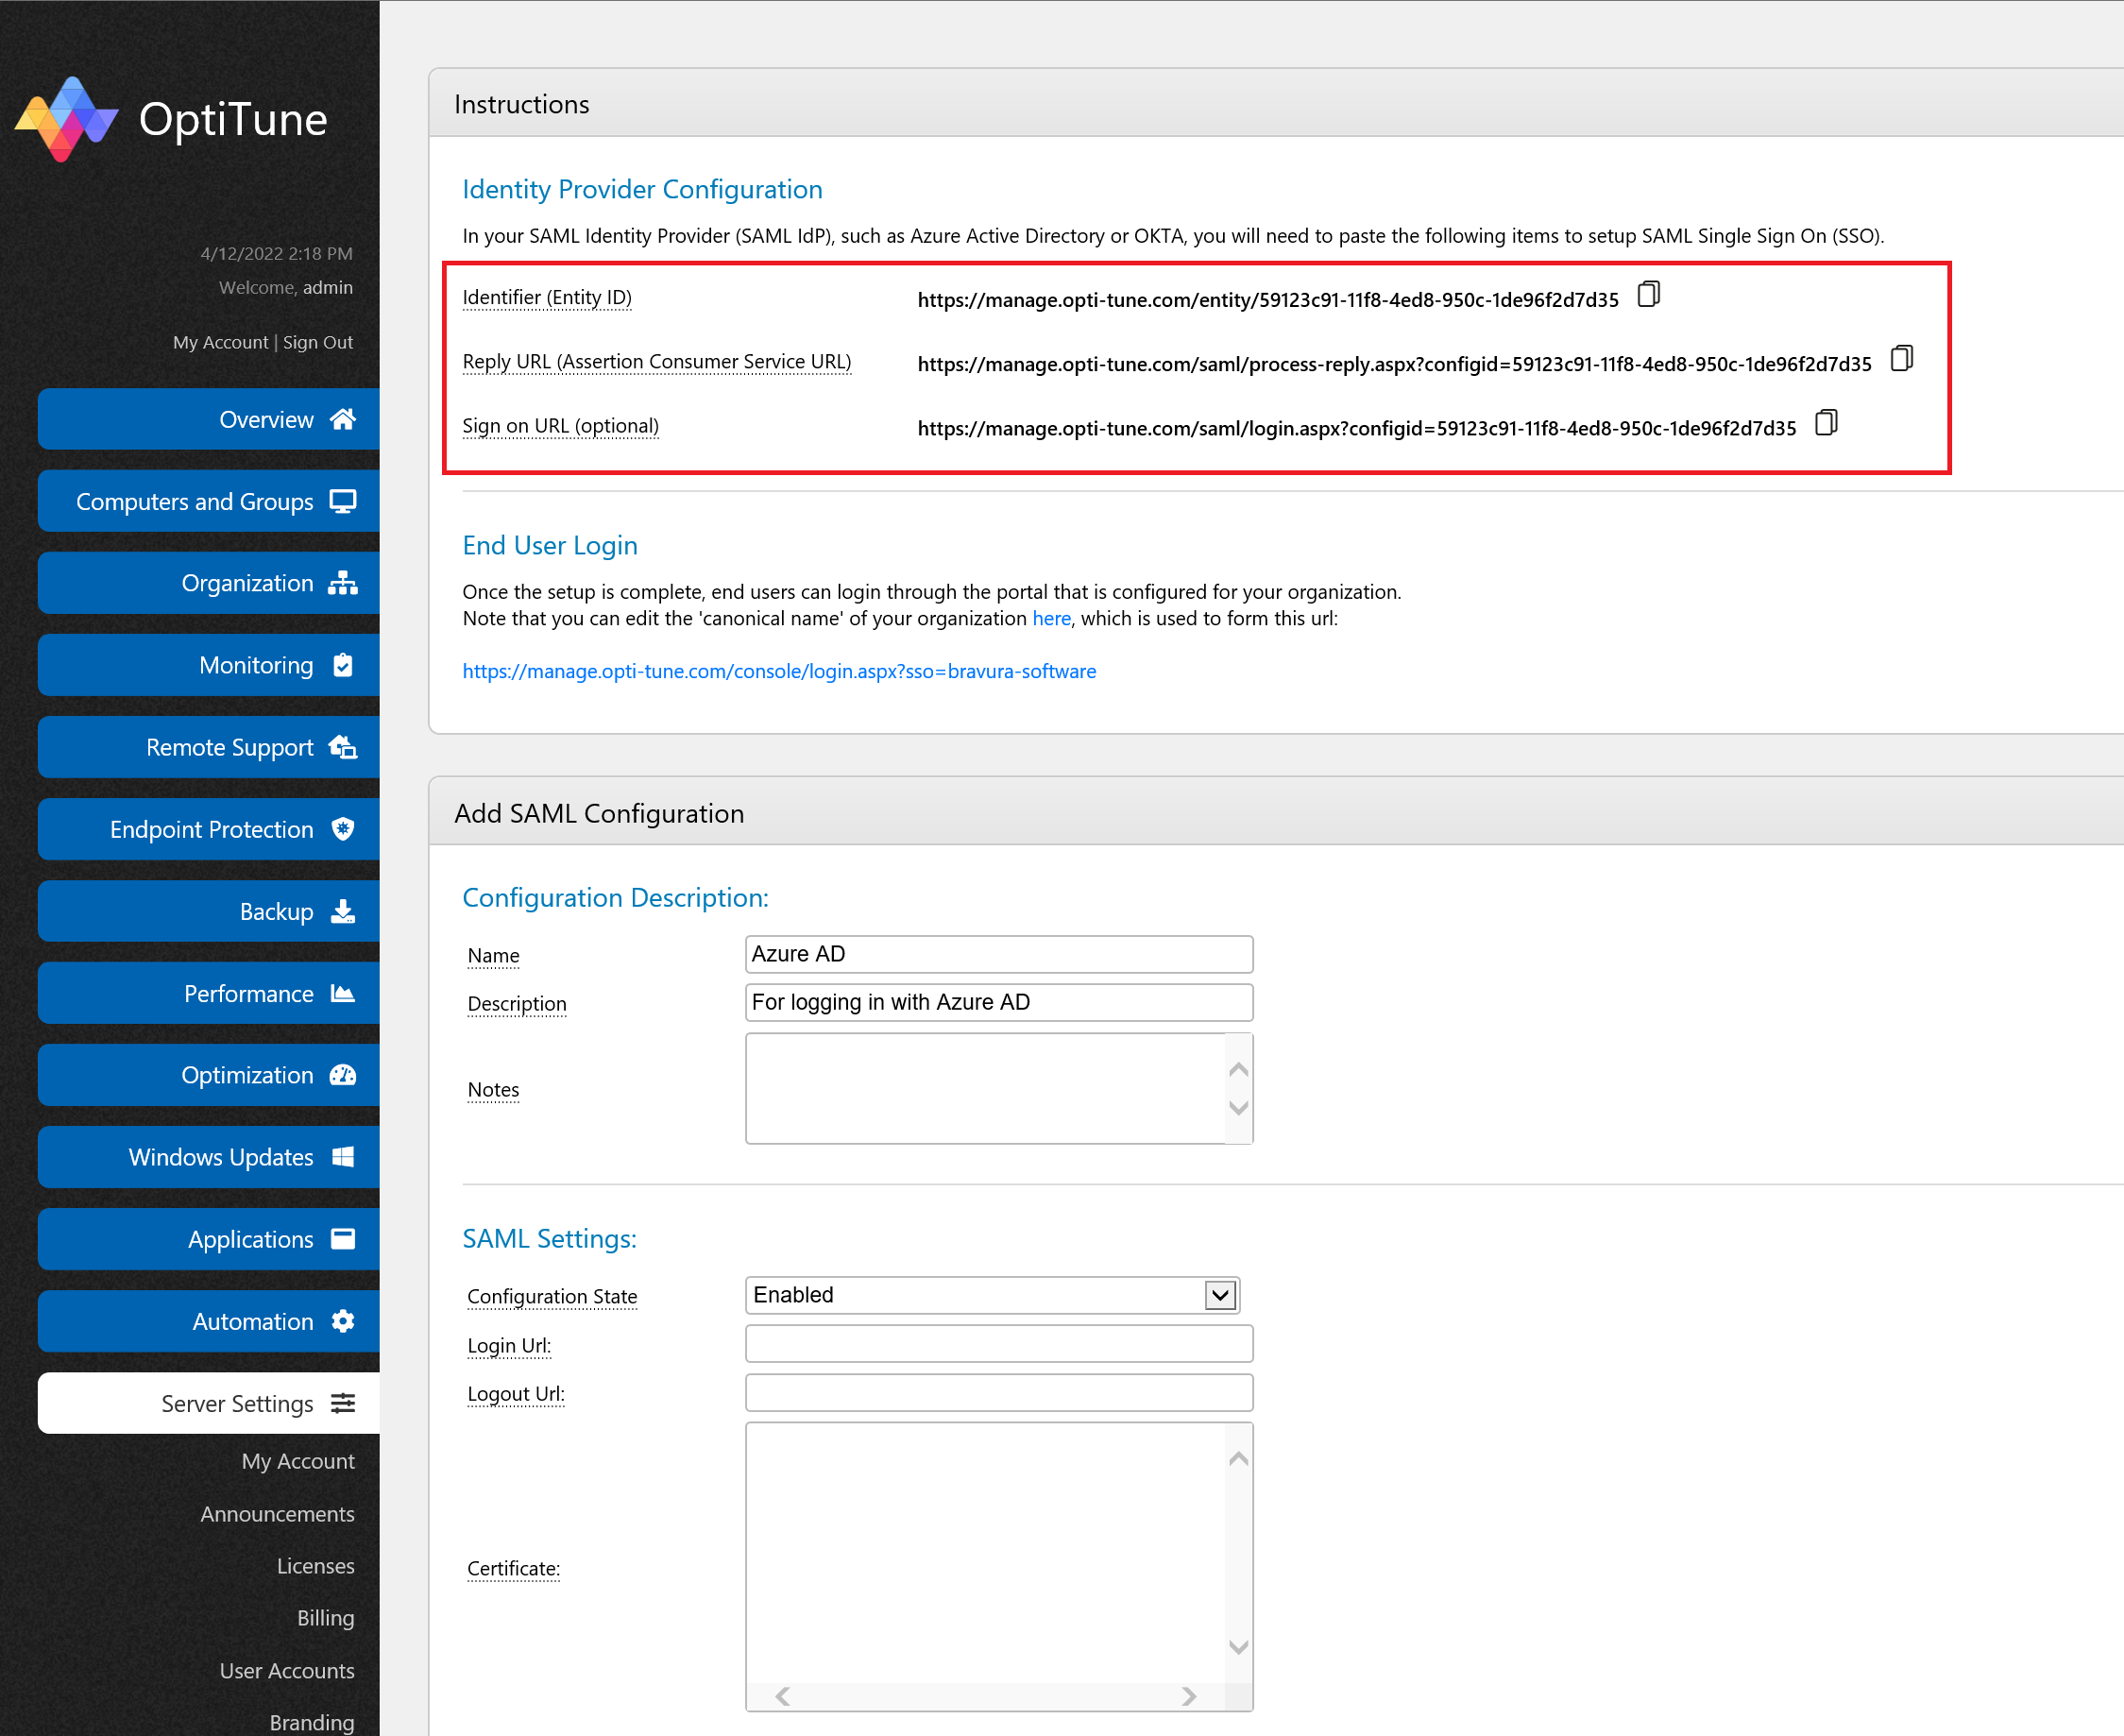
Copy the SAML information for the OptiTune application back into Azure AD
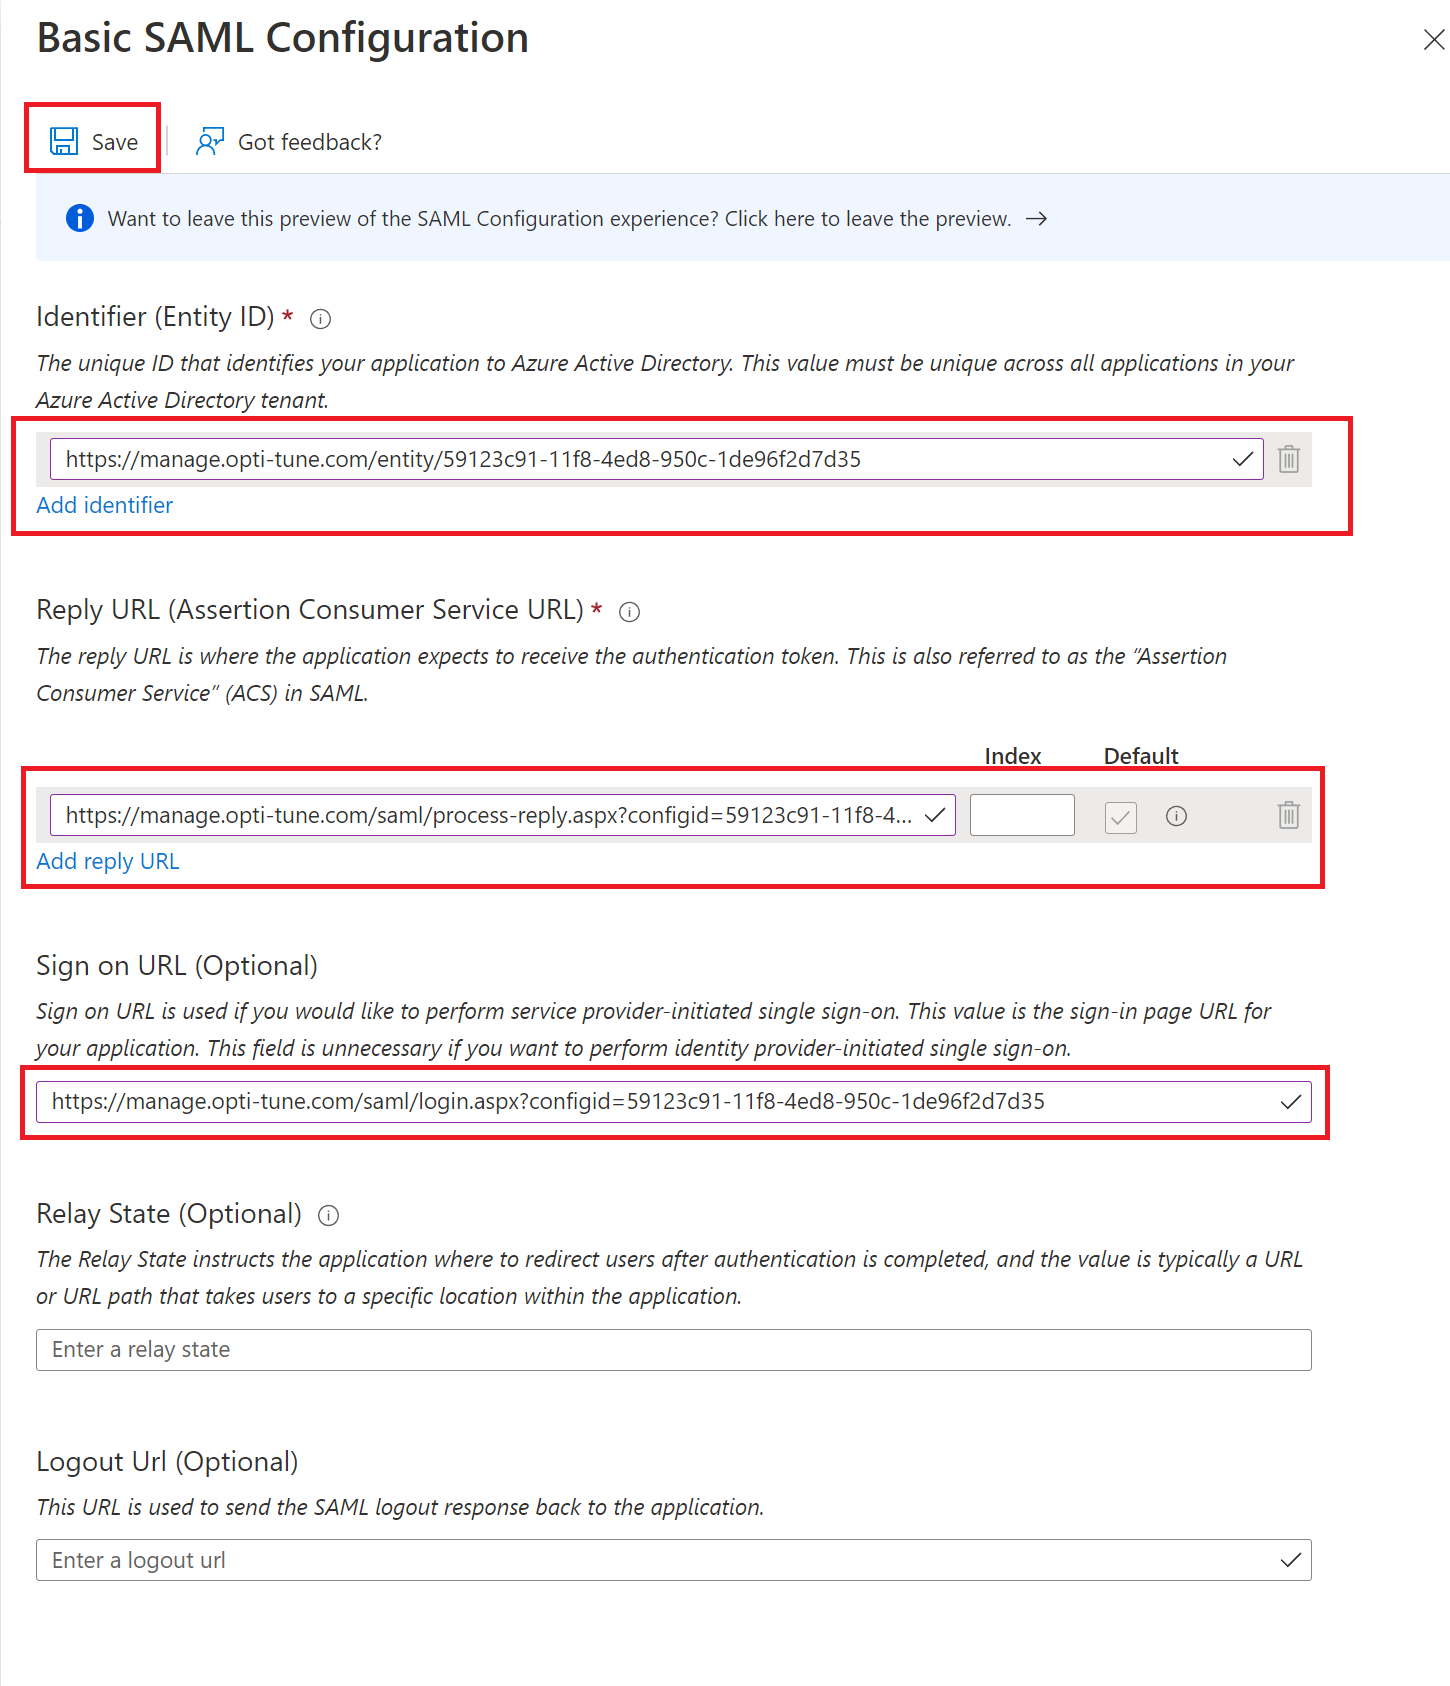
Copy and paste each of these fields into the appropriate area in Azure AD - Basic SAML Configuration, and press "Save".
- Identifier (Entity ID)
- Reply URL (Assertion Consumer Service URL)
- Sign on URL (optional)
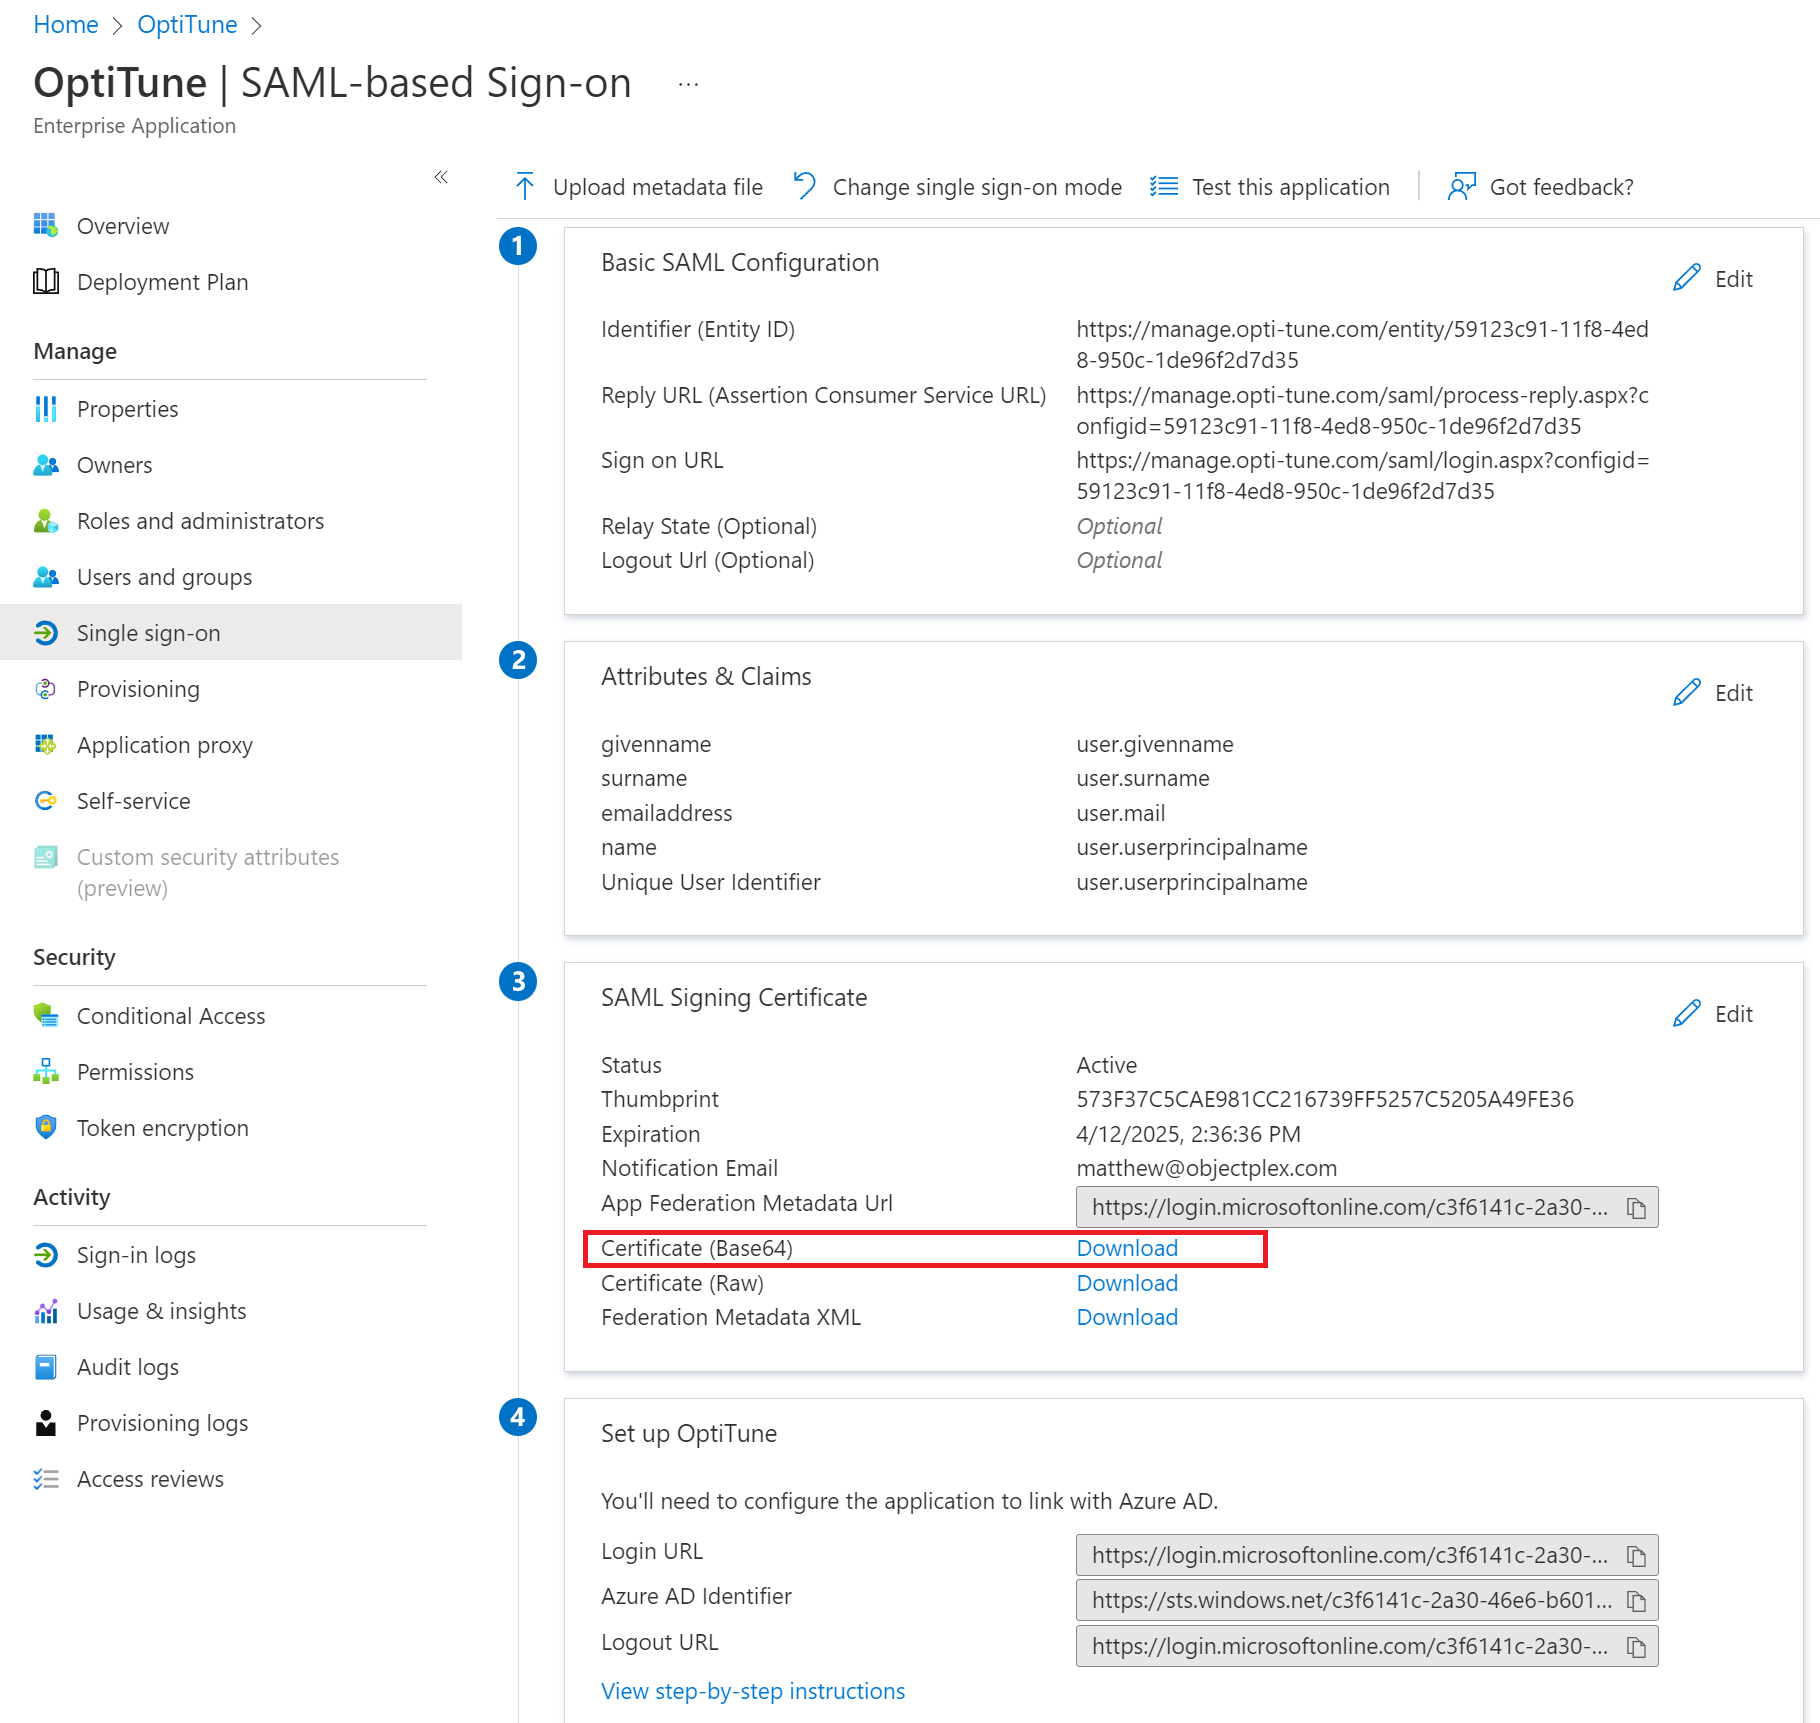
Download the Base64 SAML Signing certificate from Azure AD
Download the Base64 SAML Signing certificate from Azure AD, and open up the ".cer" file in notepad. It should begin with "-----BEGIN CERTIFICATE-----" and end with "-----END CERTIFICATE-----"
Add the certificate in OptiTune
Paste the contents of the certificate file into the "certificate" field in OptiTune
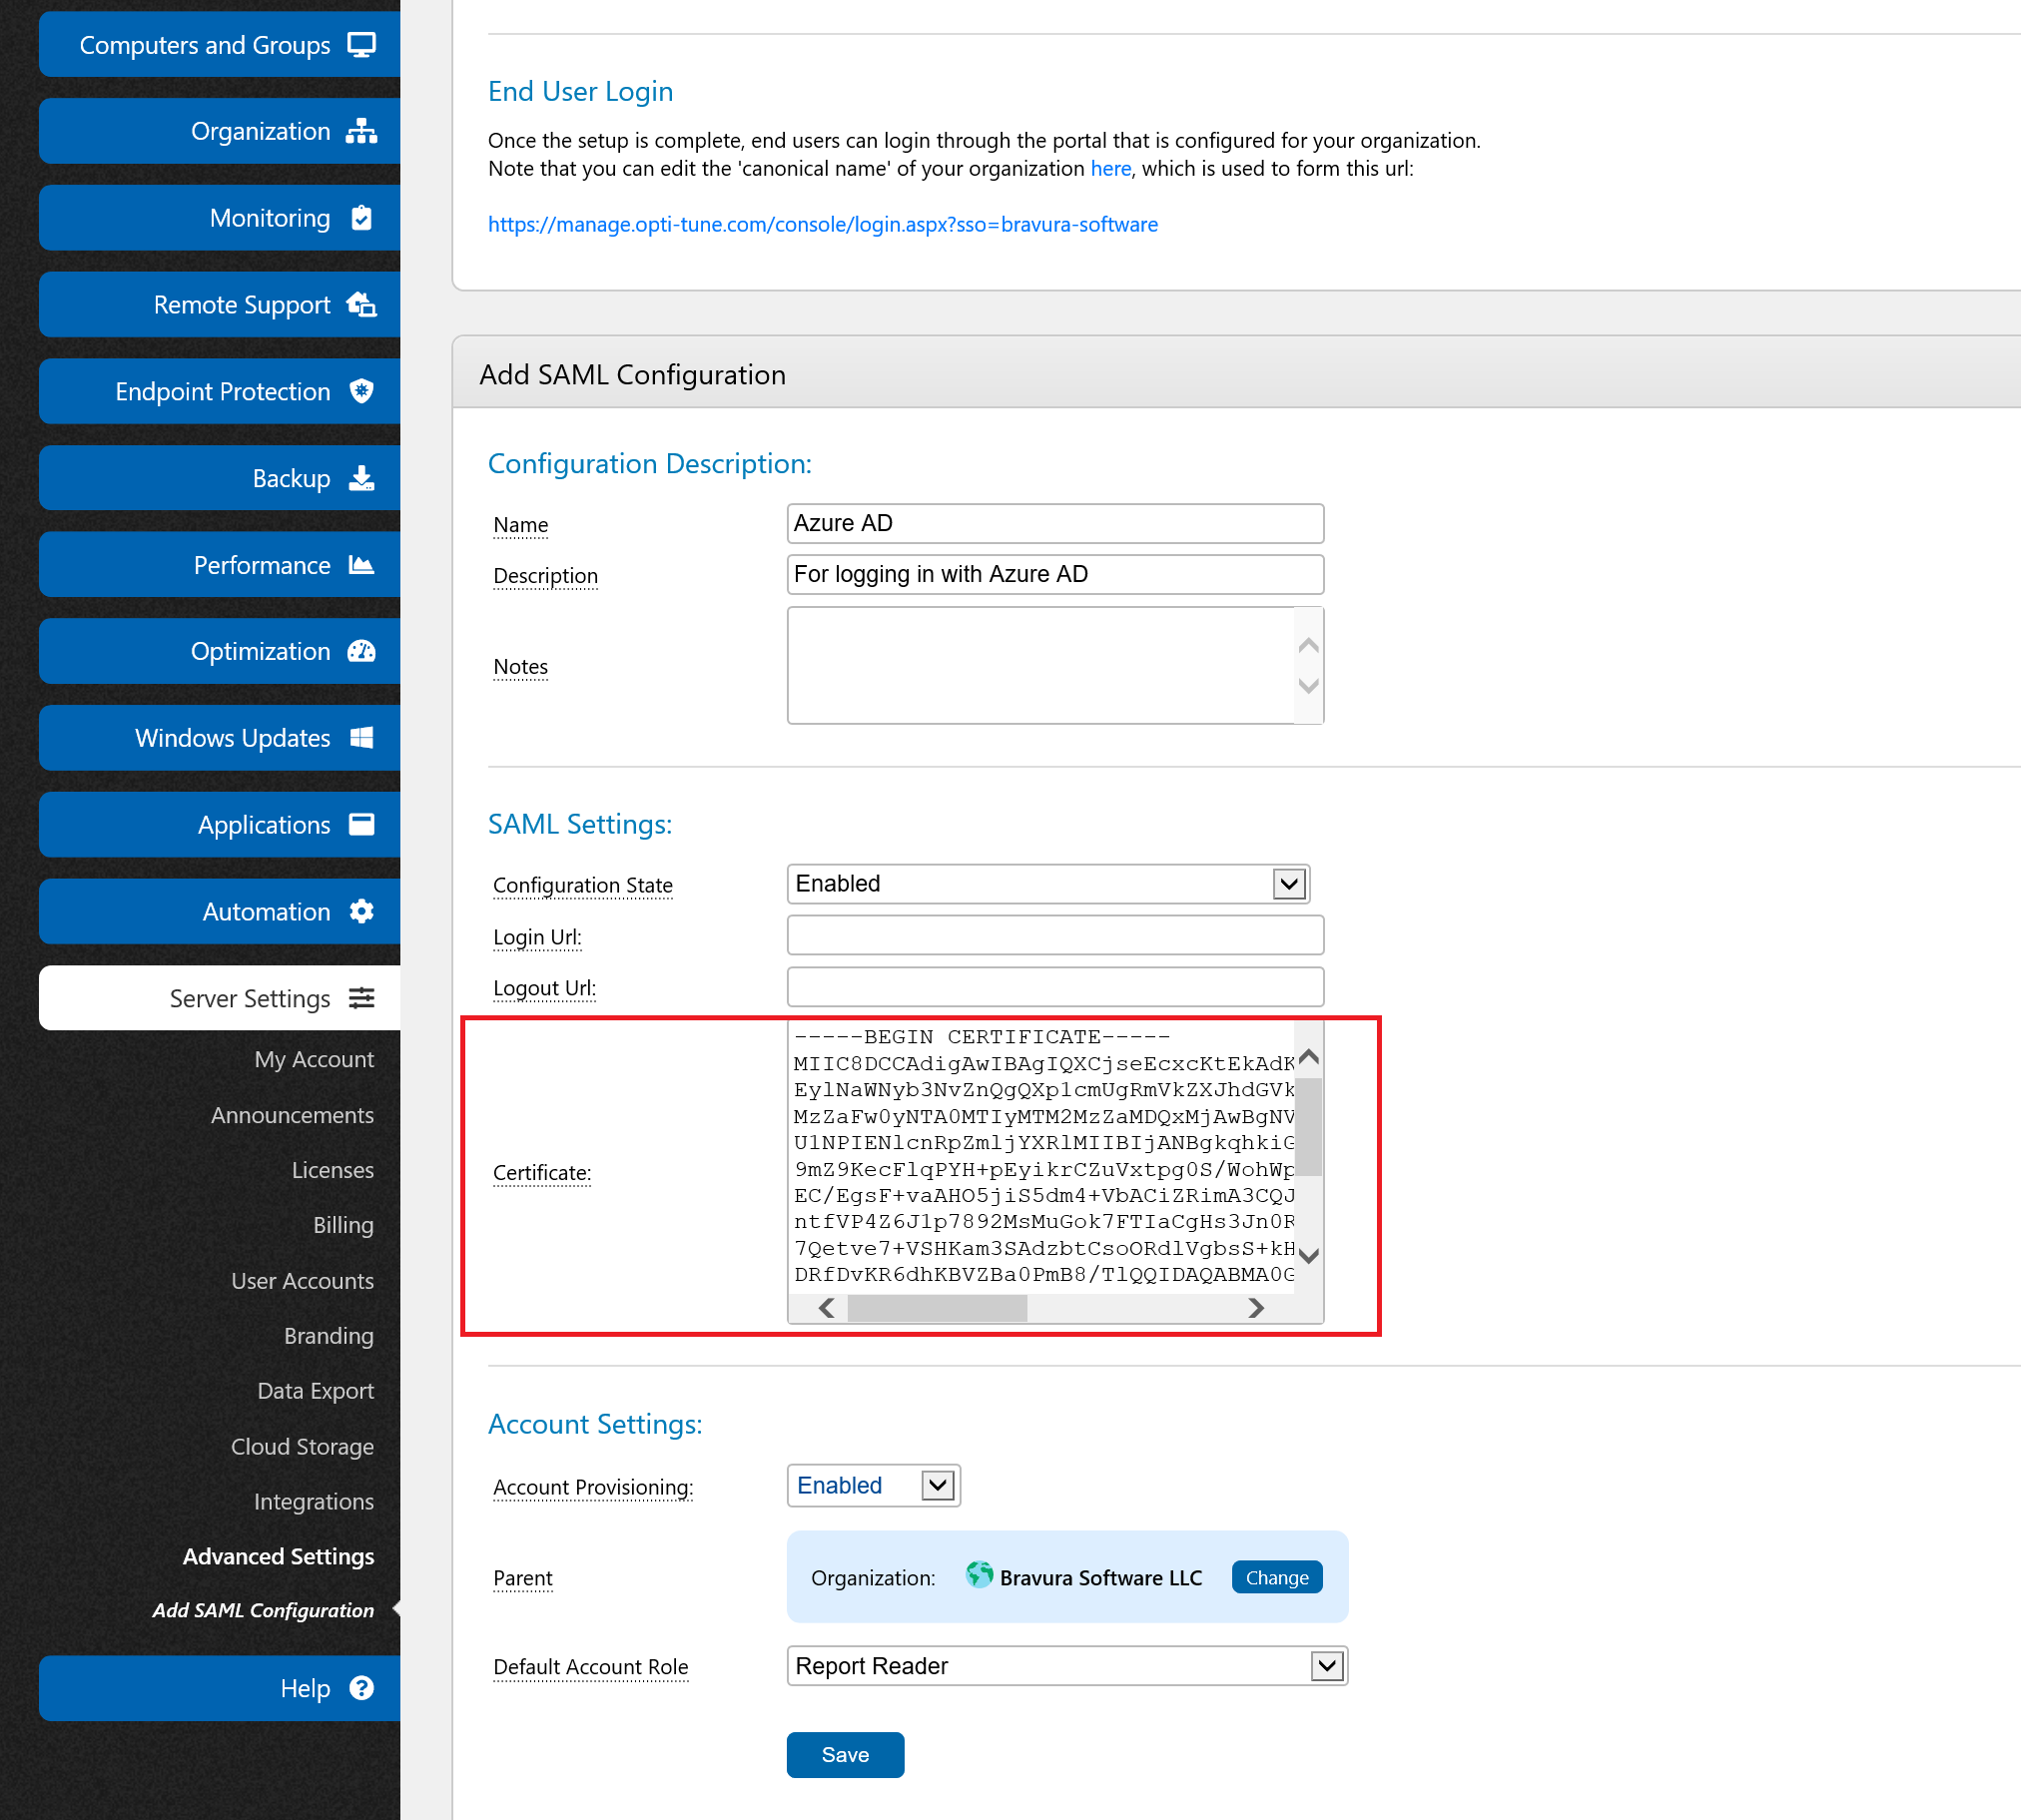
Add the Login URL and Logout URL to OptiTune
Copy and paste the "Login URL" and "Logout URL" from Azure AD to OptiTune
Save and Test
You must save the "SAML Configuration" in OptiTune by pressing the "Save" button at the bottom. Test that the SSO integration is working by using your organization specific Single Sign On (SSO) link shown in the SAML Configurations page.
Or, you can visit the "Sign On Url" link that is shown at the top of the OptiTune SAML Configuration page, under "Identity Provider Configuration".