ADFS (Active Directory Federation Services) Setup Guide
Introduction
This guide will take you through the steps to setup ADFS (Active Directory Federation Services) as a single sign on Identity Provider for OptiTune.
Start adding the SAML Configuration
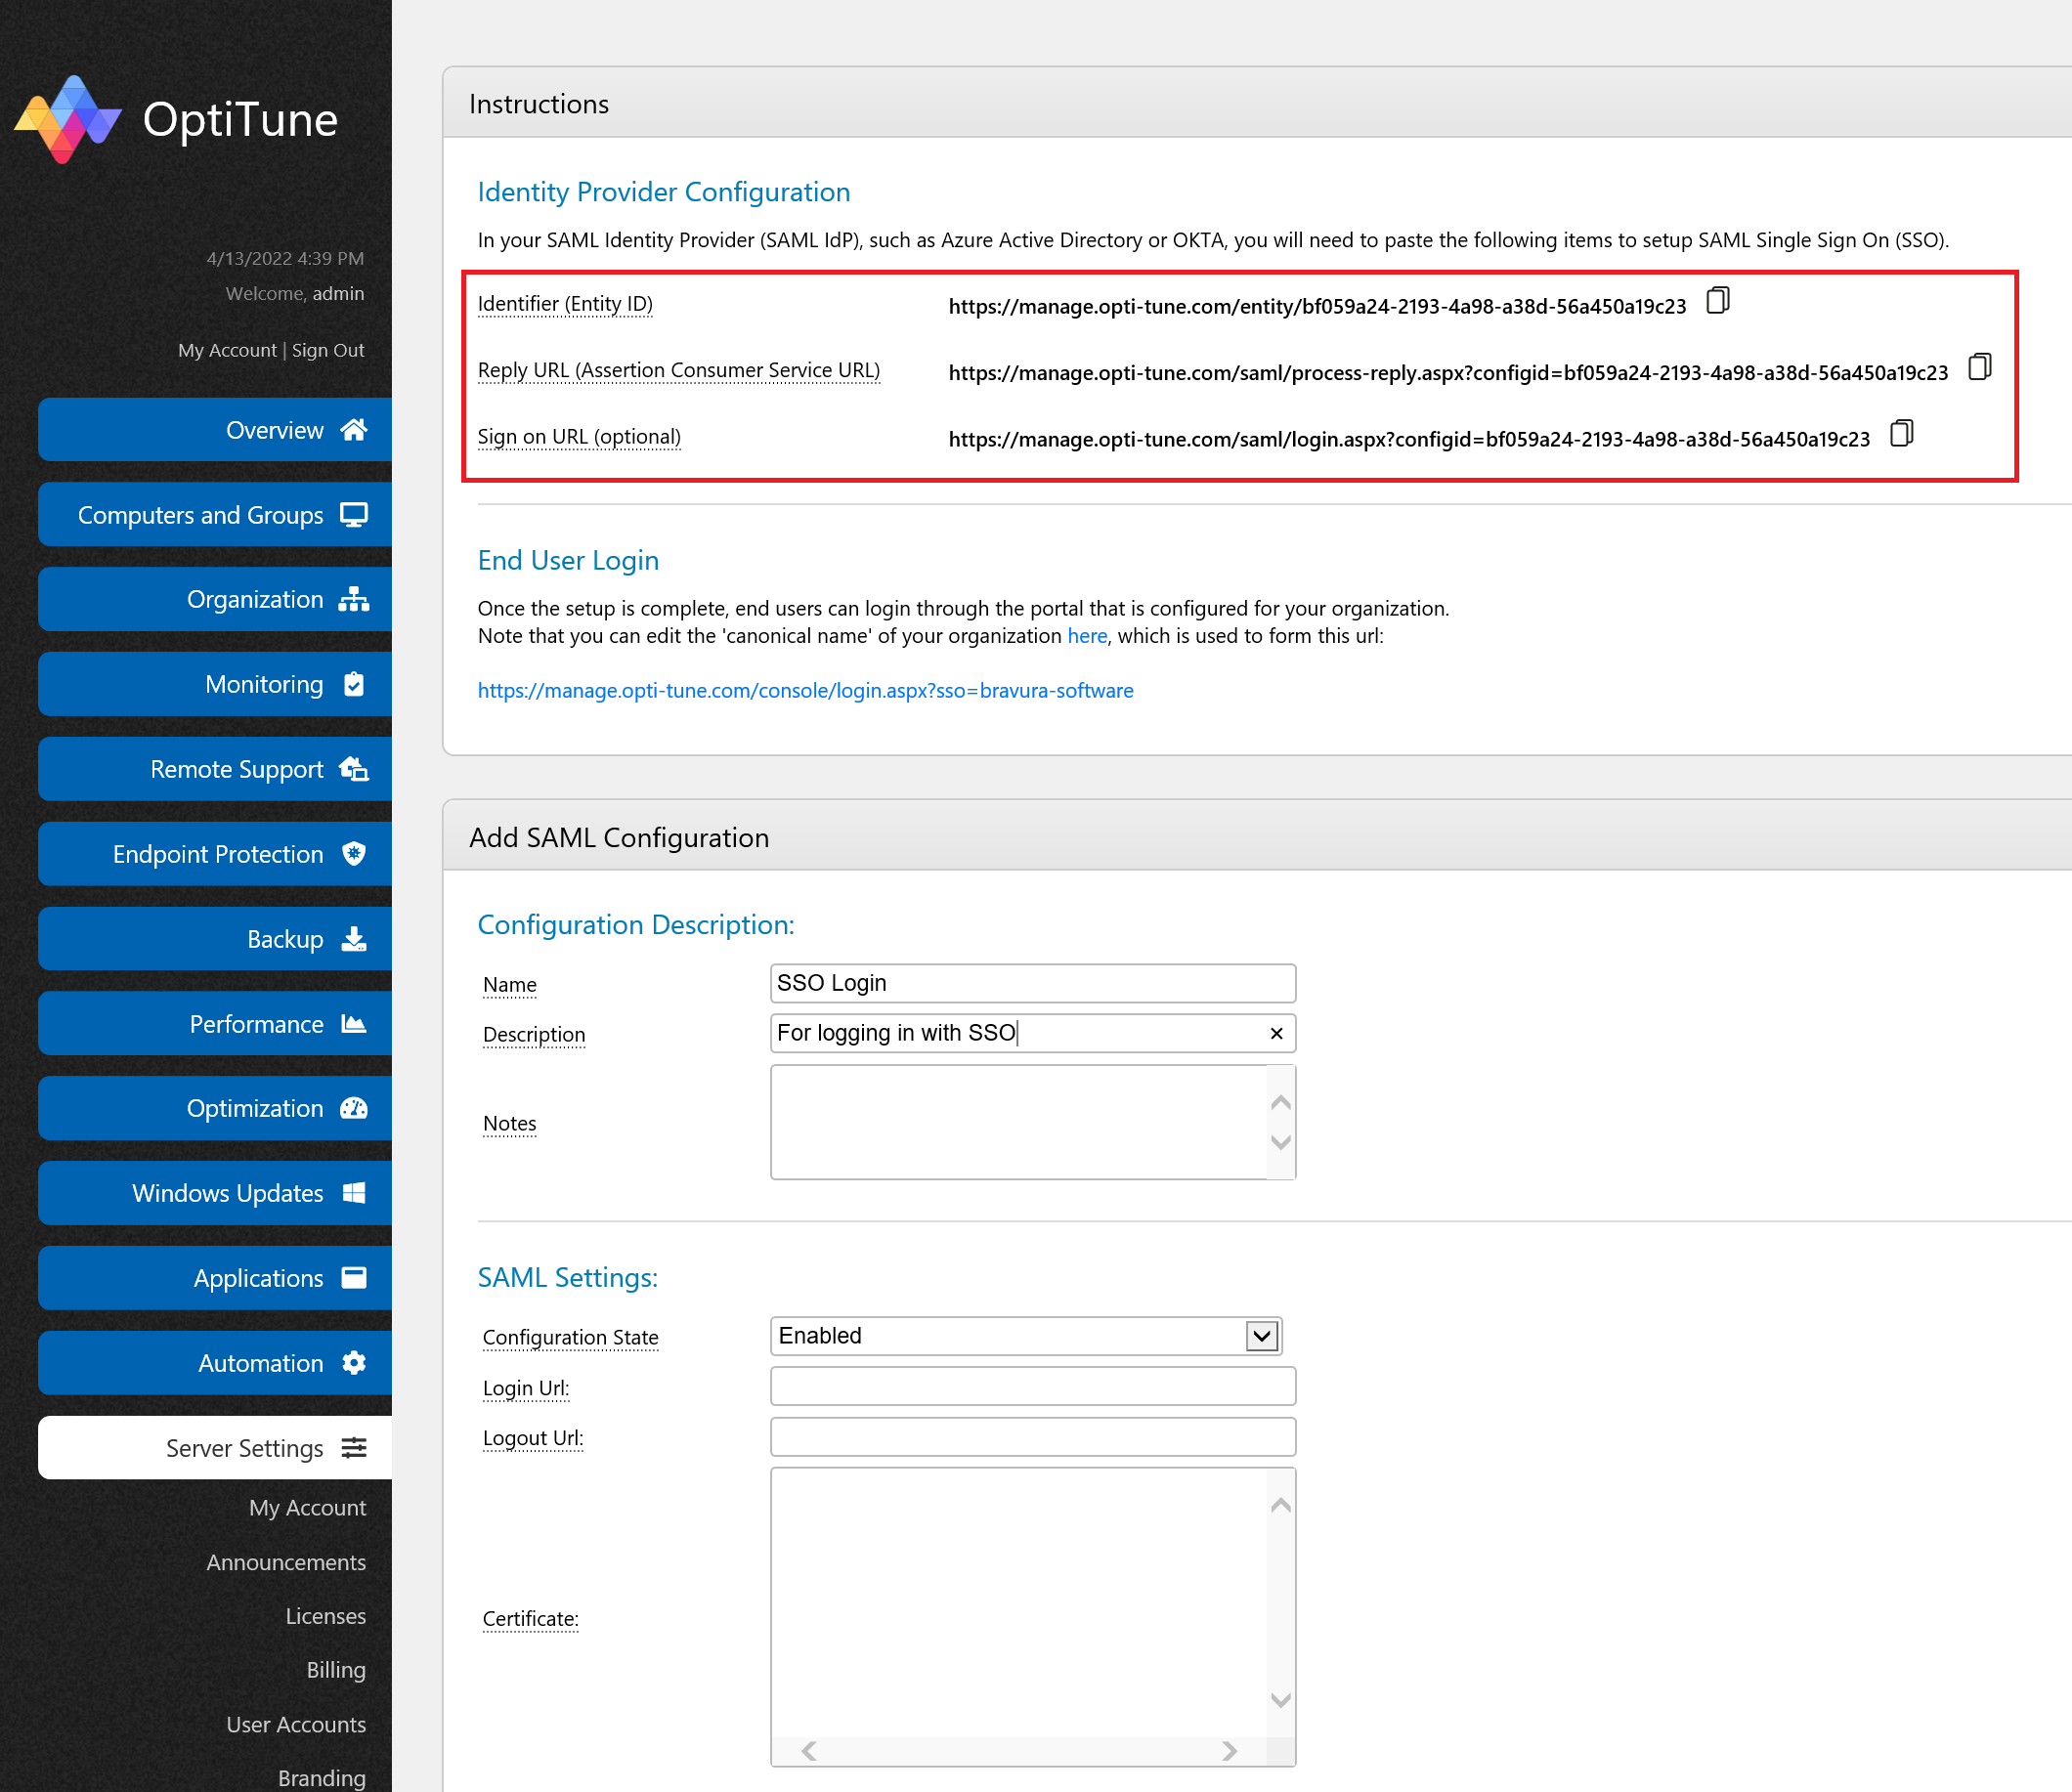
In the OptiTune management console, go to the SAML Configurations page, and click "Add".
Enter in a name and description for the SAML Configuration, as shown below.
You will need to copy the information shown under "Identity Provider Configuration" for the next steps.
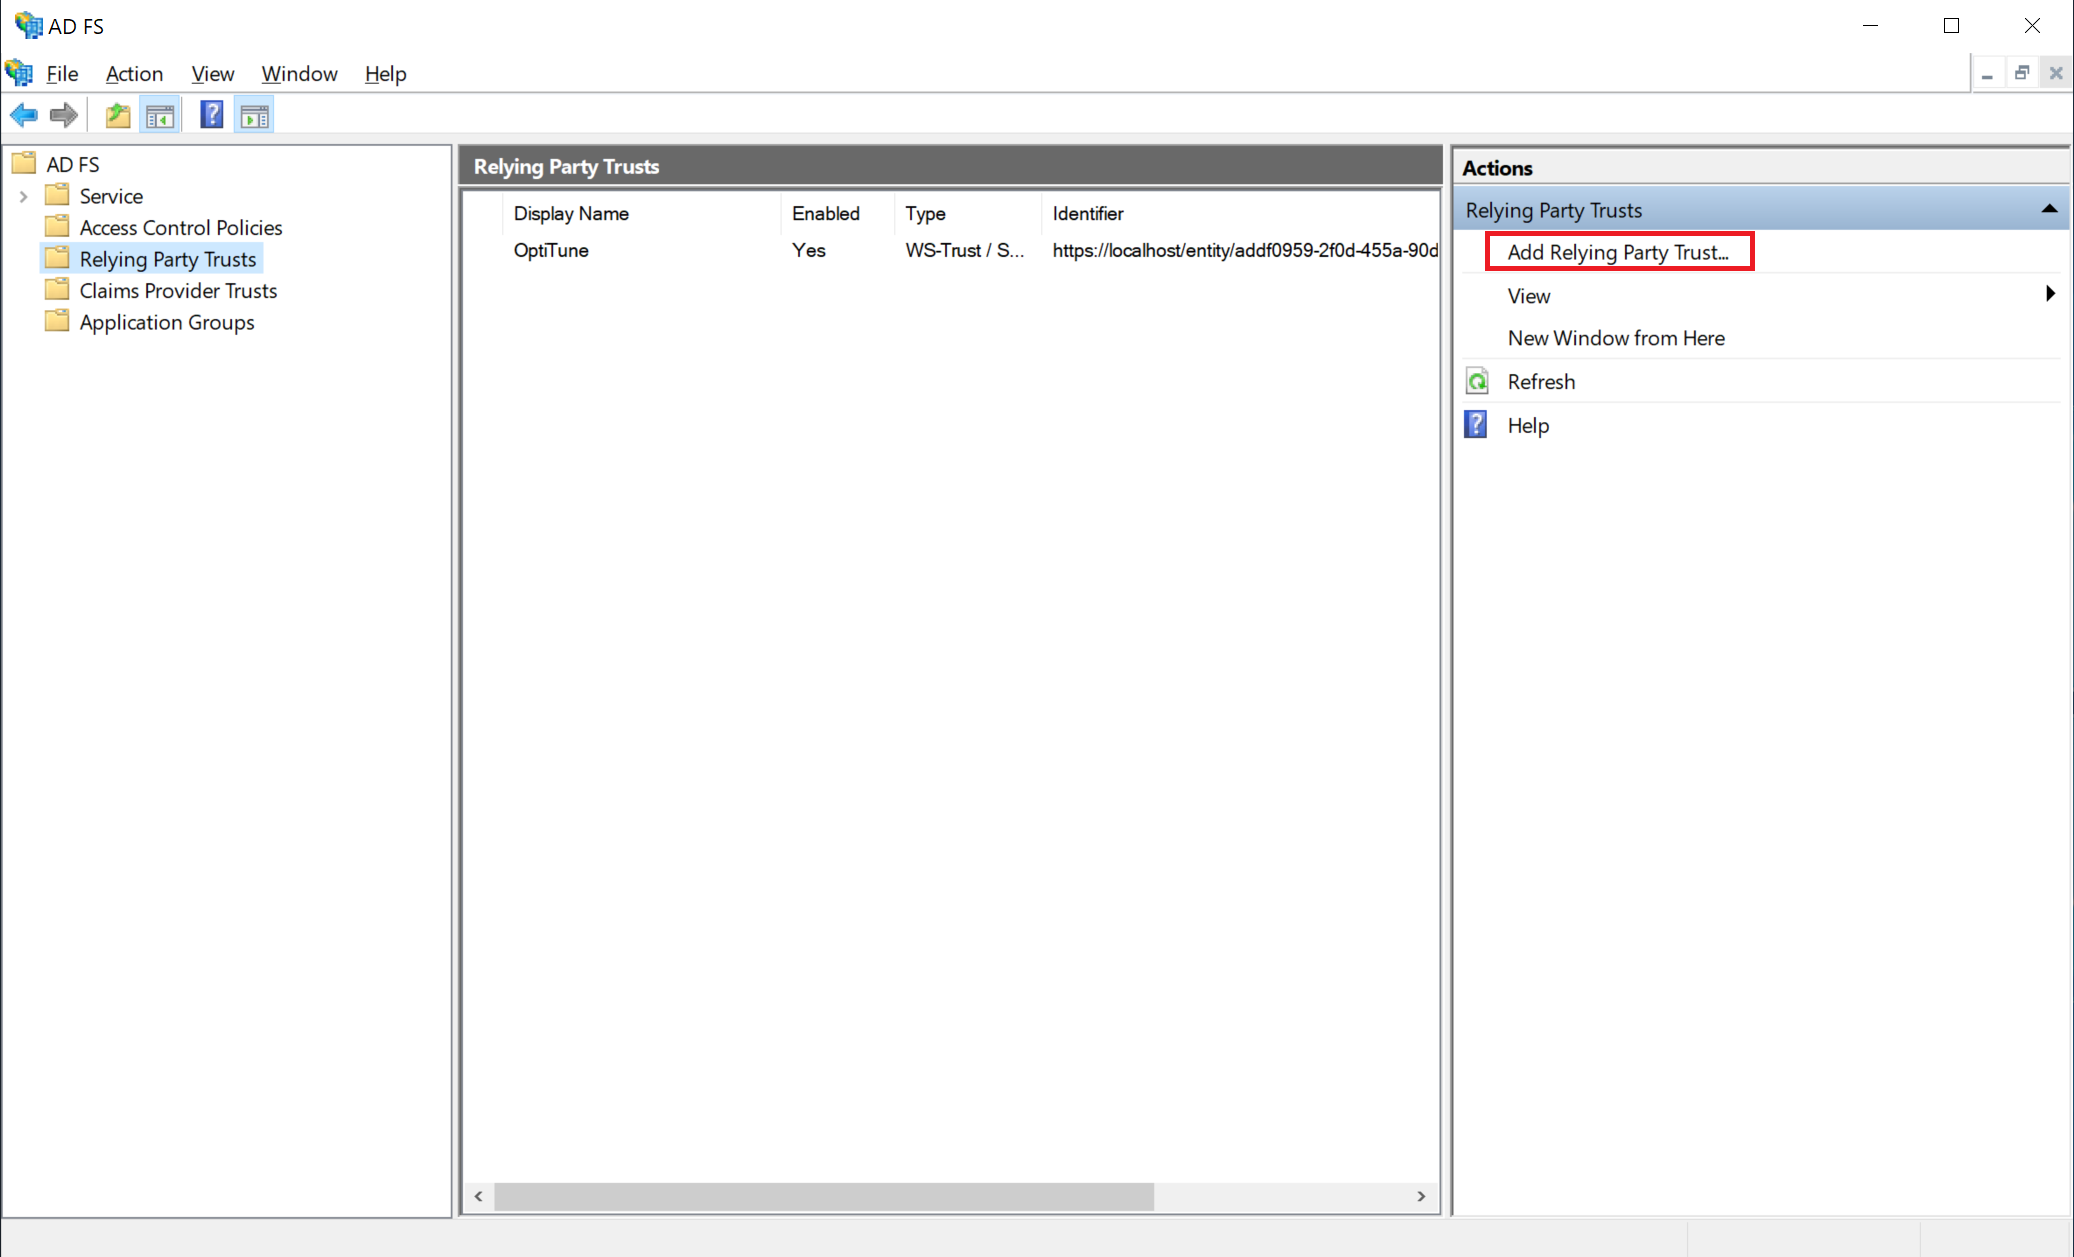
Create the ADFS "Relying Party Trust"
Login to your ADFS Server
Login to your ADFS server, and launch the "AD FS Management" administrative tool. Navigate to "Relying Party Trusts" and click "Add Relying Party Trust..." on the right.
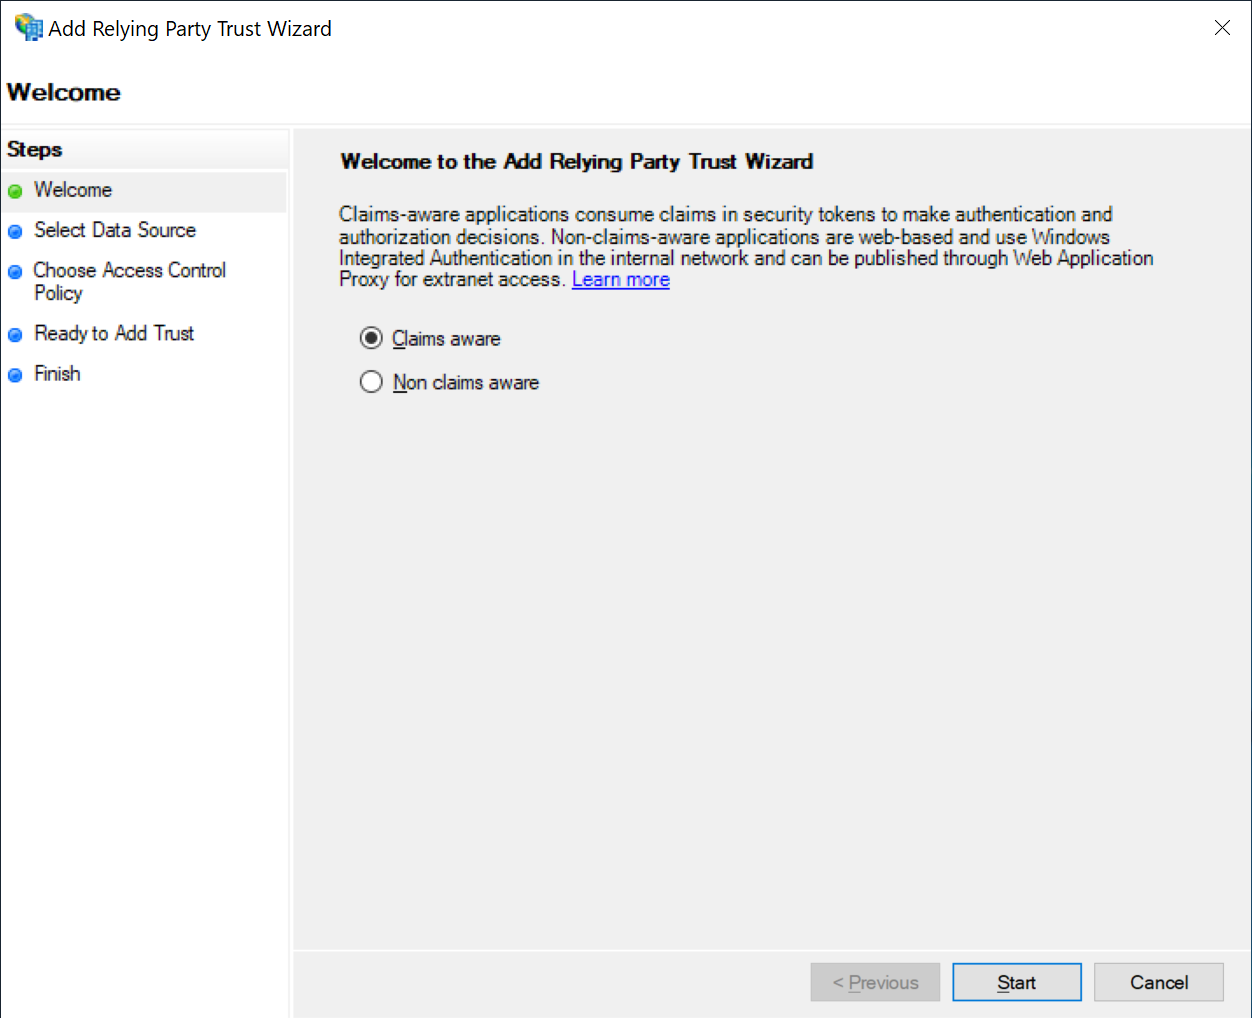
Select "Claims Aware"
Leave the default option of "Claims Aware" selected, and click "Start"
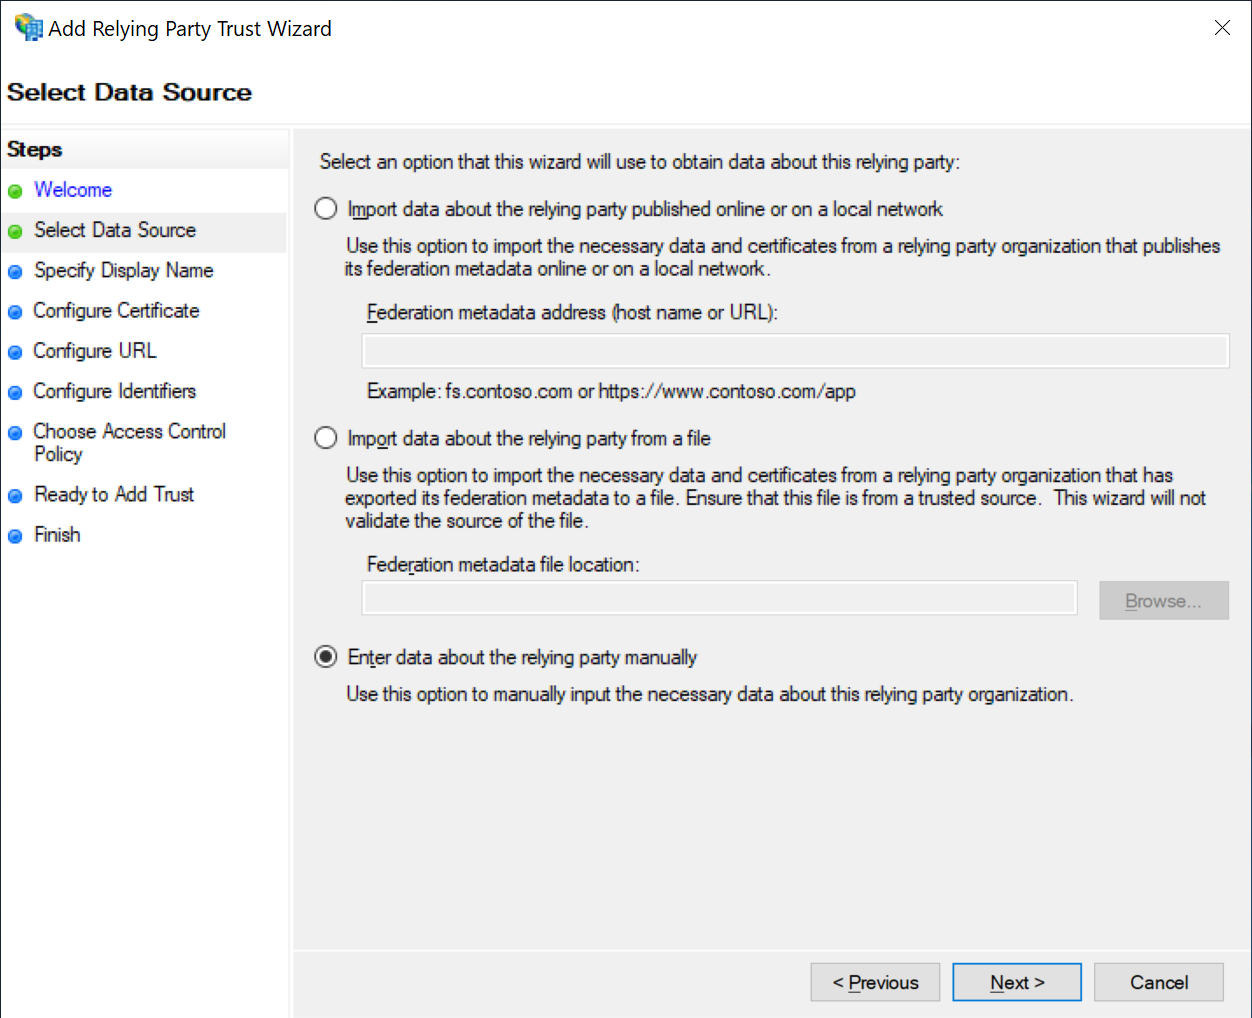
Select "Enter data about the relying party manually"
And click "Next"
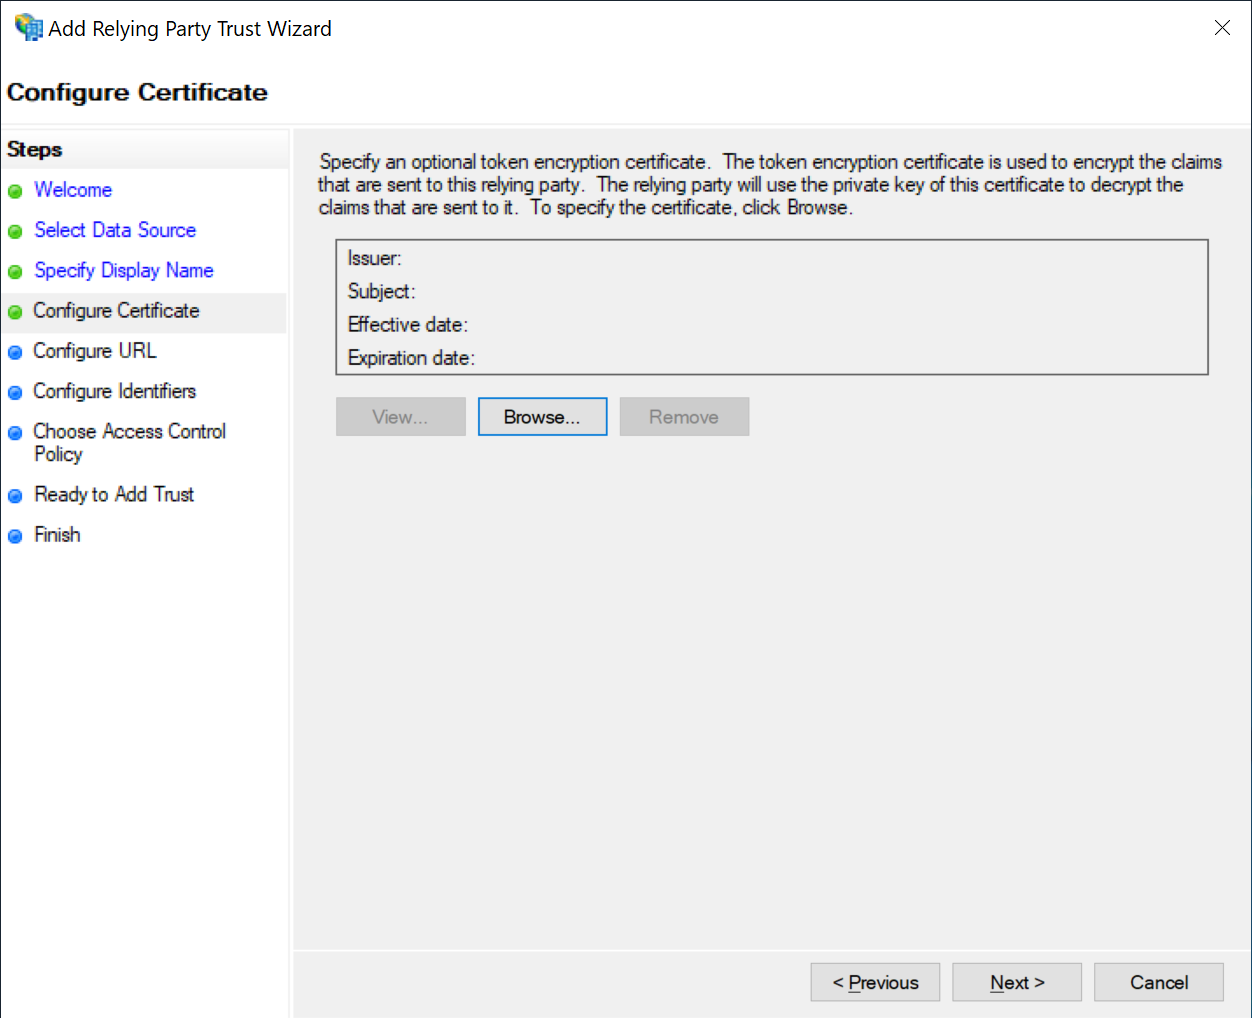
Leave a blank certificate
And click "Next"
Select SAML
Check "Enable support for the SAML 2.0 WebSSO protocol", and copy and paste the Reply URL (Assertion Consumer Service URL) from OptiTune (as shown in the very first step to the text box in ADFS.
Then click "Next"

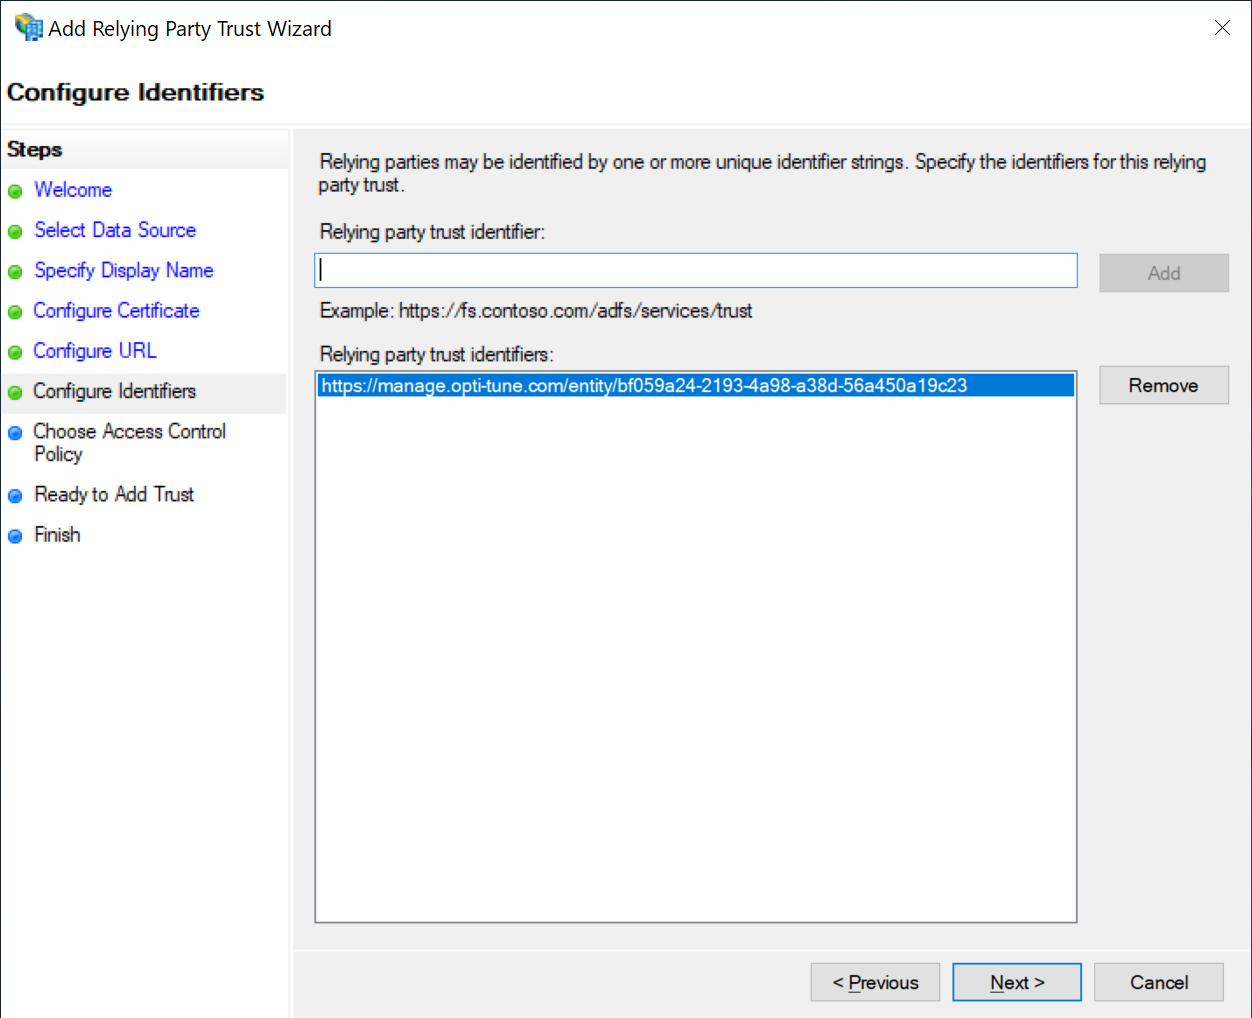
Enter the Identifier
Copy and paste the Identifier (Entity ID) text from OptiTune (as shown in the very first step to the text box, and press "Add".
Then click "Next"
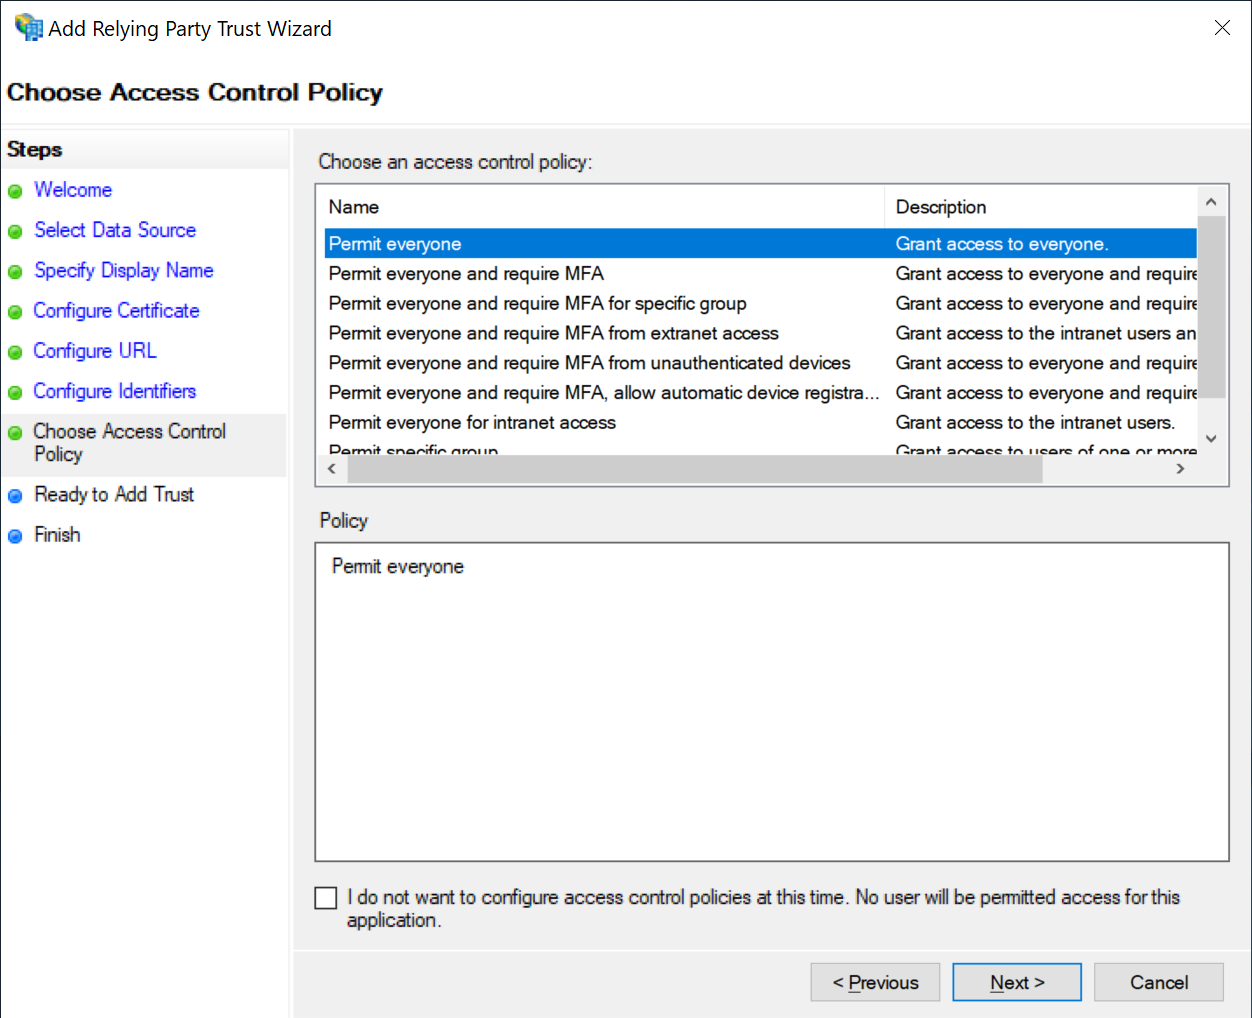
Choose Access Control Policy
Select the desired access control policy, for example "Permit everyone".
Then click "Next"
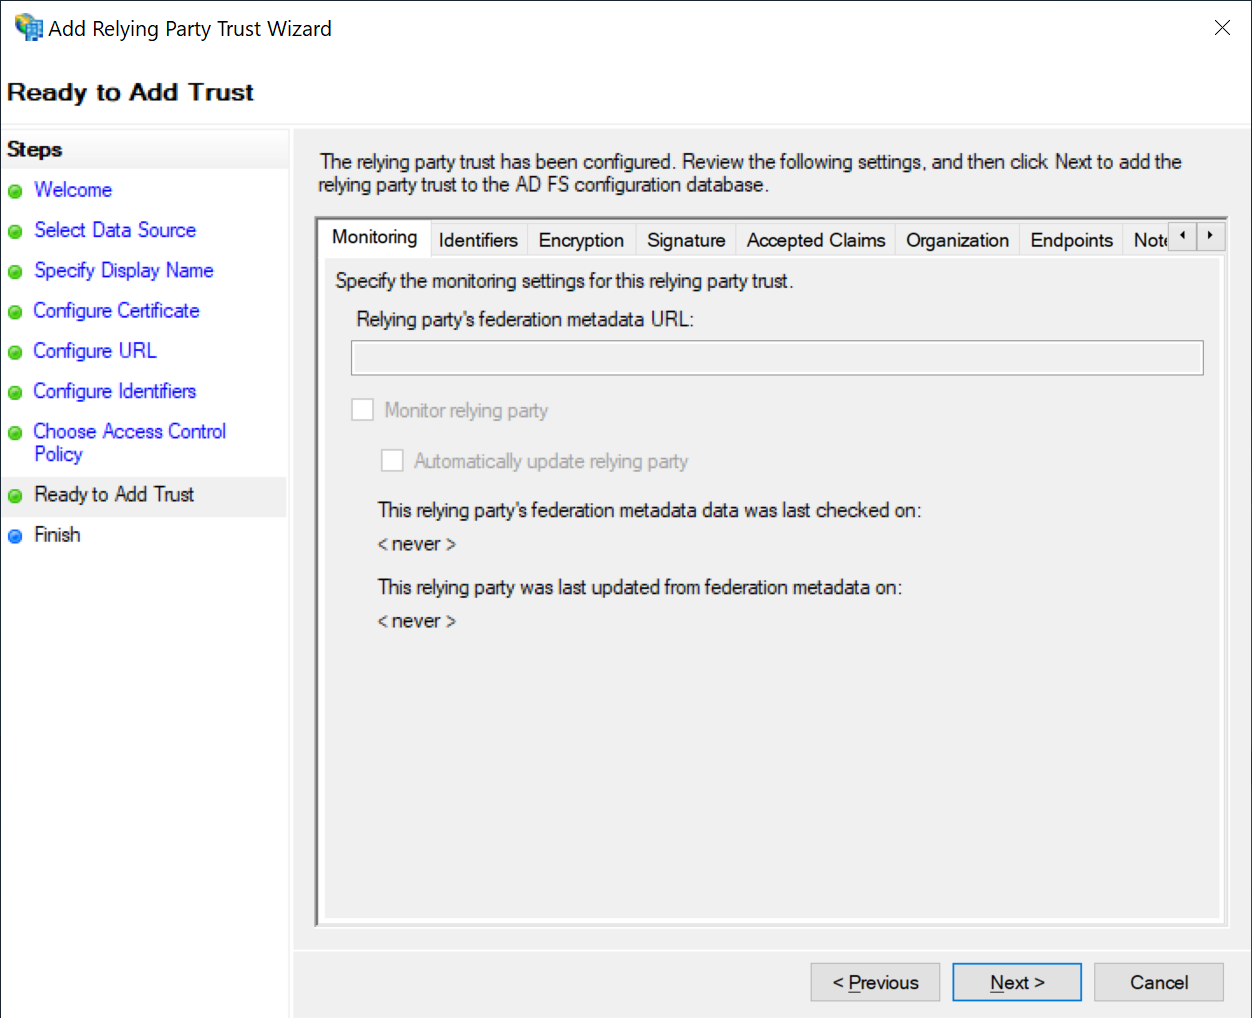
Review the configuration
Click "Next"
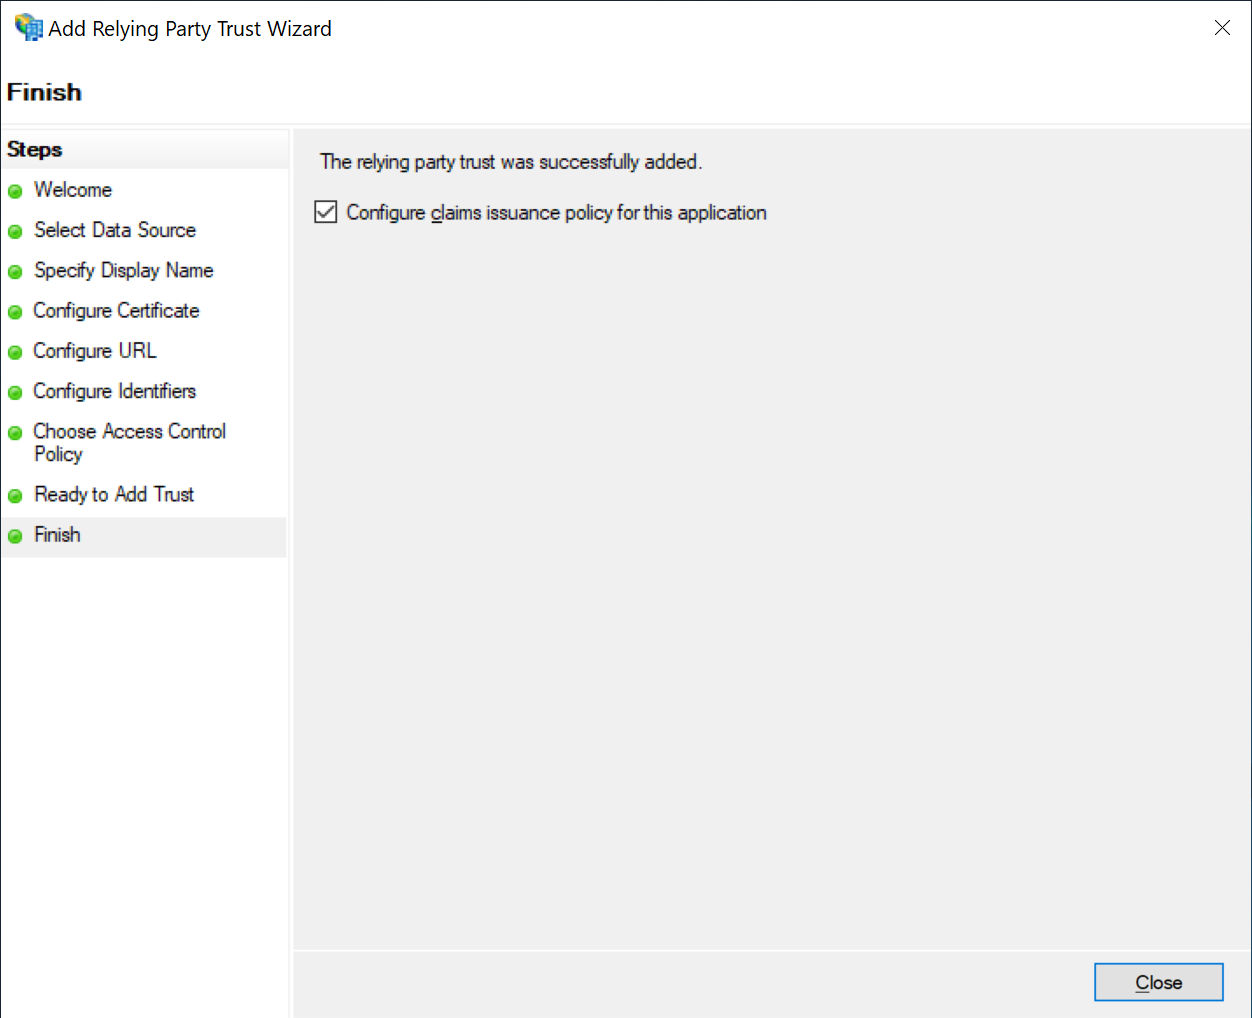
Finalize
Leave the defaults, and click "Close"
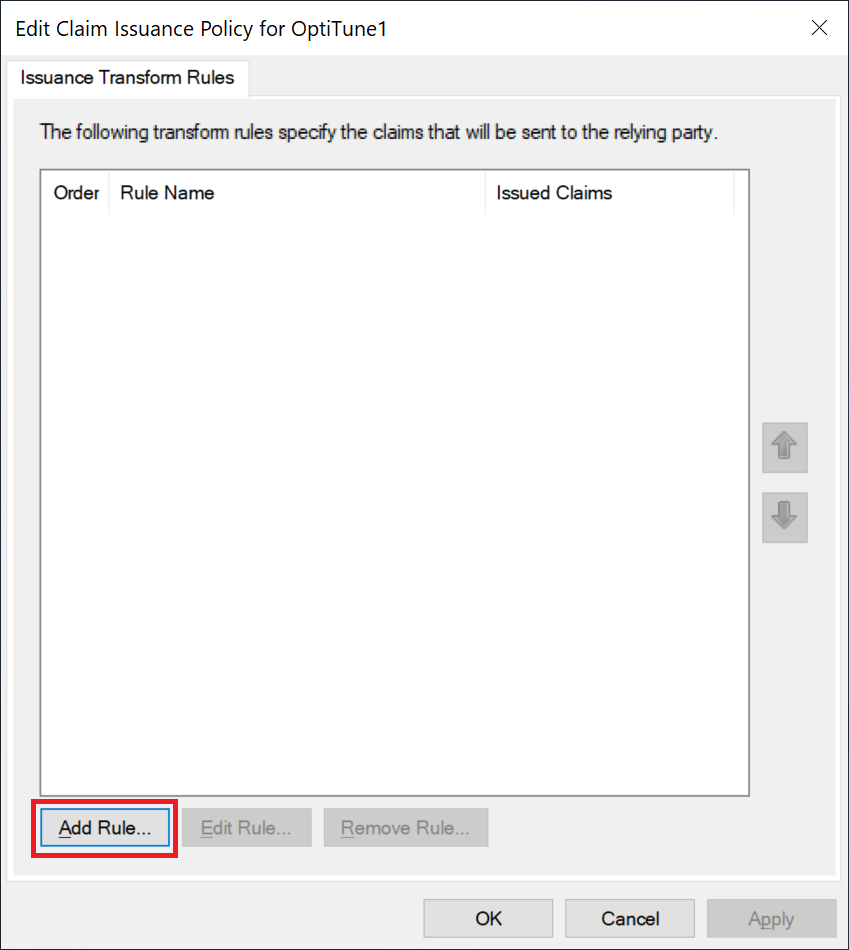
Configure Claims Issuance Policy
By default ADFS will not send the needed information for OptiTune to identify who is logging in. On this screen that shows up, we will add rules so that ADFS sends the needed information to OptiTune.
In the "Edit Claim Issuance Policy" dialog, click "Add Rule...".
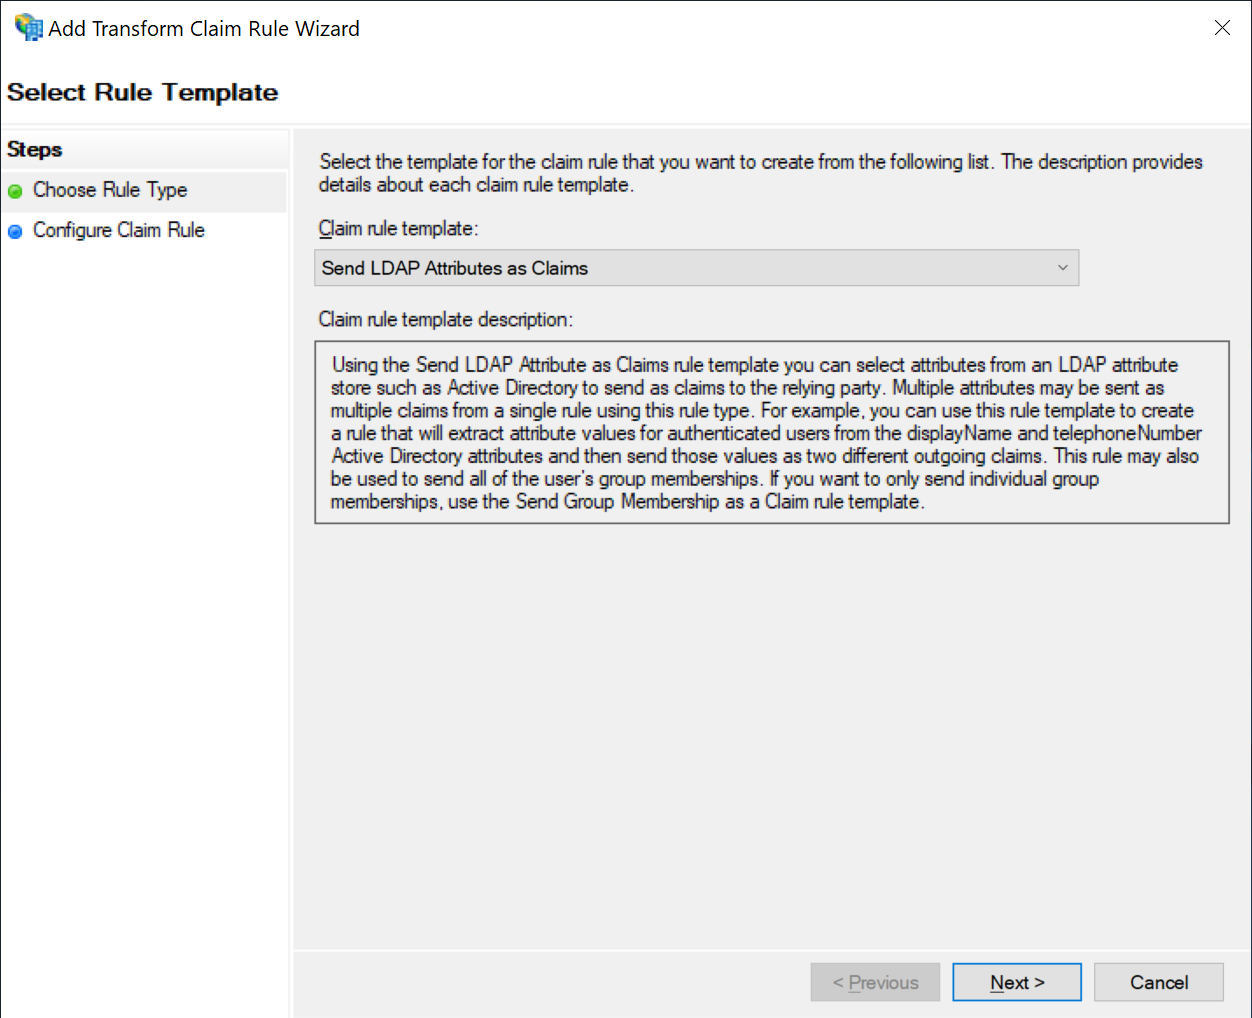
Send LDAP Attributes as Claims
Make sure "Send LDAP Attributes as Claims" is selected, and click "Next"
Configure Claim Rule
Enter a name for the claim rule, like "Default". Select the attribute store "Active Directory". Then, add at least the following 3 items, as shown below:
- E-Mail Address
- Given Name
- Surname
Click "Finish"

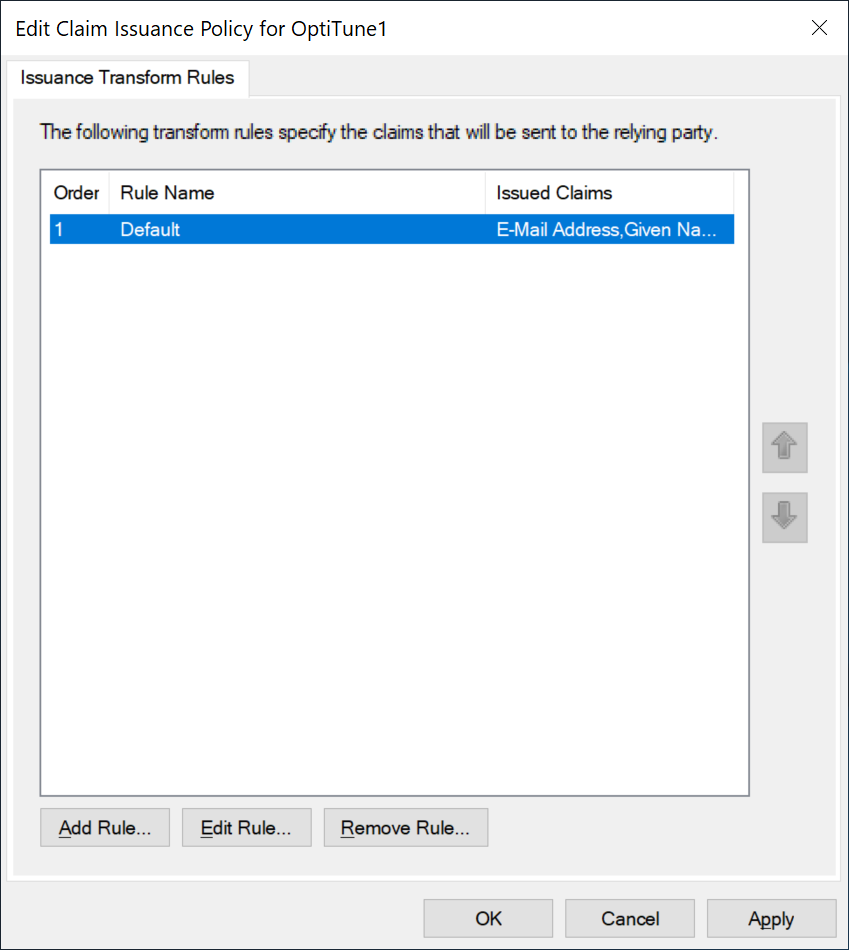
Save Claim Rule
The new claim rule you've created will be shown in this dialog.
Click "OK"
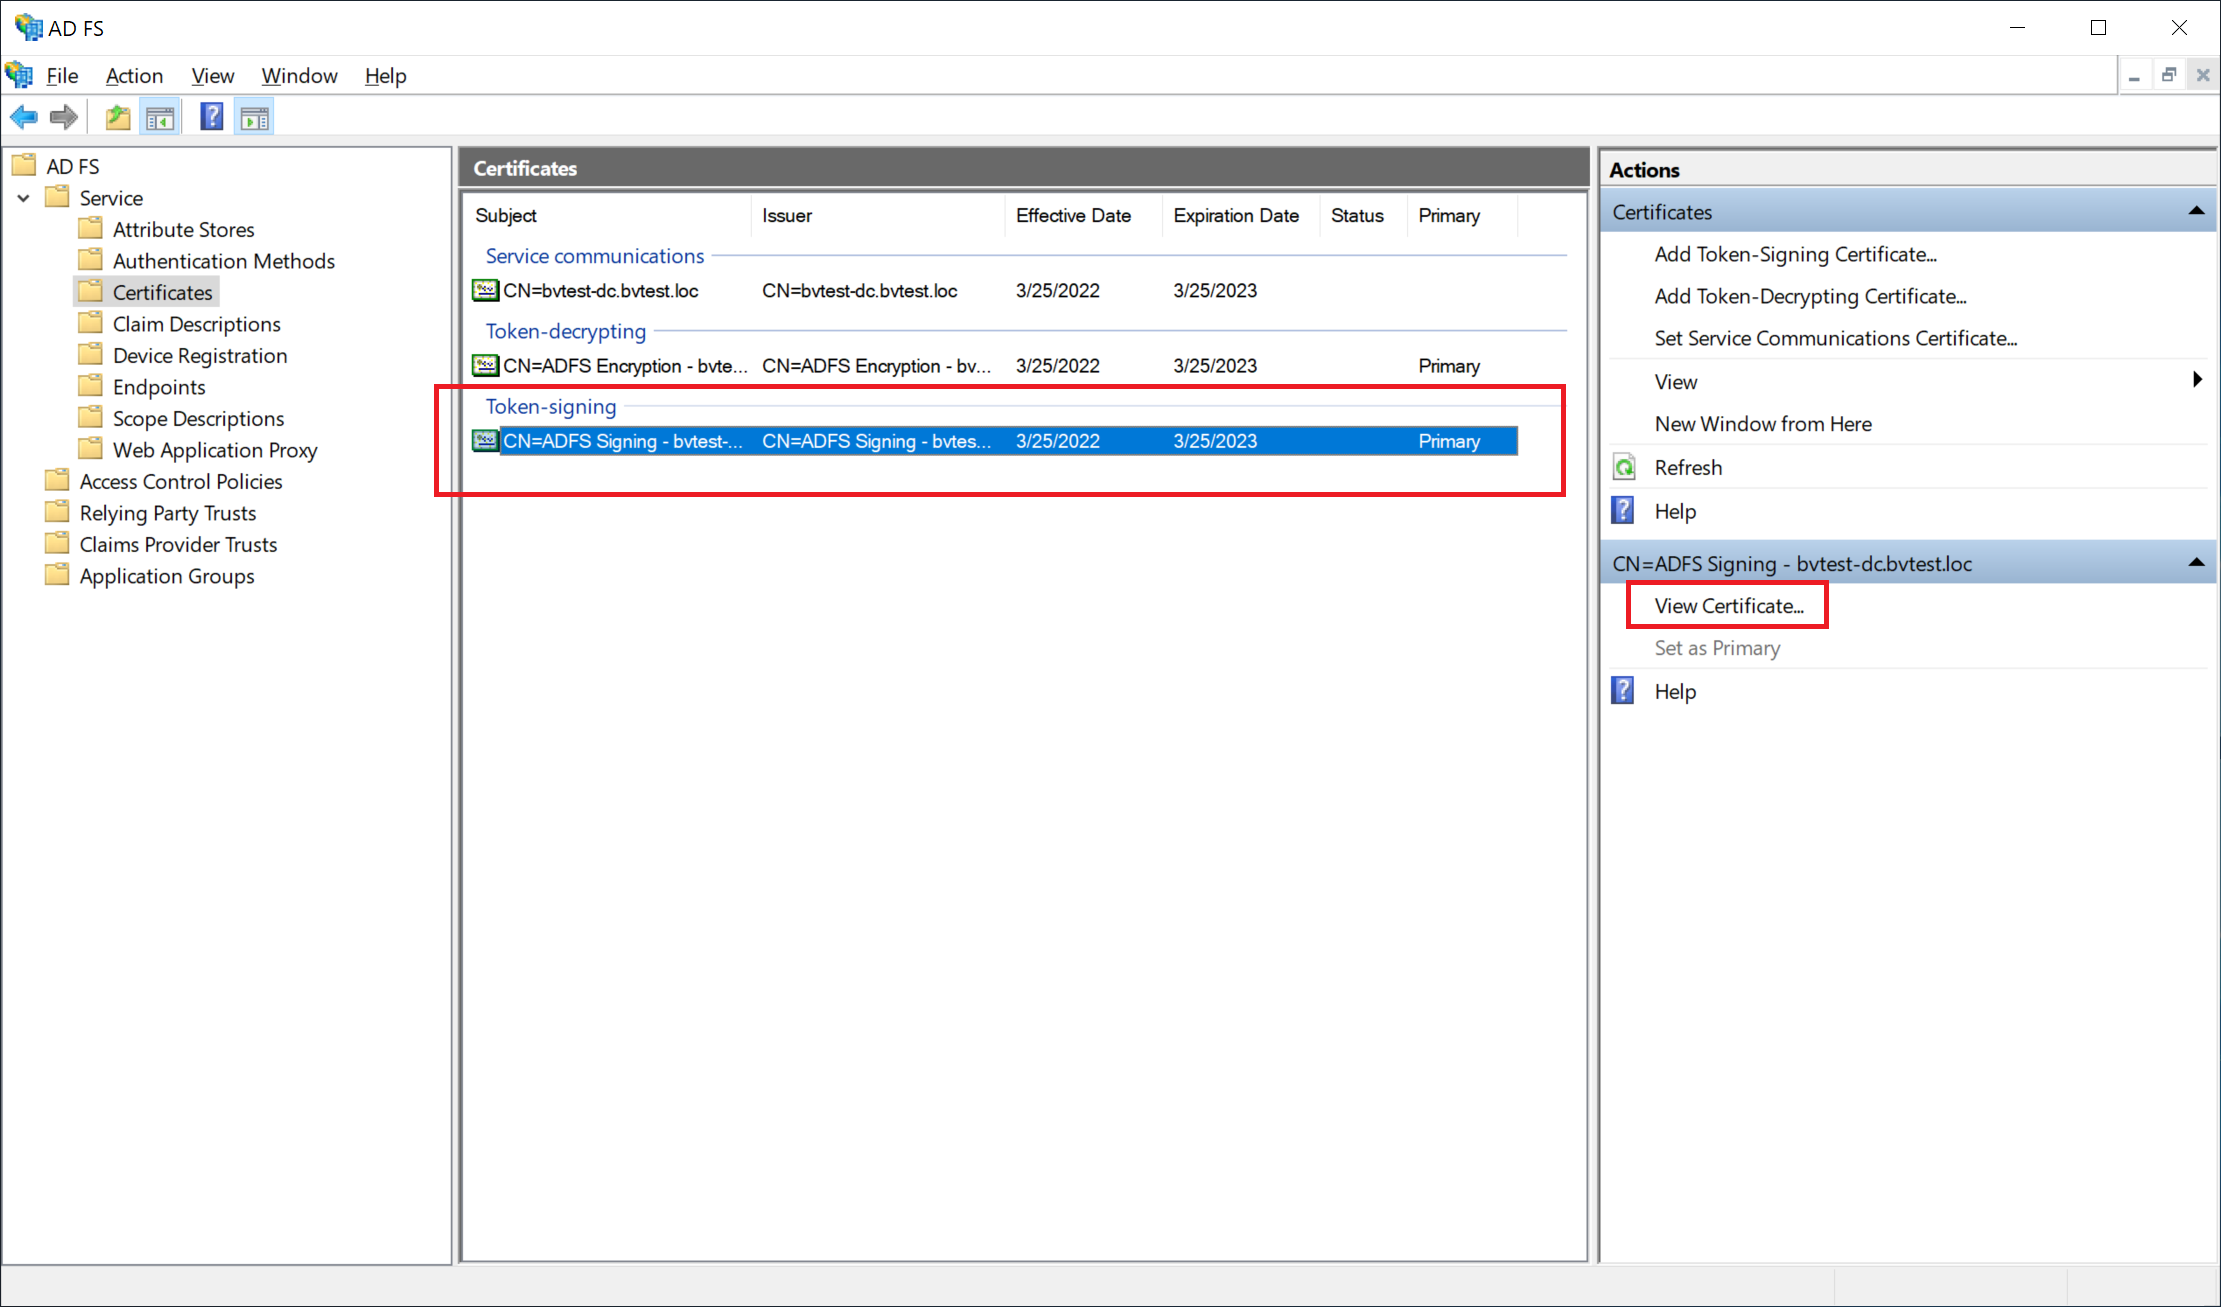
Export Token Signing Certificate
Next, you will need to export the token signing certificate from ADFS, in base64 format. This certificate is needed by OptiTune (the Service Provider) to verify that data sent by ADFS (the Identity Provider) is genuine.
Navigate to "Service" > "Certificates", and then select the "Token-signing" certificate.
Click "View Certificate..."
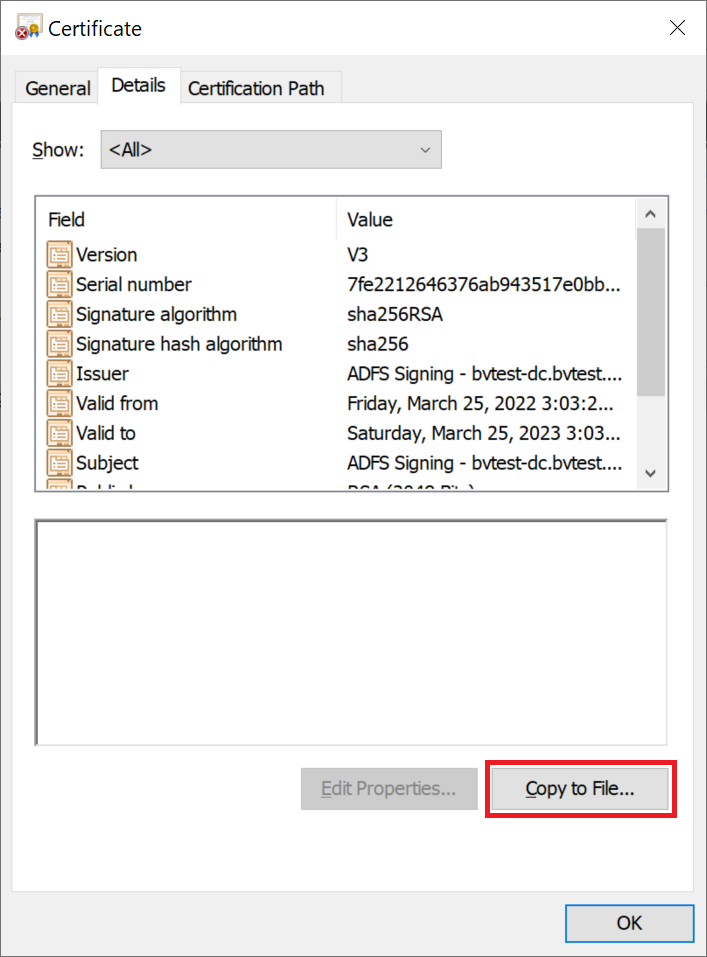
Export Certificate
Click on the "Details" tab, and then press "Copy to File..."
Export Certificate Wizard
Click "Next"

Select Base 64 Encoded
Select "Base-64 encoded X.509 (.CER)" and then click "Next"

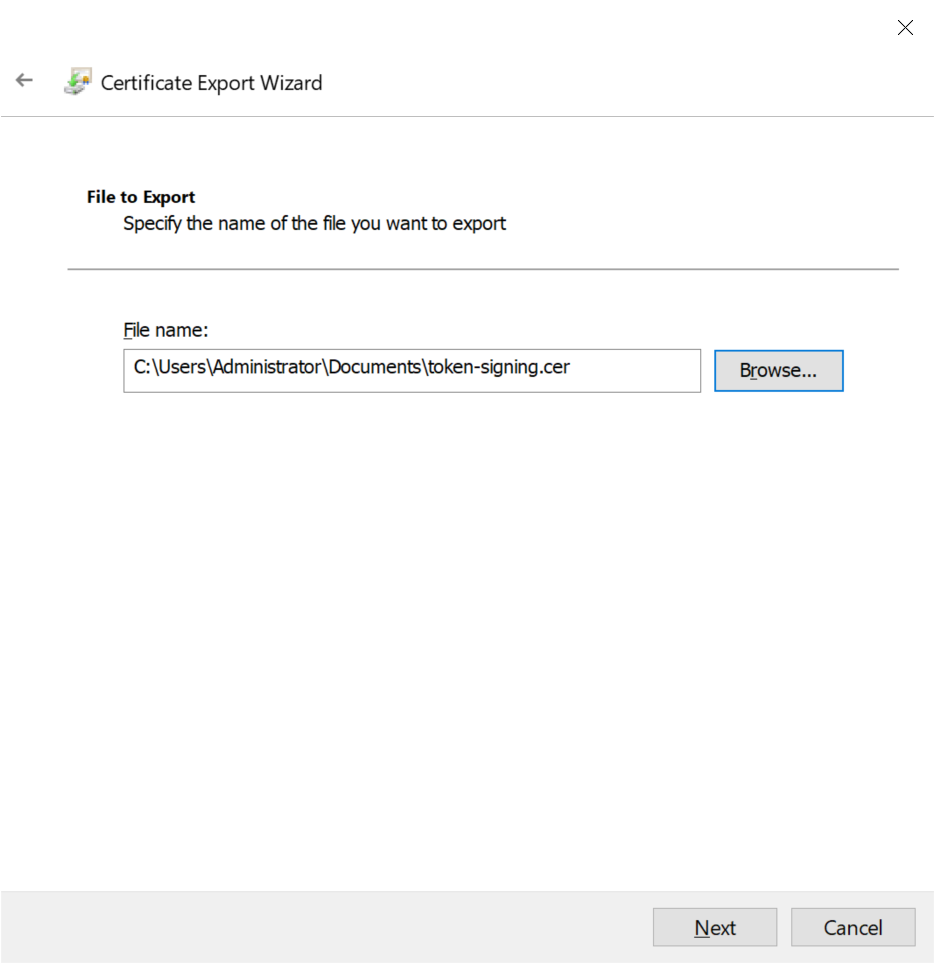
Enter a File Name
Enter a file name for the certificate to export, and click "Next" until you have exported the certificate. Then, open up the certificate in notepad or a text editor, and copy the file contents.
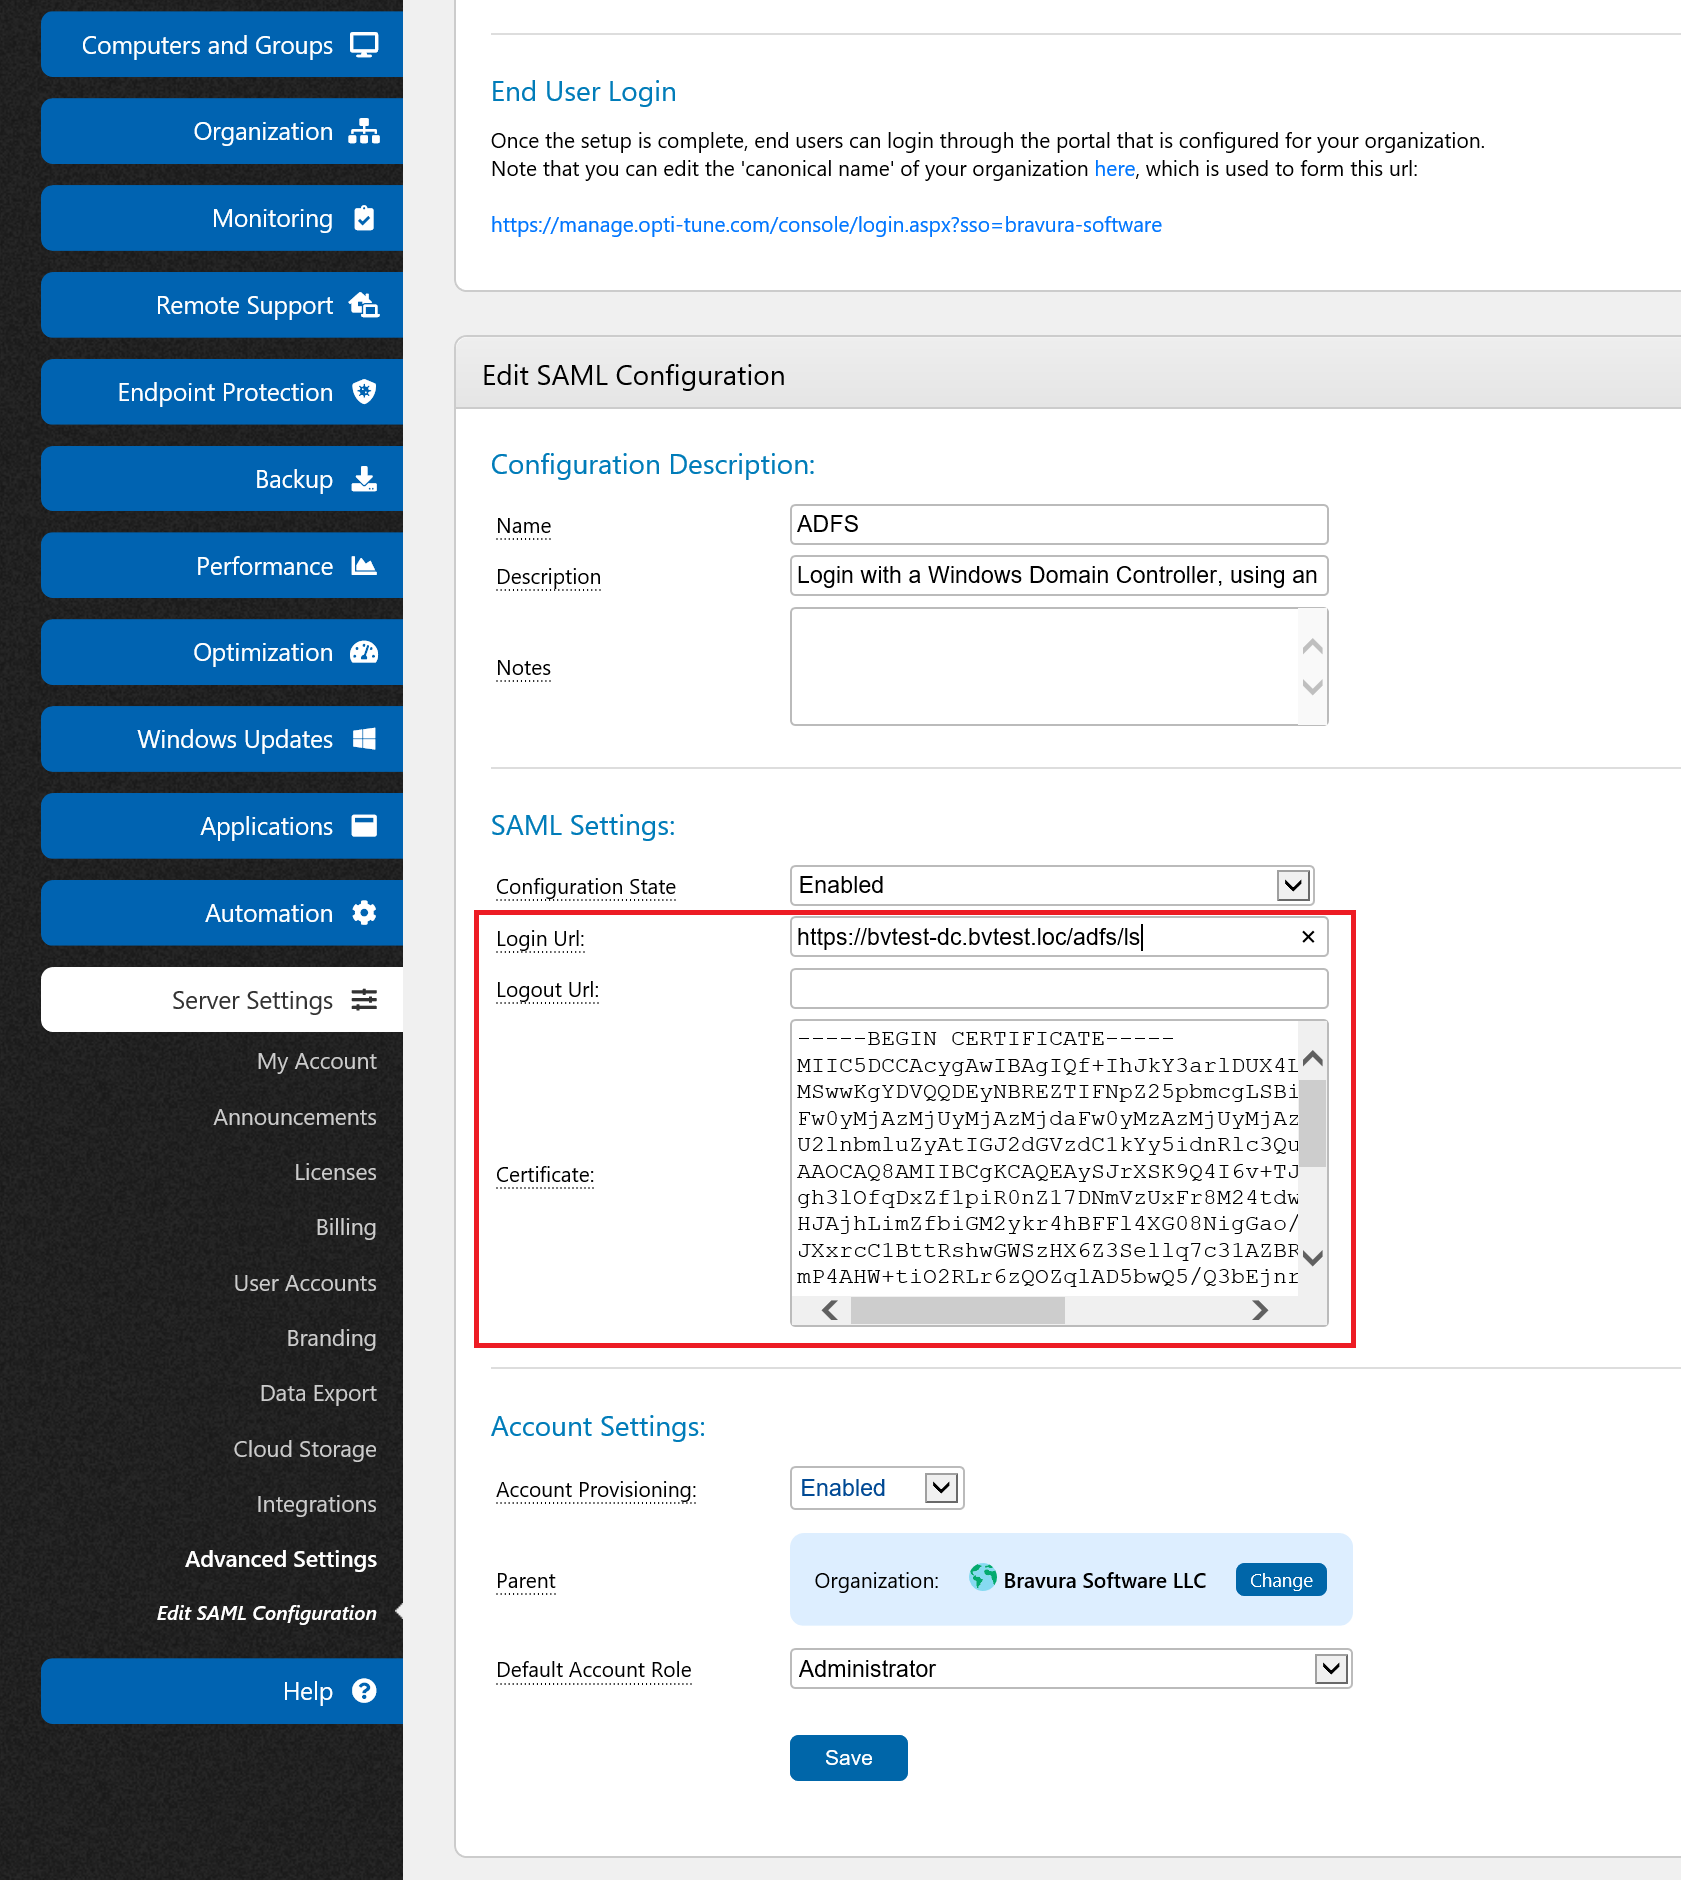
Back in OptiTune, enter the Certificate, and Login Url
After opening the exported certificate in notepad, and copying the file contents, go back to OptiTune and paste the contents of the certificate in the "Certificate" field, under "SAML Settings".
Also, you will need to enter the "Login URL" under "SAML Settings". This is typically follows the pattern:
where server.com is the domain name of your ADFS server.
Finally, click "Save" to save the changes to your SAML configuration.
Save and Test
You must save the "SAML Configuration" in OptiTune by pressing the "Save" button at the bottom. Test that the SSO integration is working by using your organization specific Single Sign On (SSO) link shown in the SAML Configurations page.
Or, you can visit the "Sign On Url" link that is shown at the top of the OptiTune SAML Configuration page, under "Identity Provider Configuration".