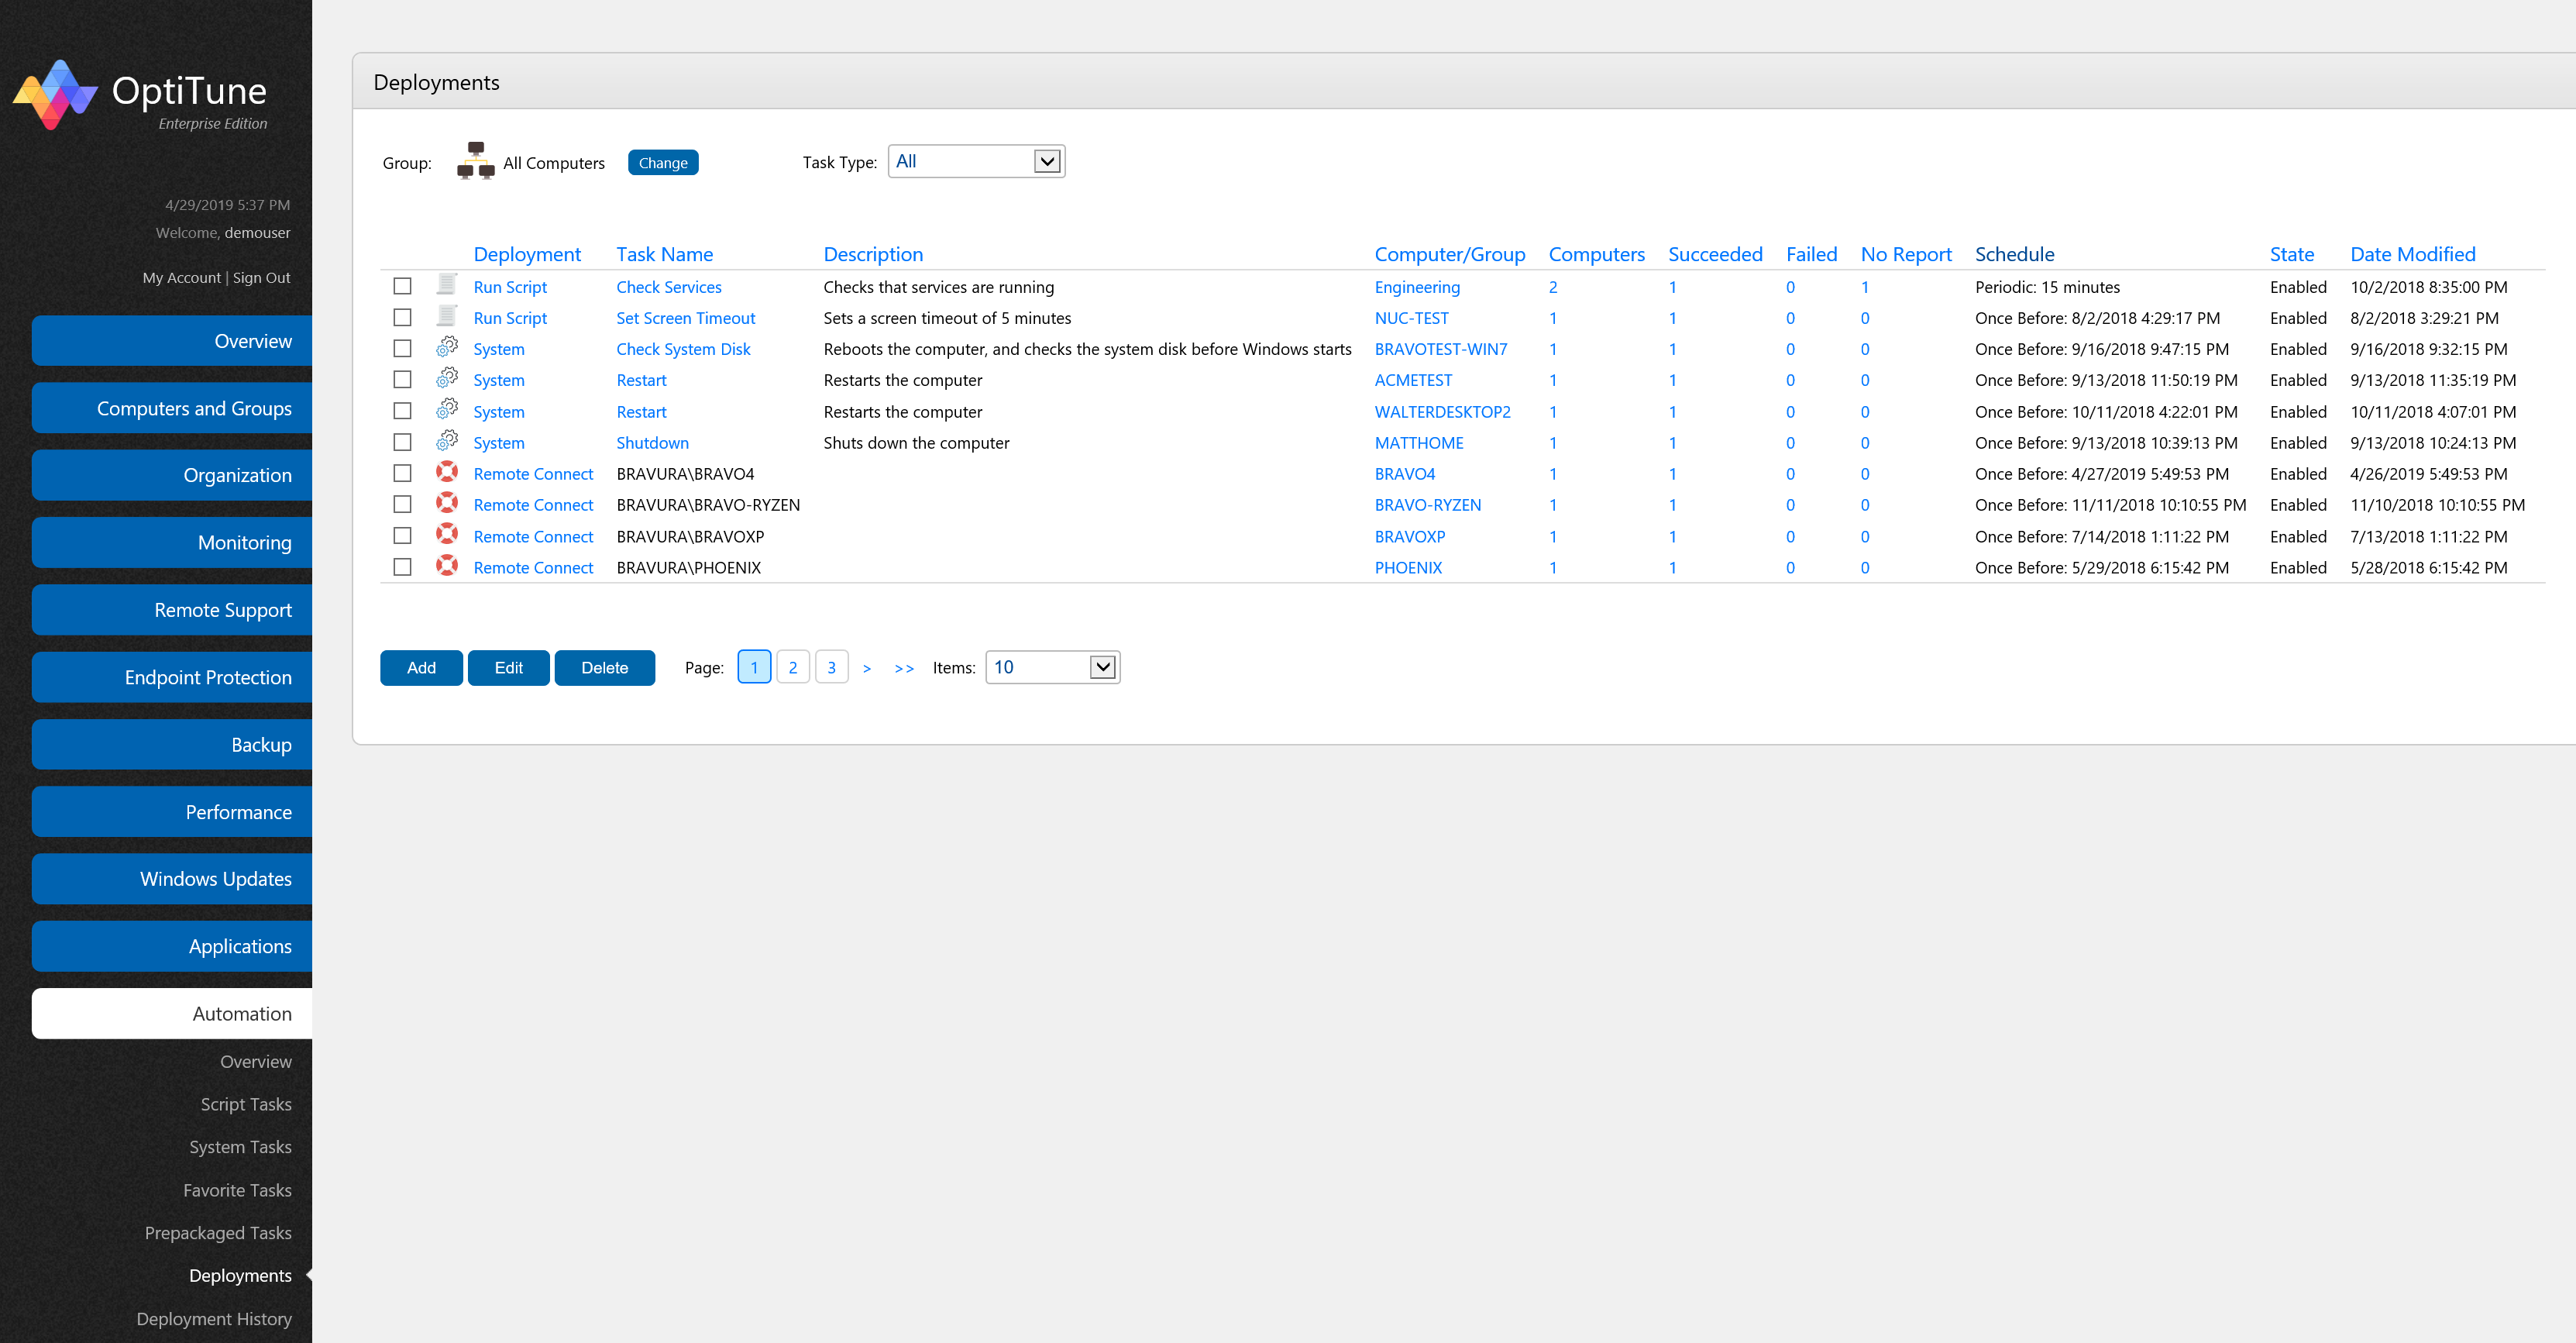
Deployments
To view the current deployments in your organization, click on the "Automation" tab, and select "Deployments".

On this screen, you will find a listing of all deployments in your organization.
About Deployments
In OptiTune, when you want to deploy a task to a computer or group of computers, you need to create a "deployment".
For example, if you want to install Microsoft Office 2010 on a group of computers, you would first create an Install Task for Microsoft Office 2010. Then, you would "deploy" the install task (or any other task) to a group of computers by creating a deployment using the "Add" button.
Once you have created the deployment, OptiTune will execute the specified task on the group of computers according to the schedule you've defined.
Columns
On this page, you will find the following columns for deployments:
Deployment - The type of the task (install, uninstall, repair).
Task Name - The name of the task.
Description - The description of the task.
Computer/Group - The name of the target computer or group for the deployment.
Computers - The number of computers affected by the deployment.
Succeeded - The number of computers for which the task was successfully deployed. Click on a value to view the specific computers.
Failed - The number of computers for which the task failed to deploy. Click on a value to view the specific computers.
No Report - The number of computers for which the task has not yet executed, or we haven't received a report for. Click on a value to view the specific computers.
Schedule - The schedule to execute the task on the group of computers.
State - Whether or not the deployment is Enabled
Date Modified - The date and time the deployment or task was last modified. Actions
Actions
Add
To create a new deployment, click "Add".
Edit
To edit an existing deployment, select the deployment by clicking on its checkbox, and click "Edit". Or, you can click on value under the "Deployment" column.
Delete
To delete an existing deployment, select the deployment by clicking on its checkbox, and click "Delete".