ConnectWise Manage Integration
Introduction
On this page, you can create a new ConnectWise Manage integration, or edit an existing ConnectWise Manage integration.
As a prerequisite, you need to have a working ConnectWise Manage account and a ConnectWise Manage "API
Member" that is setup correctly with appropriate access.
When adding a new ConnectWise Manage Integration in OptiTune, you will first be prompted to enter the "API Key" for your ConnectWise Manage "API Member". Follow the steps outlined in the next section to create the ConnectWise Manage API Member, and copy and paste the API Key back in OptiTune.
ConnectWise Manage Security Role
First, you will need to setup a "Security Role" for your ConnectWise Manage "API Member" that provides minimal access to ConnectWise Manage.
Login to your ConnectWise Manage server.
Then, go to "System" > "Security Roles", and click on the plus sign.
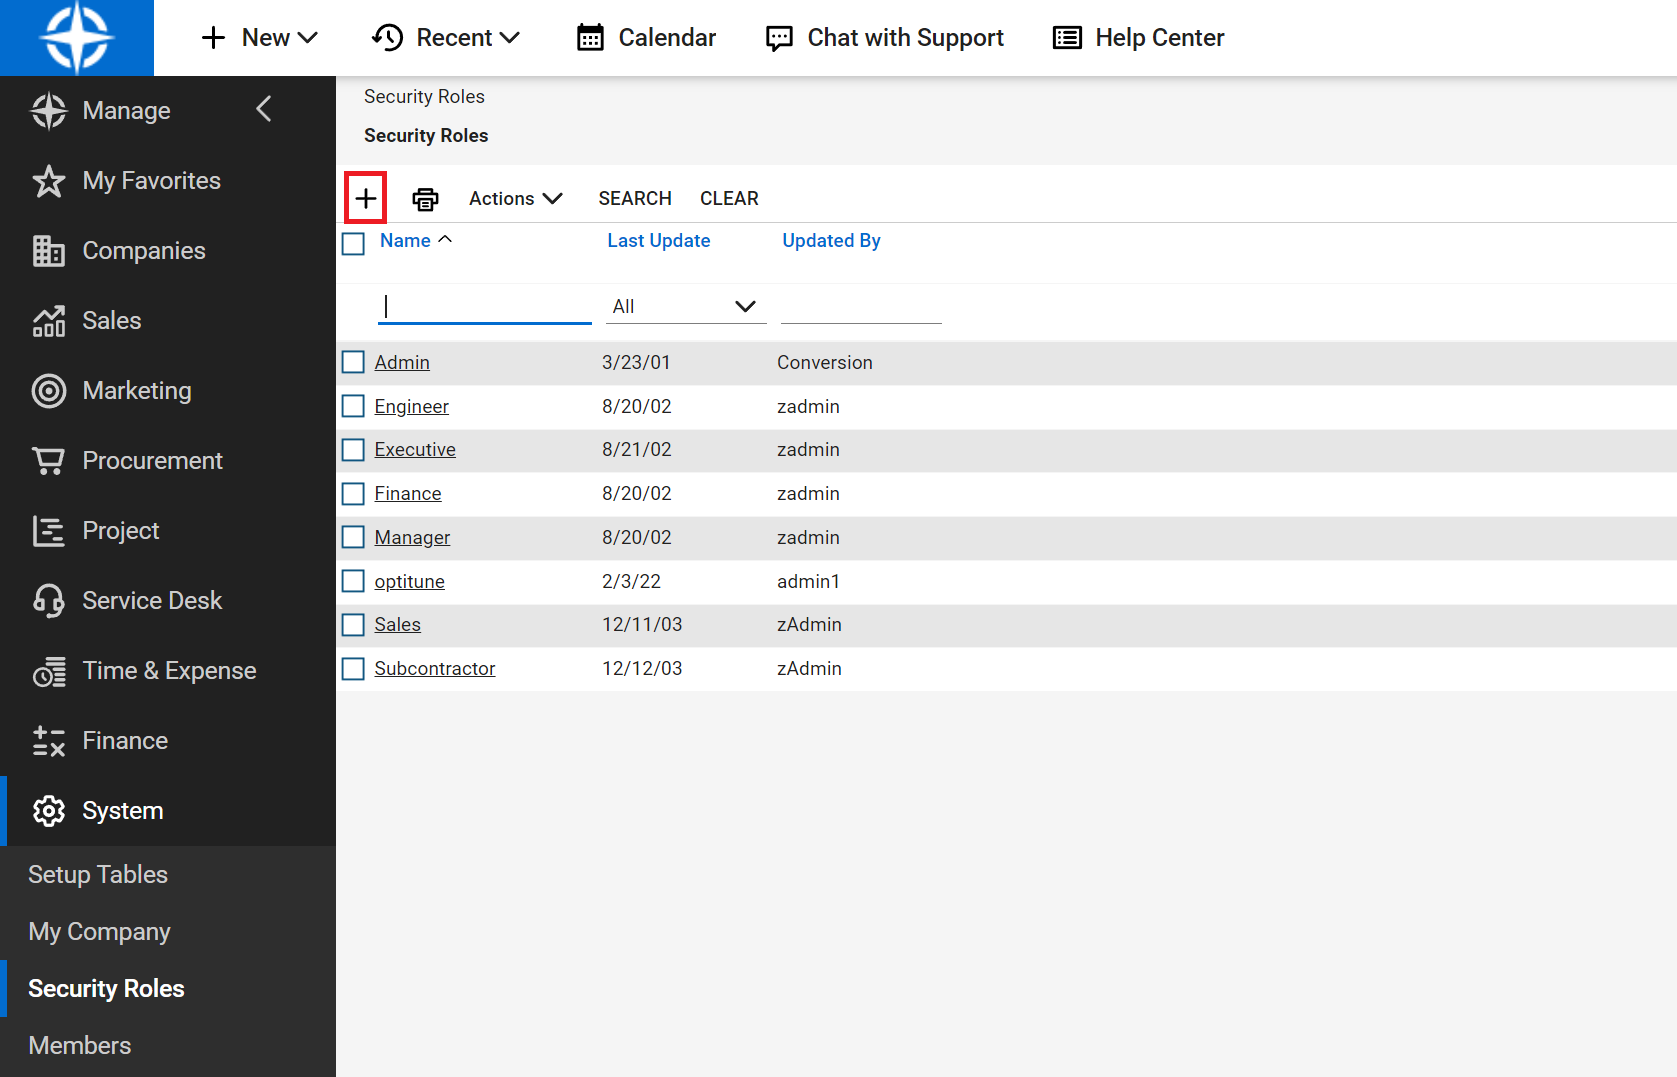
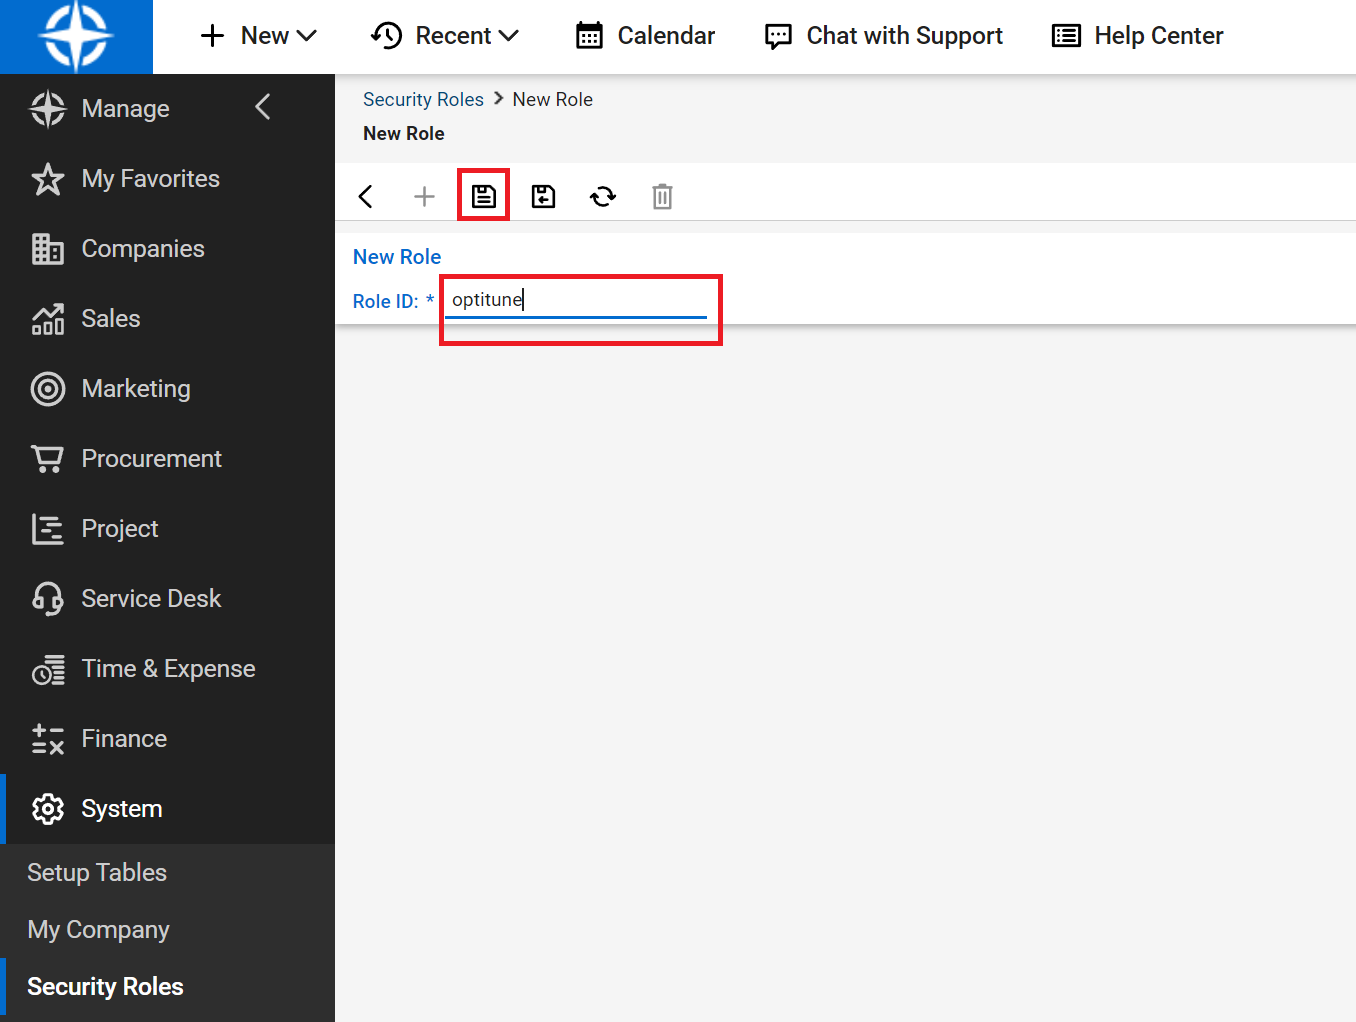
Enter a name for the security role, like "optitune", and click on the "Save" button.
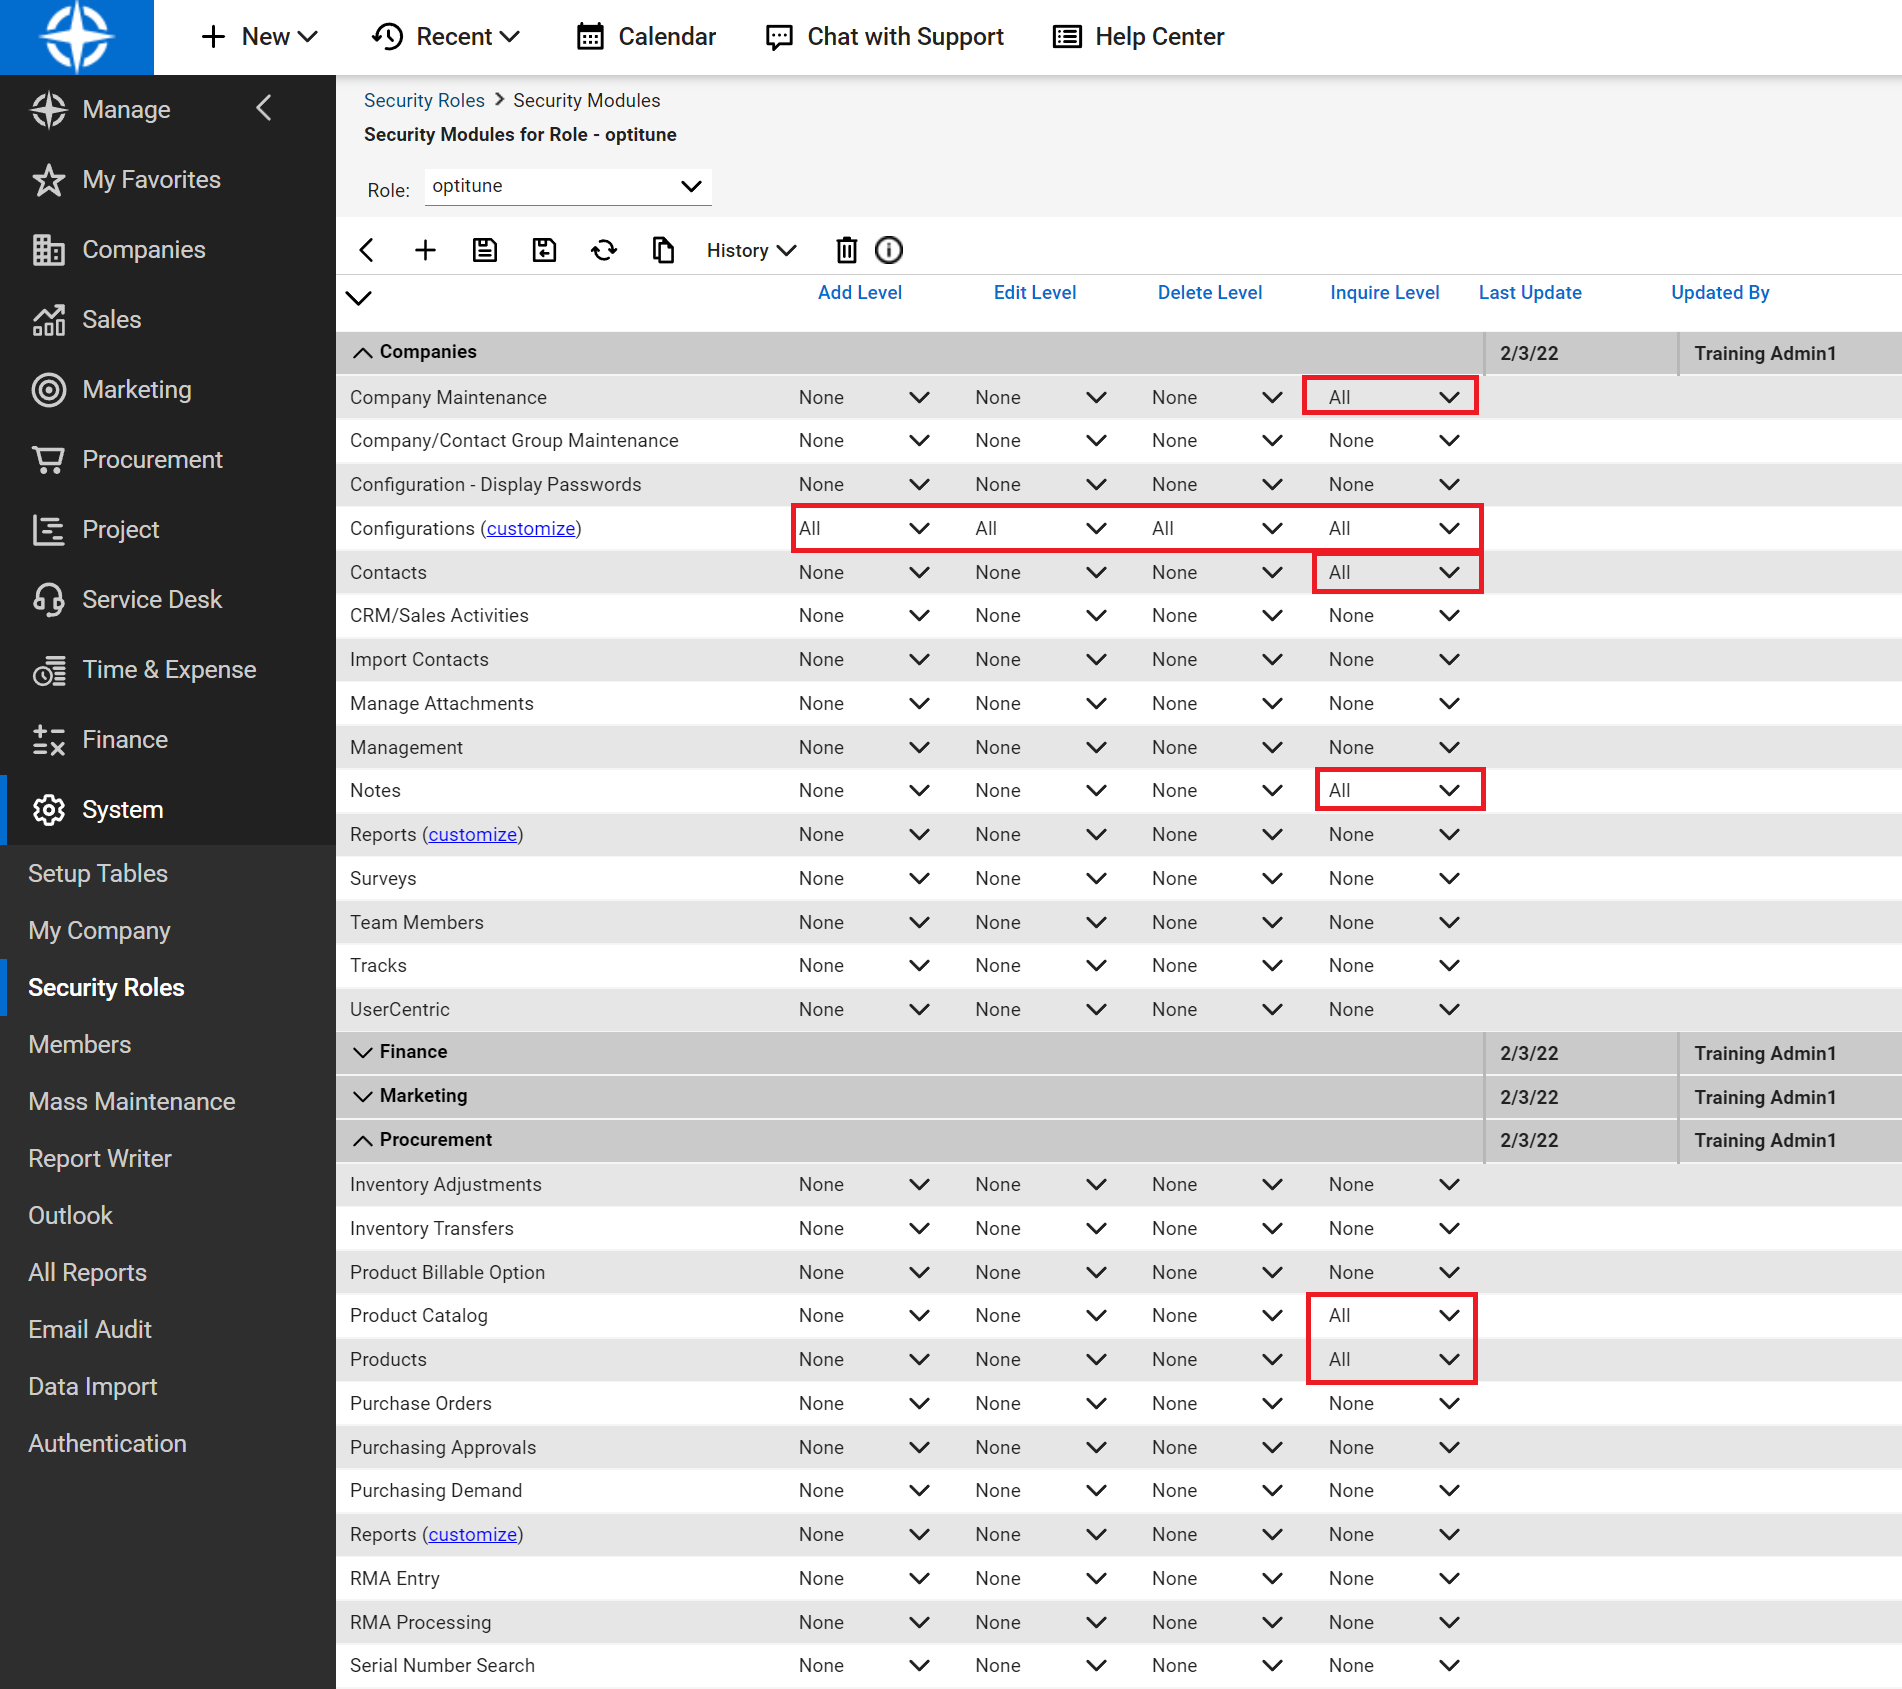
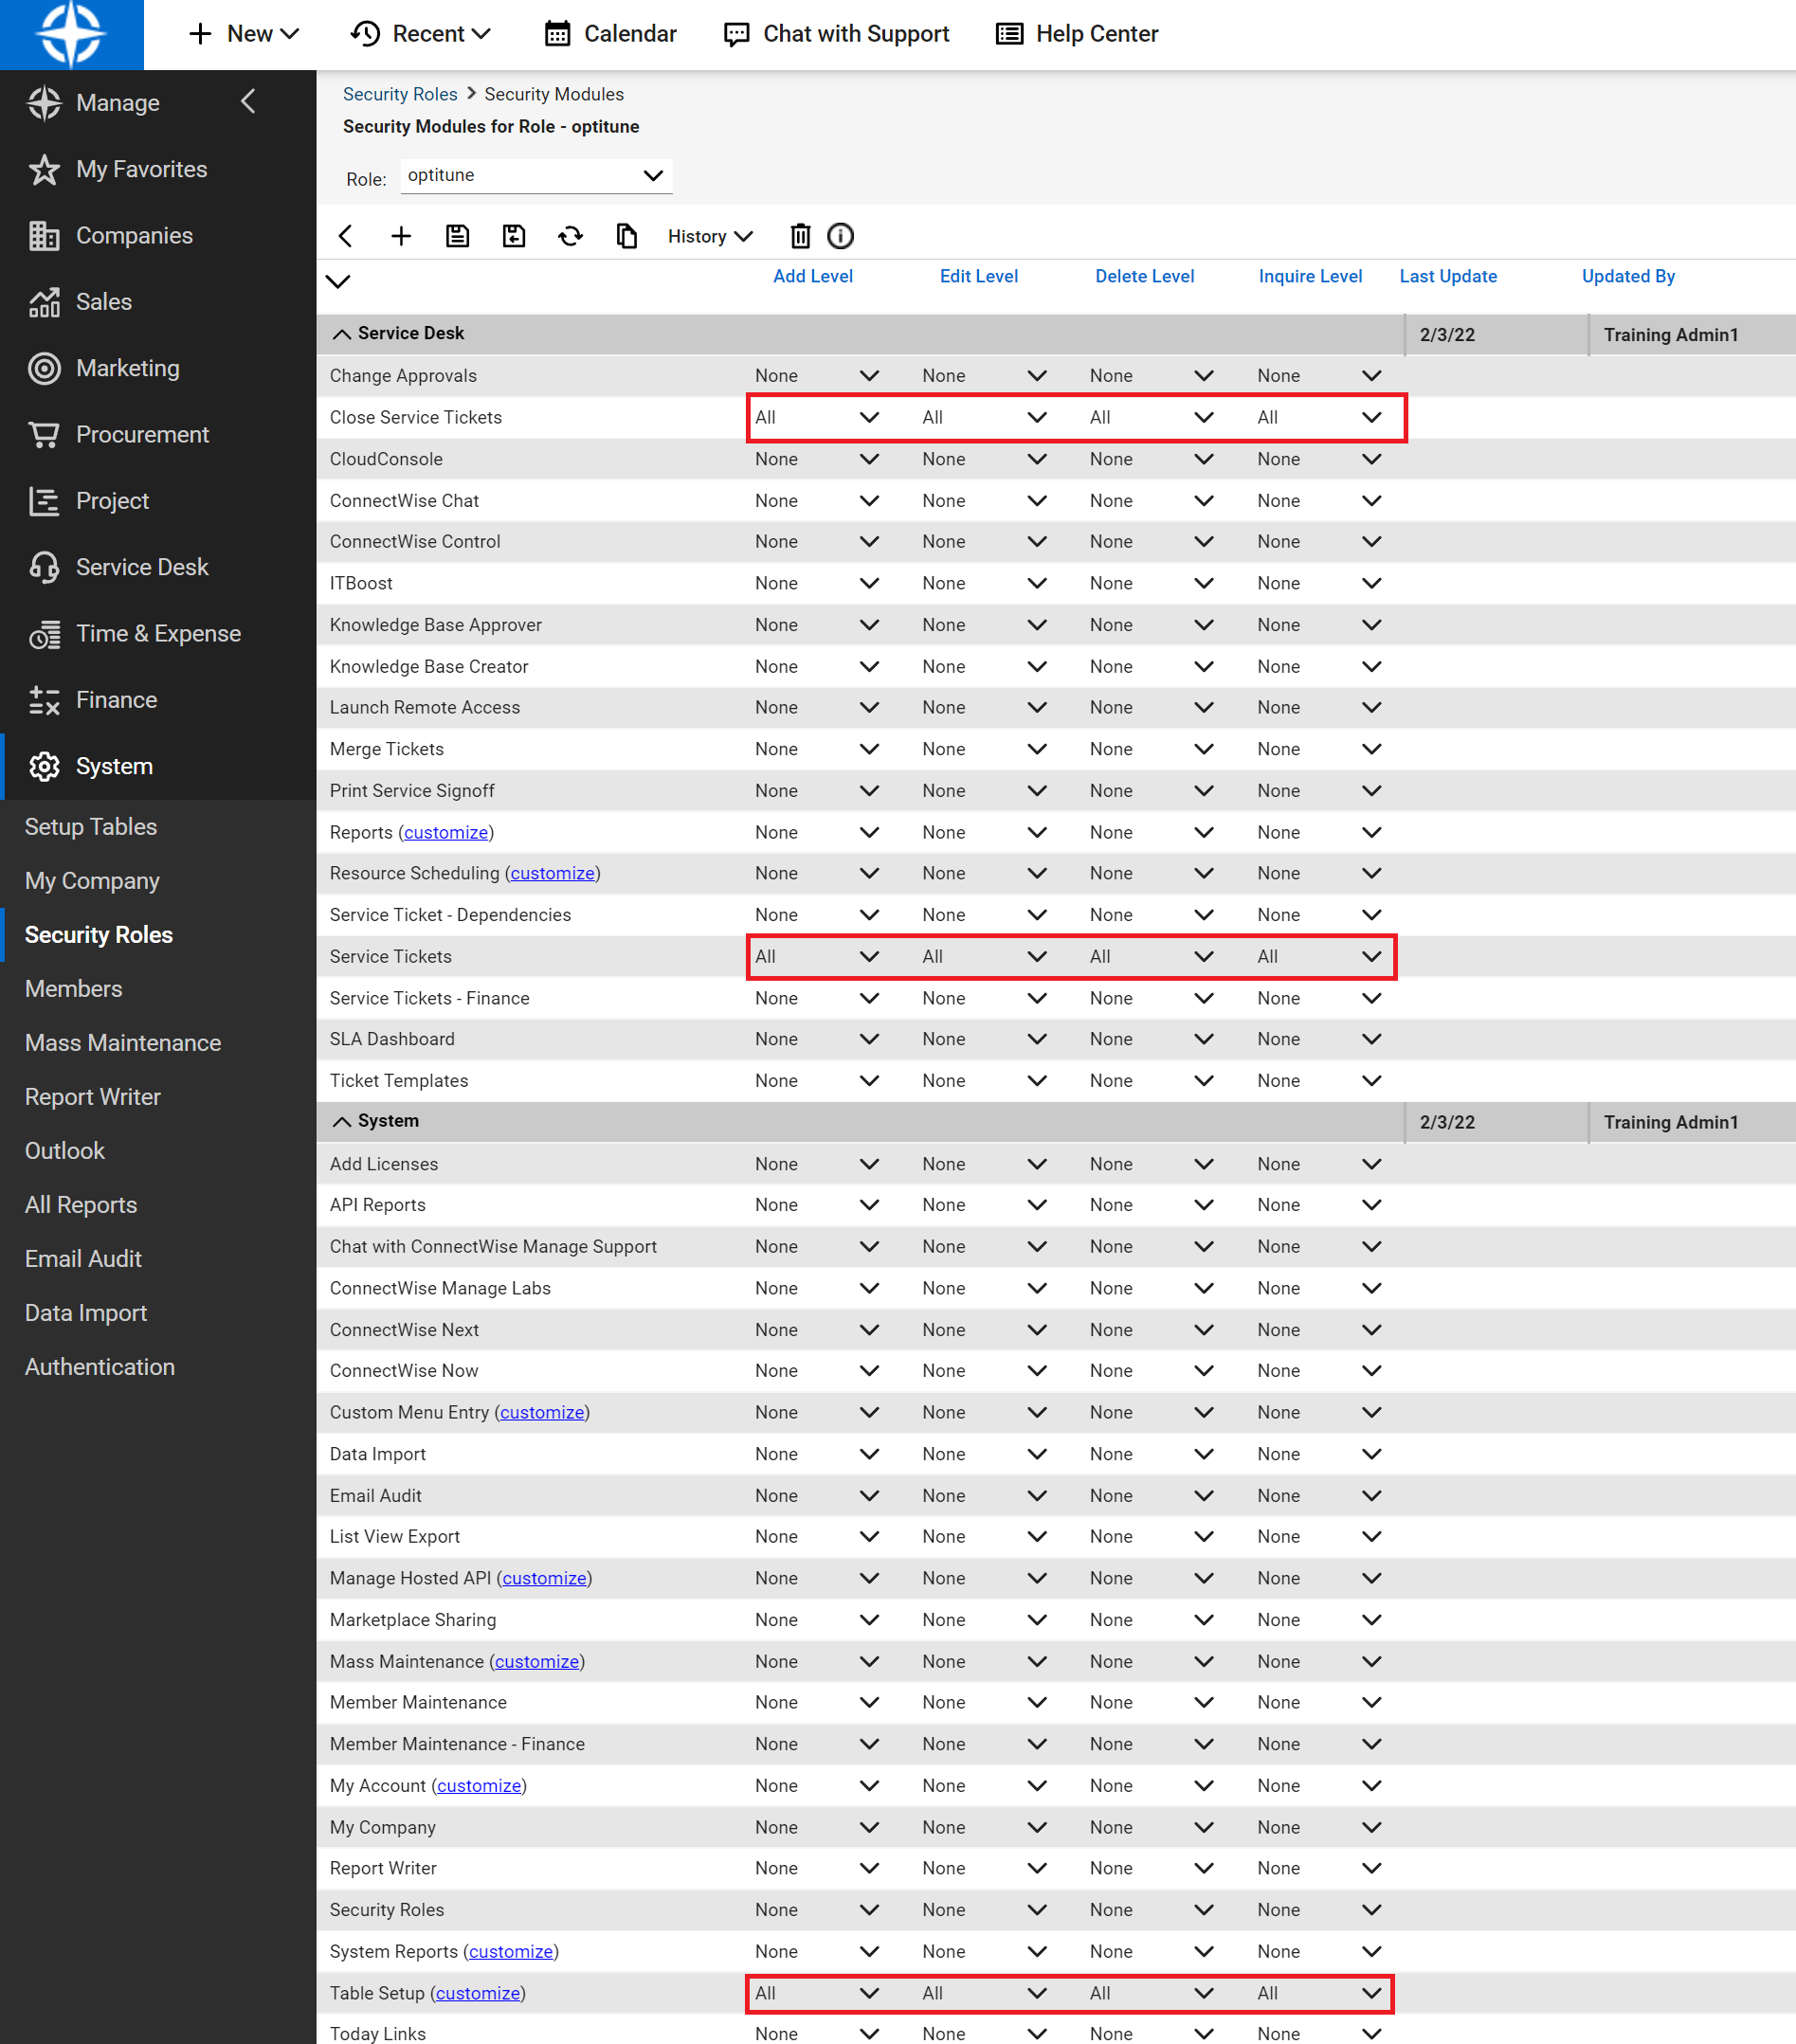
Next, click on the "optitune" security role, and set its permissions as shown below. Be sure to click on the "Save" button after you are done setting the appropriate permissions.
| Category | Permission | Add Level | Edit Level | Delete Level | Inquire Level |
|---|---|---|---|---|---|
| Companies | Company Maintenance | None | None | None | All |
| Companies | Configuration | All | All | All | All |
| Companies | Contacts | None | None | None | All |
| Companies | Notes | None | None | None | All |
| Procurement | Product Catalog | None | None | None | All |
| Procurement | Products | None | None | None | All |
| Service Desk | Close Service Tickets | All | All | All | All |
| Service Desk | Service Tickets | All | All | All | All |
| System | Table Setup | All | All | All | All |
Note that the UI in ConnectWise may change, so please refer to the table above when setting the role permissions.
ConnectWise Manage API Member
Next, you will need to create an "API Member" and assign it the newly created security role.
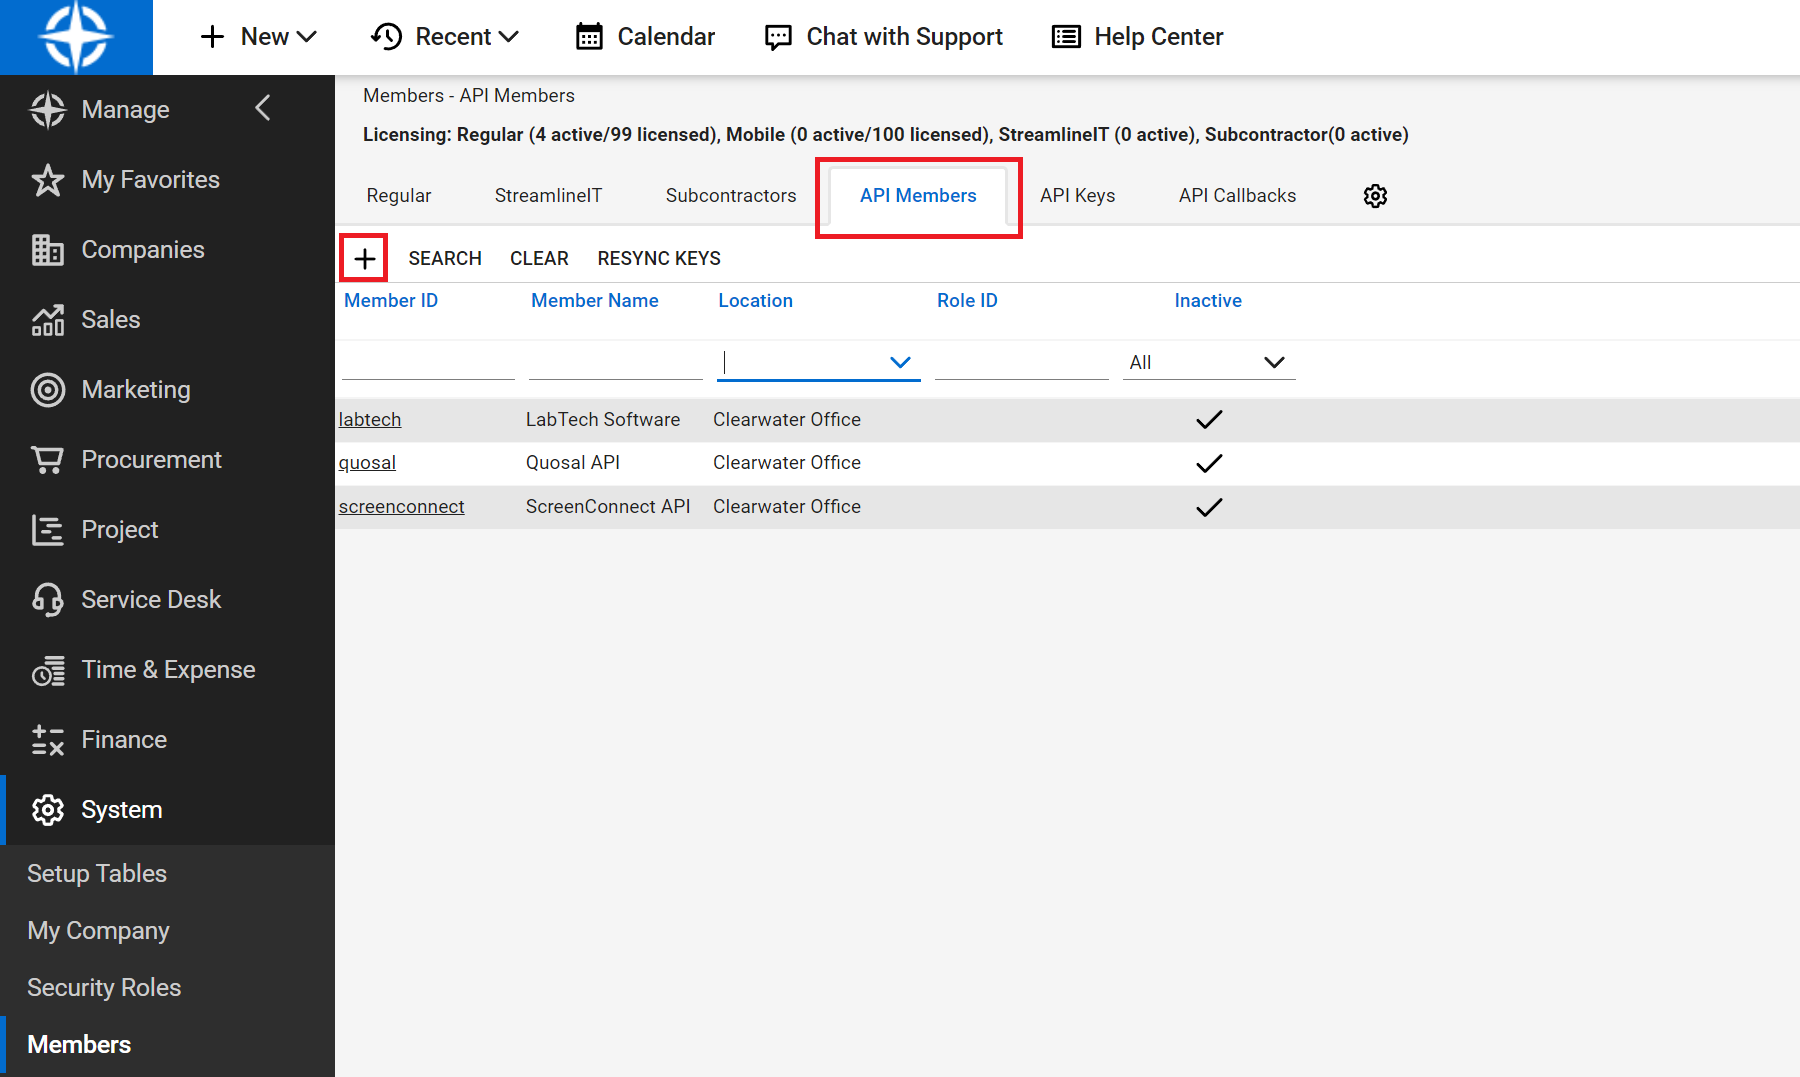
Go to "System" > "Members", click on the "API Members" tab, and then click on the plus sign.
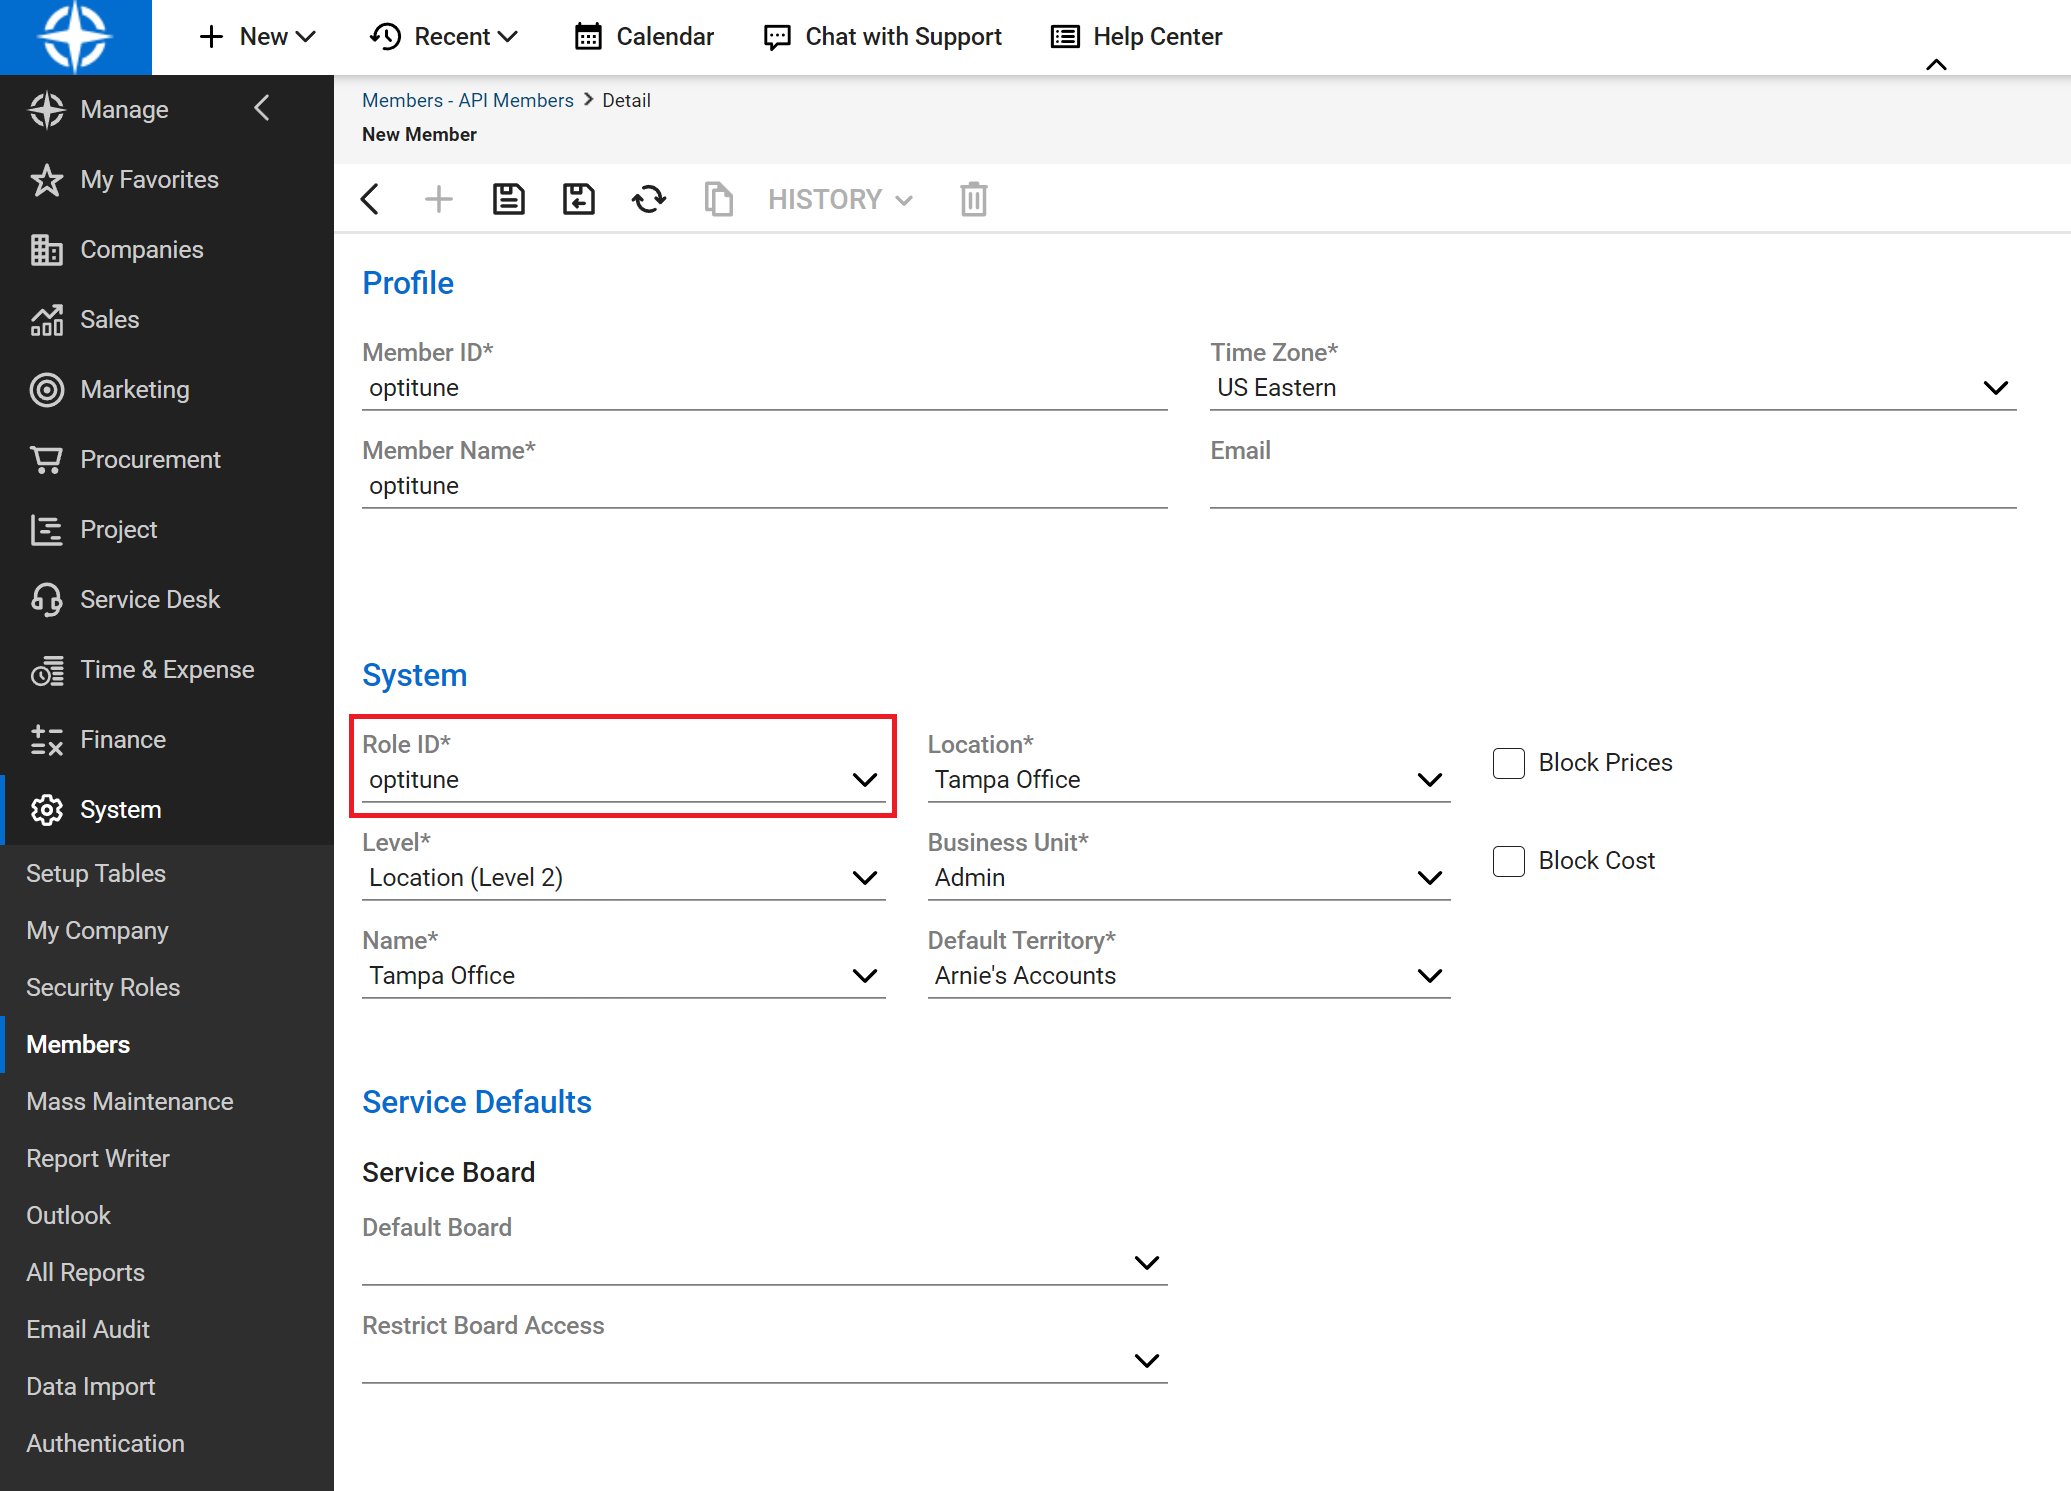
Fill in the details and all required fields for the API Member, and be sure to select the newly created security role for the API Member.
Finally, click on the "Save" button.
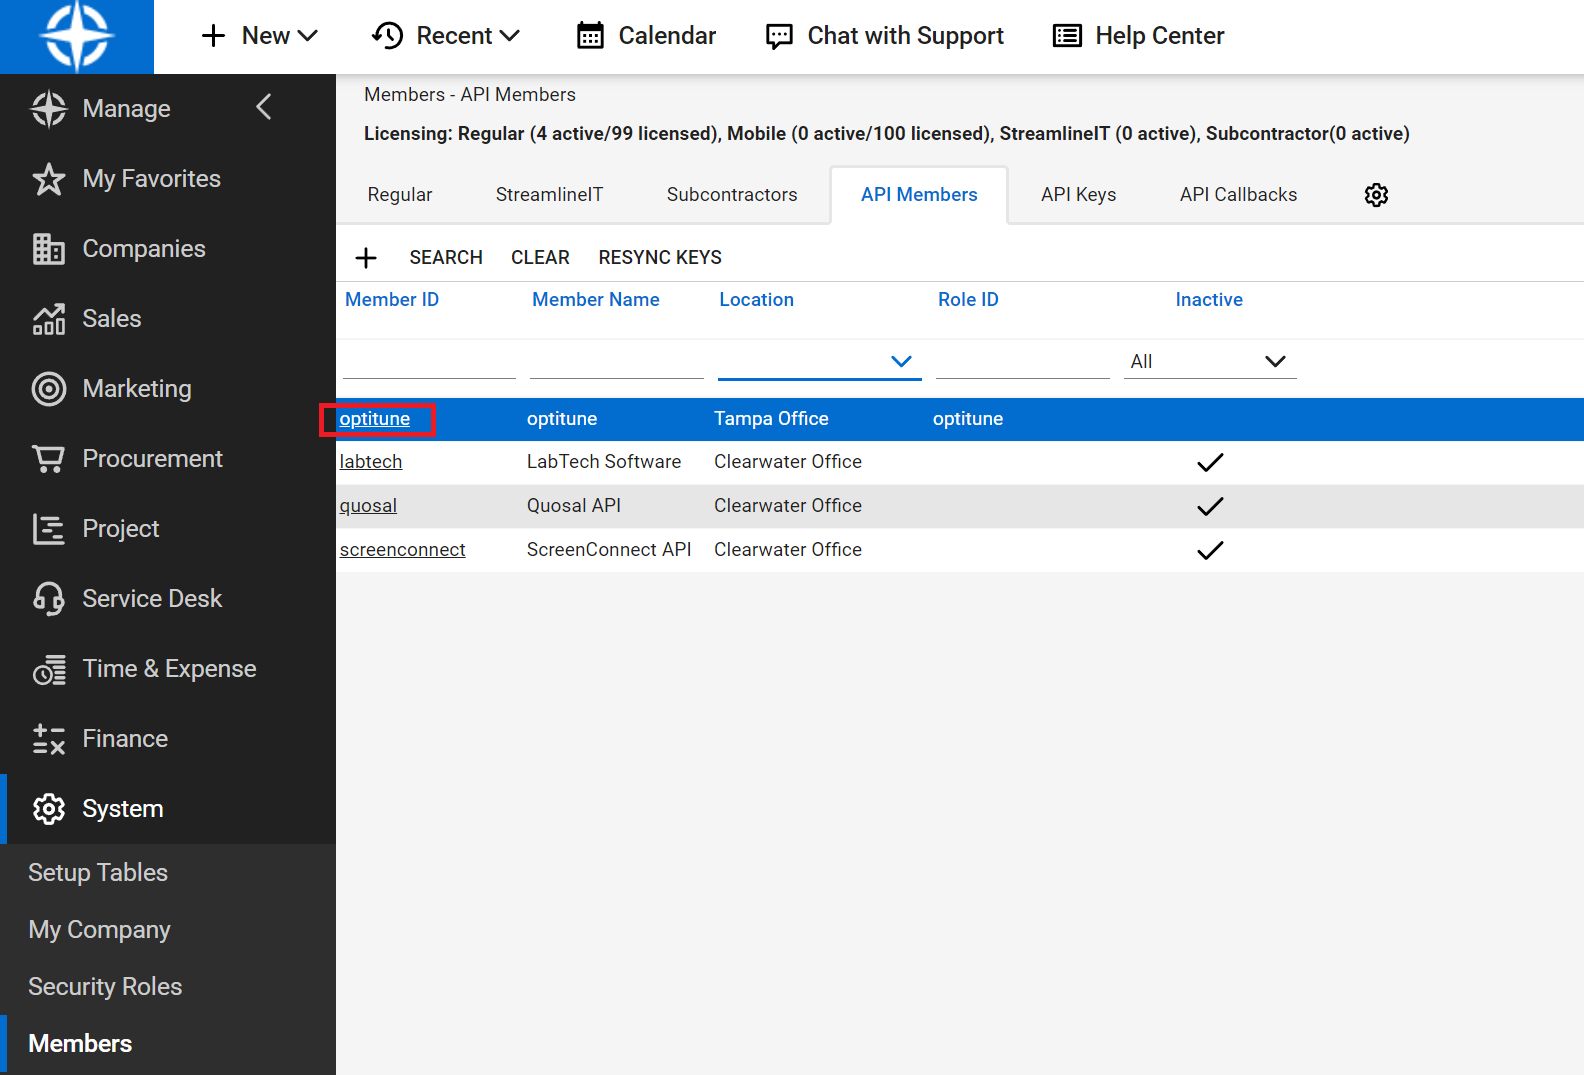
Back in the API Members section, click on the name of the newly created API Member.
Select the "API Keys" tab, then click on the plus sign.
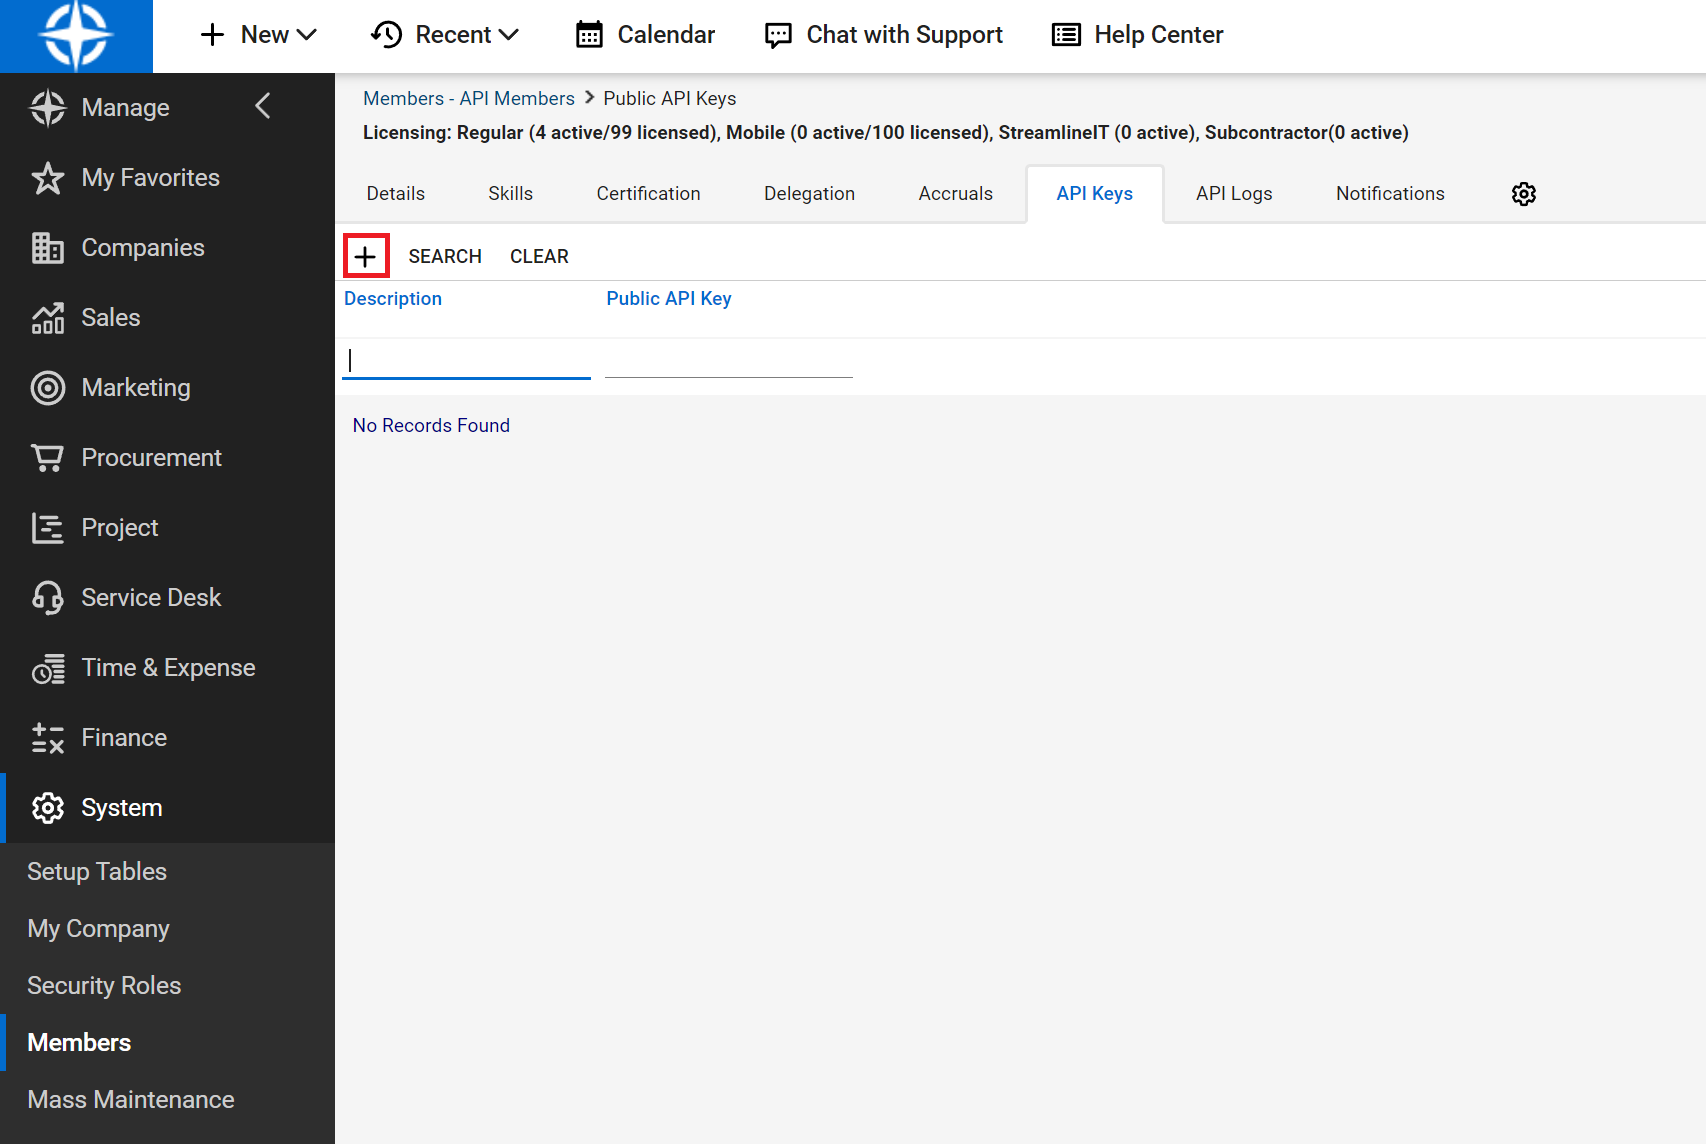
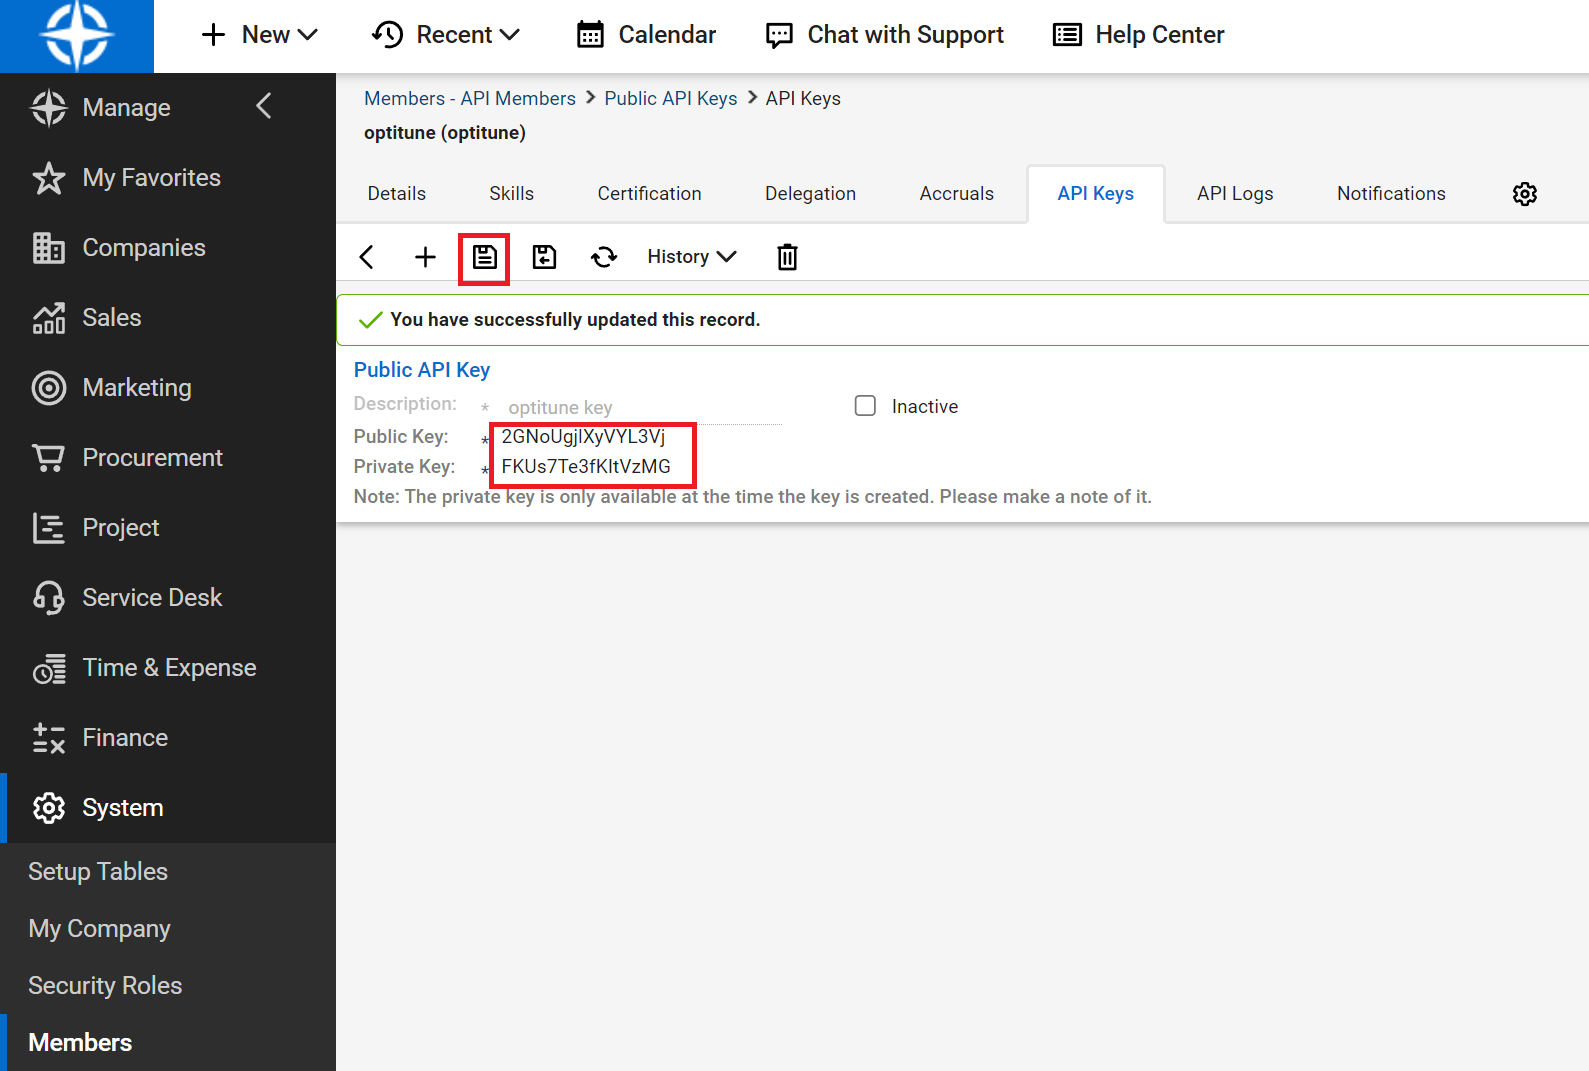
Enter a name for the API Key, and click Save. You will need to save the public and private key values, as the private key value will only be shown once. These are the credentials you will need to setup the ConnectWise Manage integration in OptiTune.
Create the Integration in OptiTune
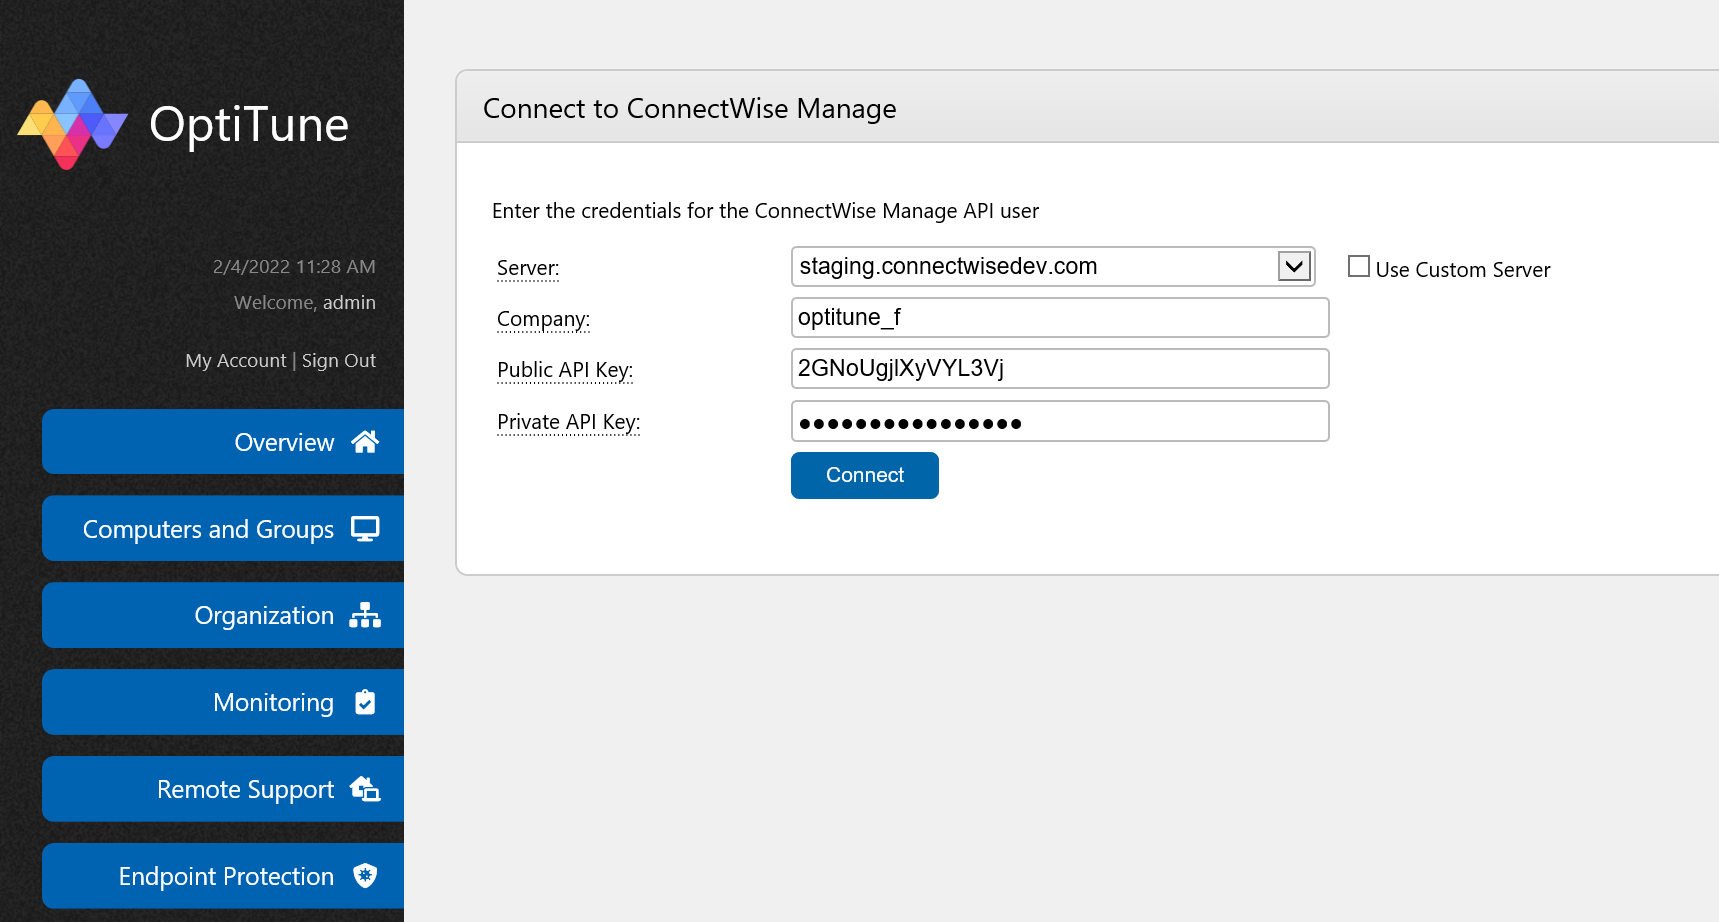
Back in OptiTune, select your ConnectWise Manage server from the dropdown list, or click the "Use Custom Server" checkbox if you are self hosting ConnectWise Manage. In either case, you only need to enter the host name, like connectwise.mydomain.com, or api-na.myconnectwise.net
Then, enter the company, and the Public API Key and Private API Key, that you generated in the previous step, and click "Connect".
Integration Details
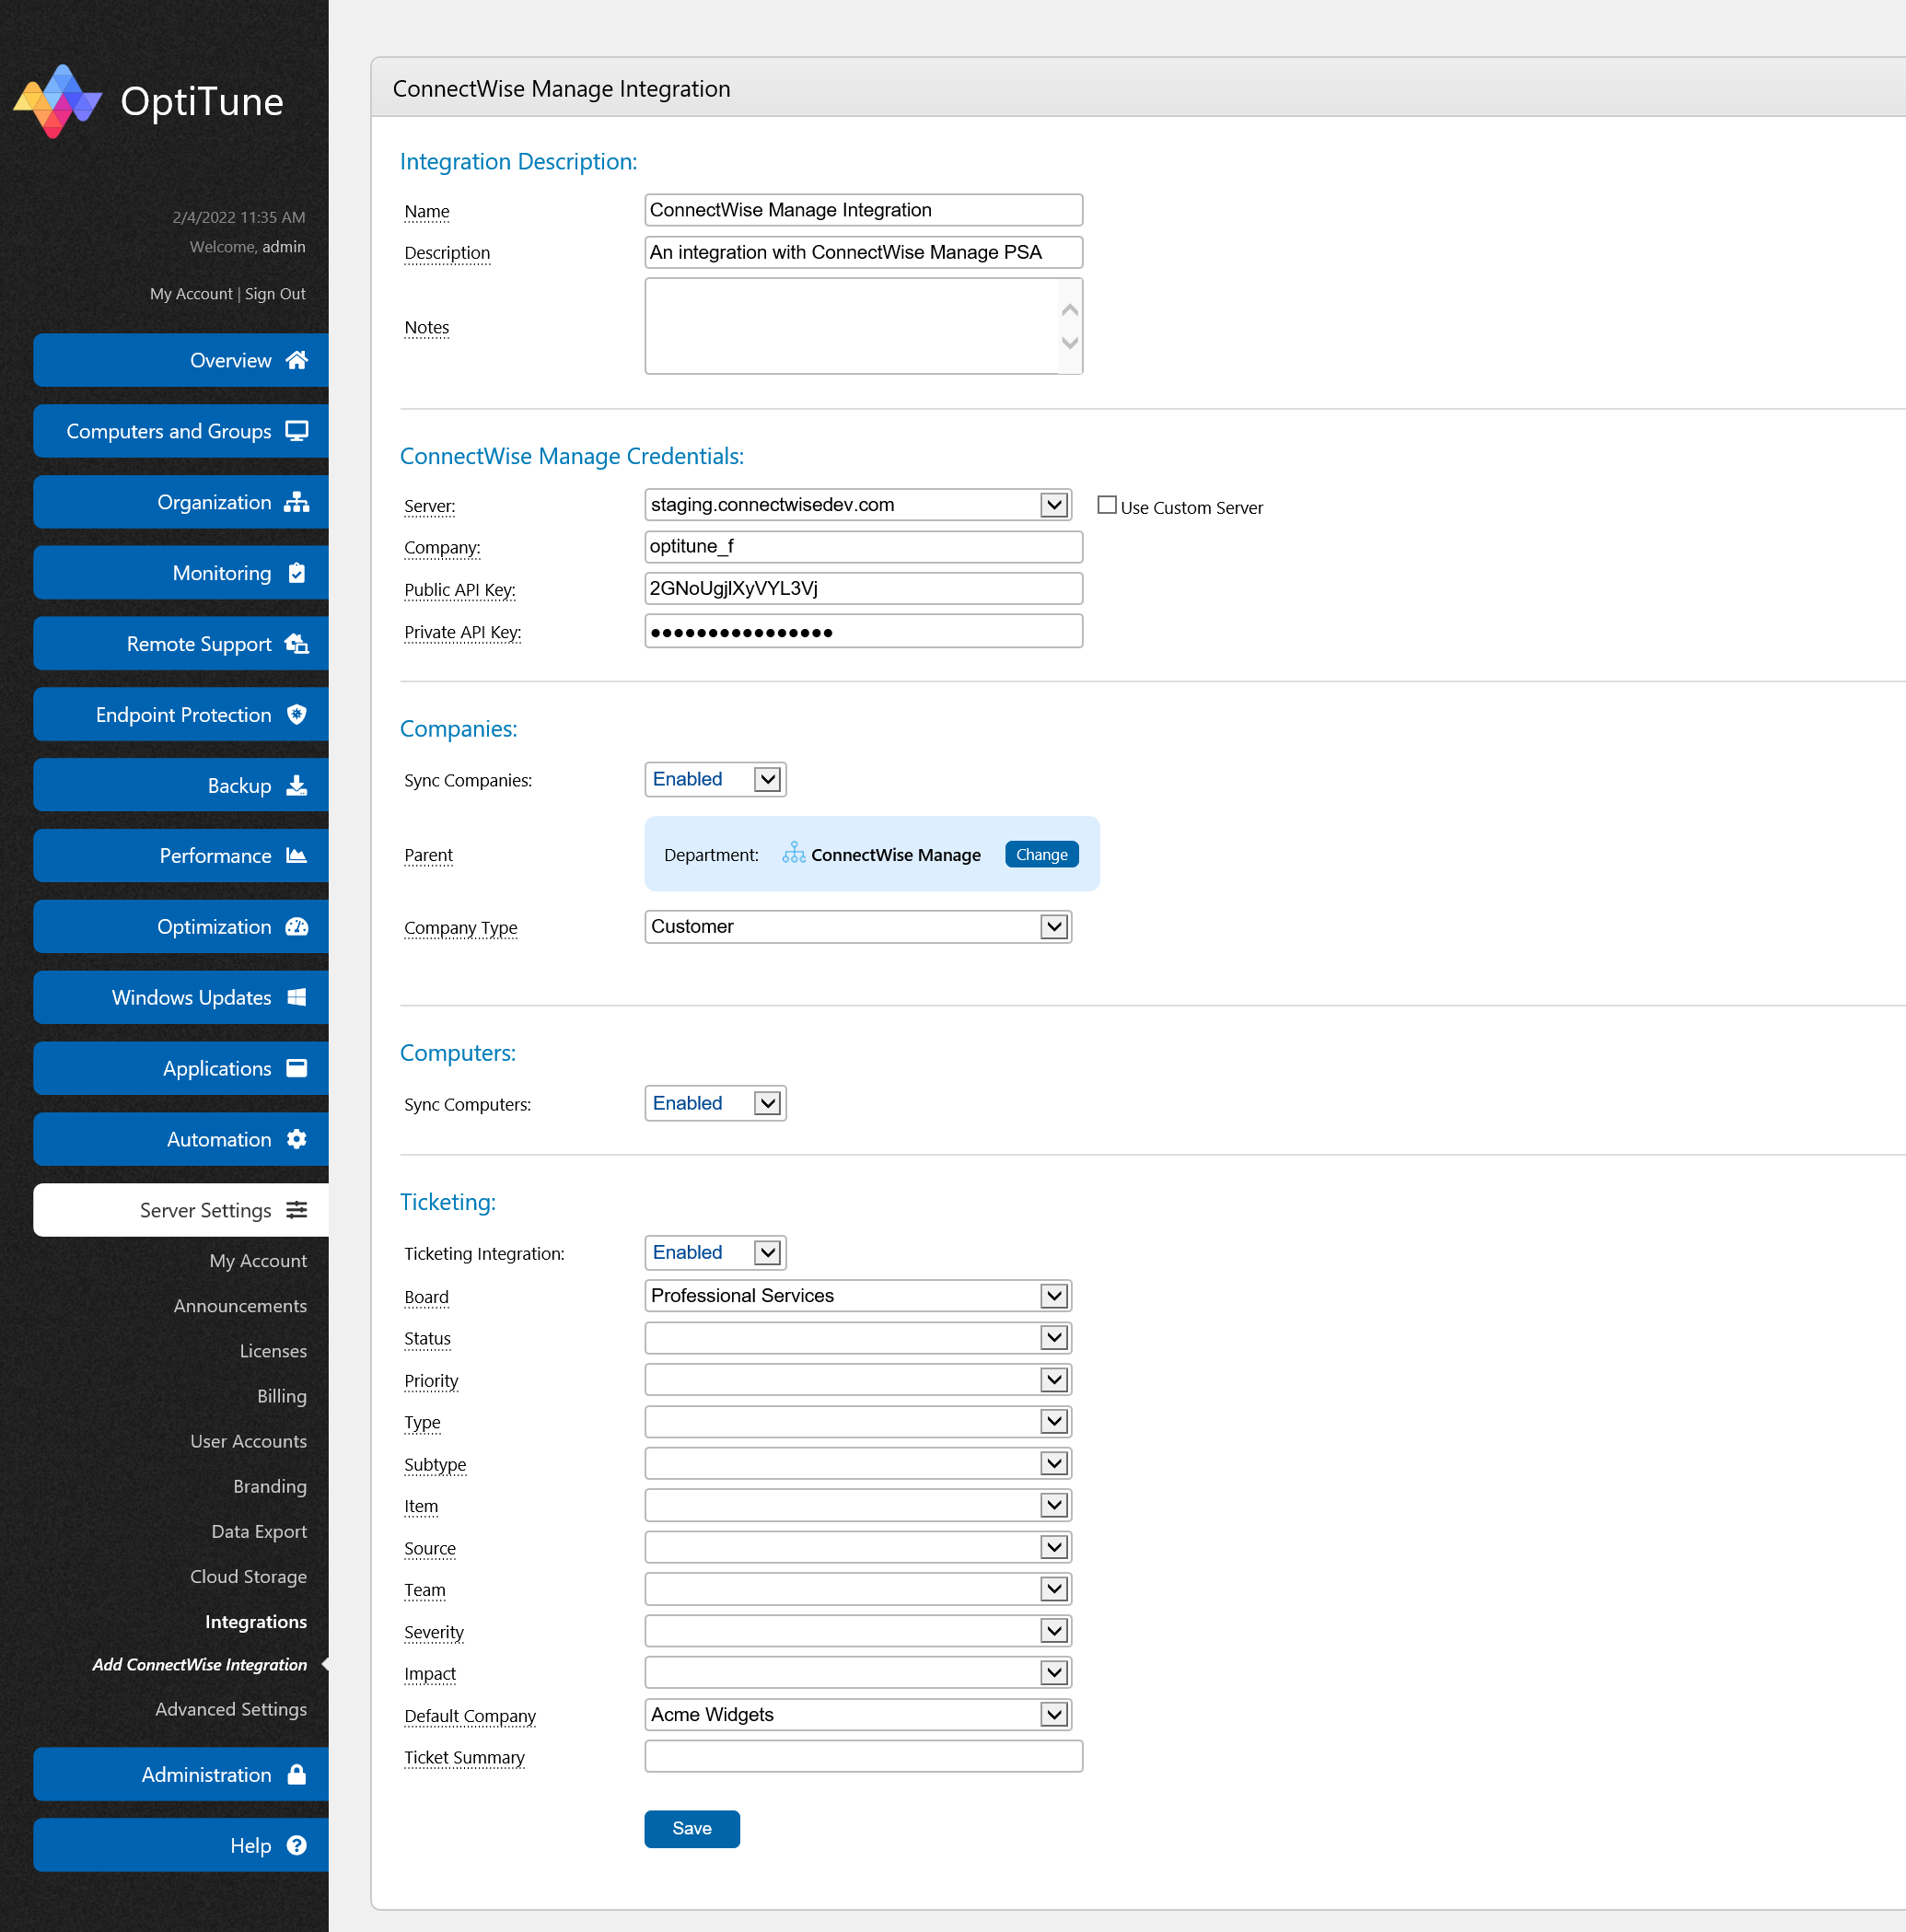
If this is your first ConnectWise Manage Integration, a new business entity called "ConnectWise PSA" will automatically be created for you, and selected as the parent business entity. If everything looks good, you can just click "Save" and use all the defaults selected. Mouse over each label for a detailed explanation of each field.
Run Synchronization
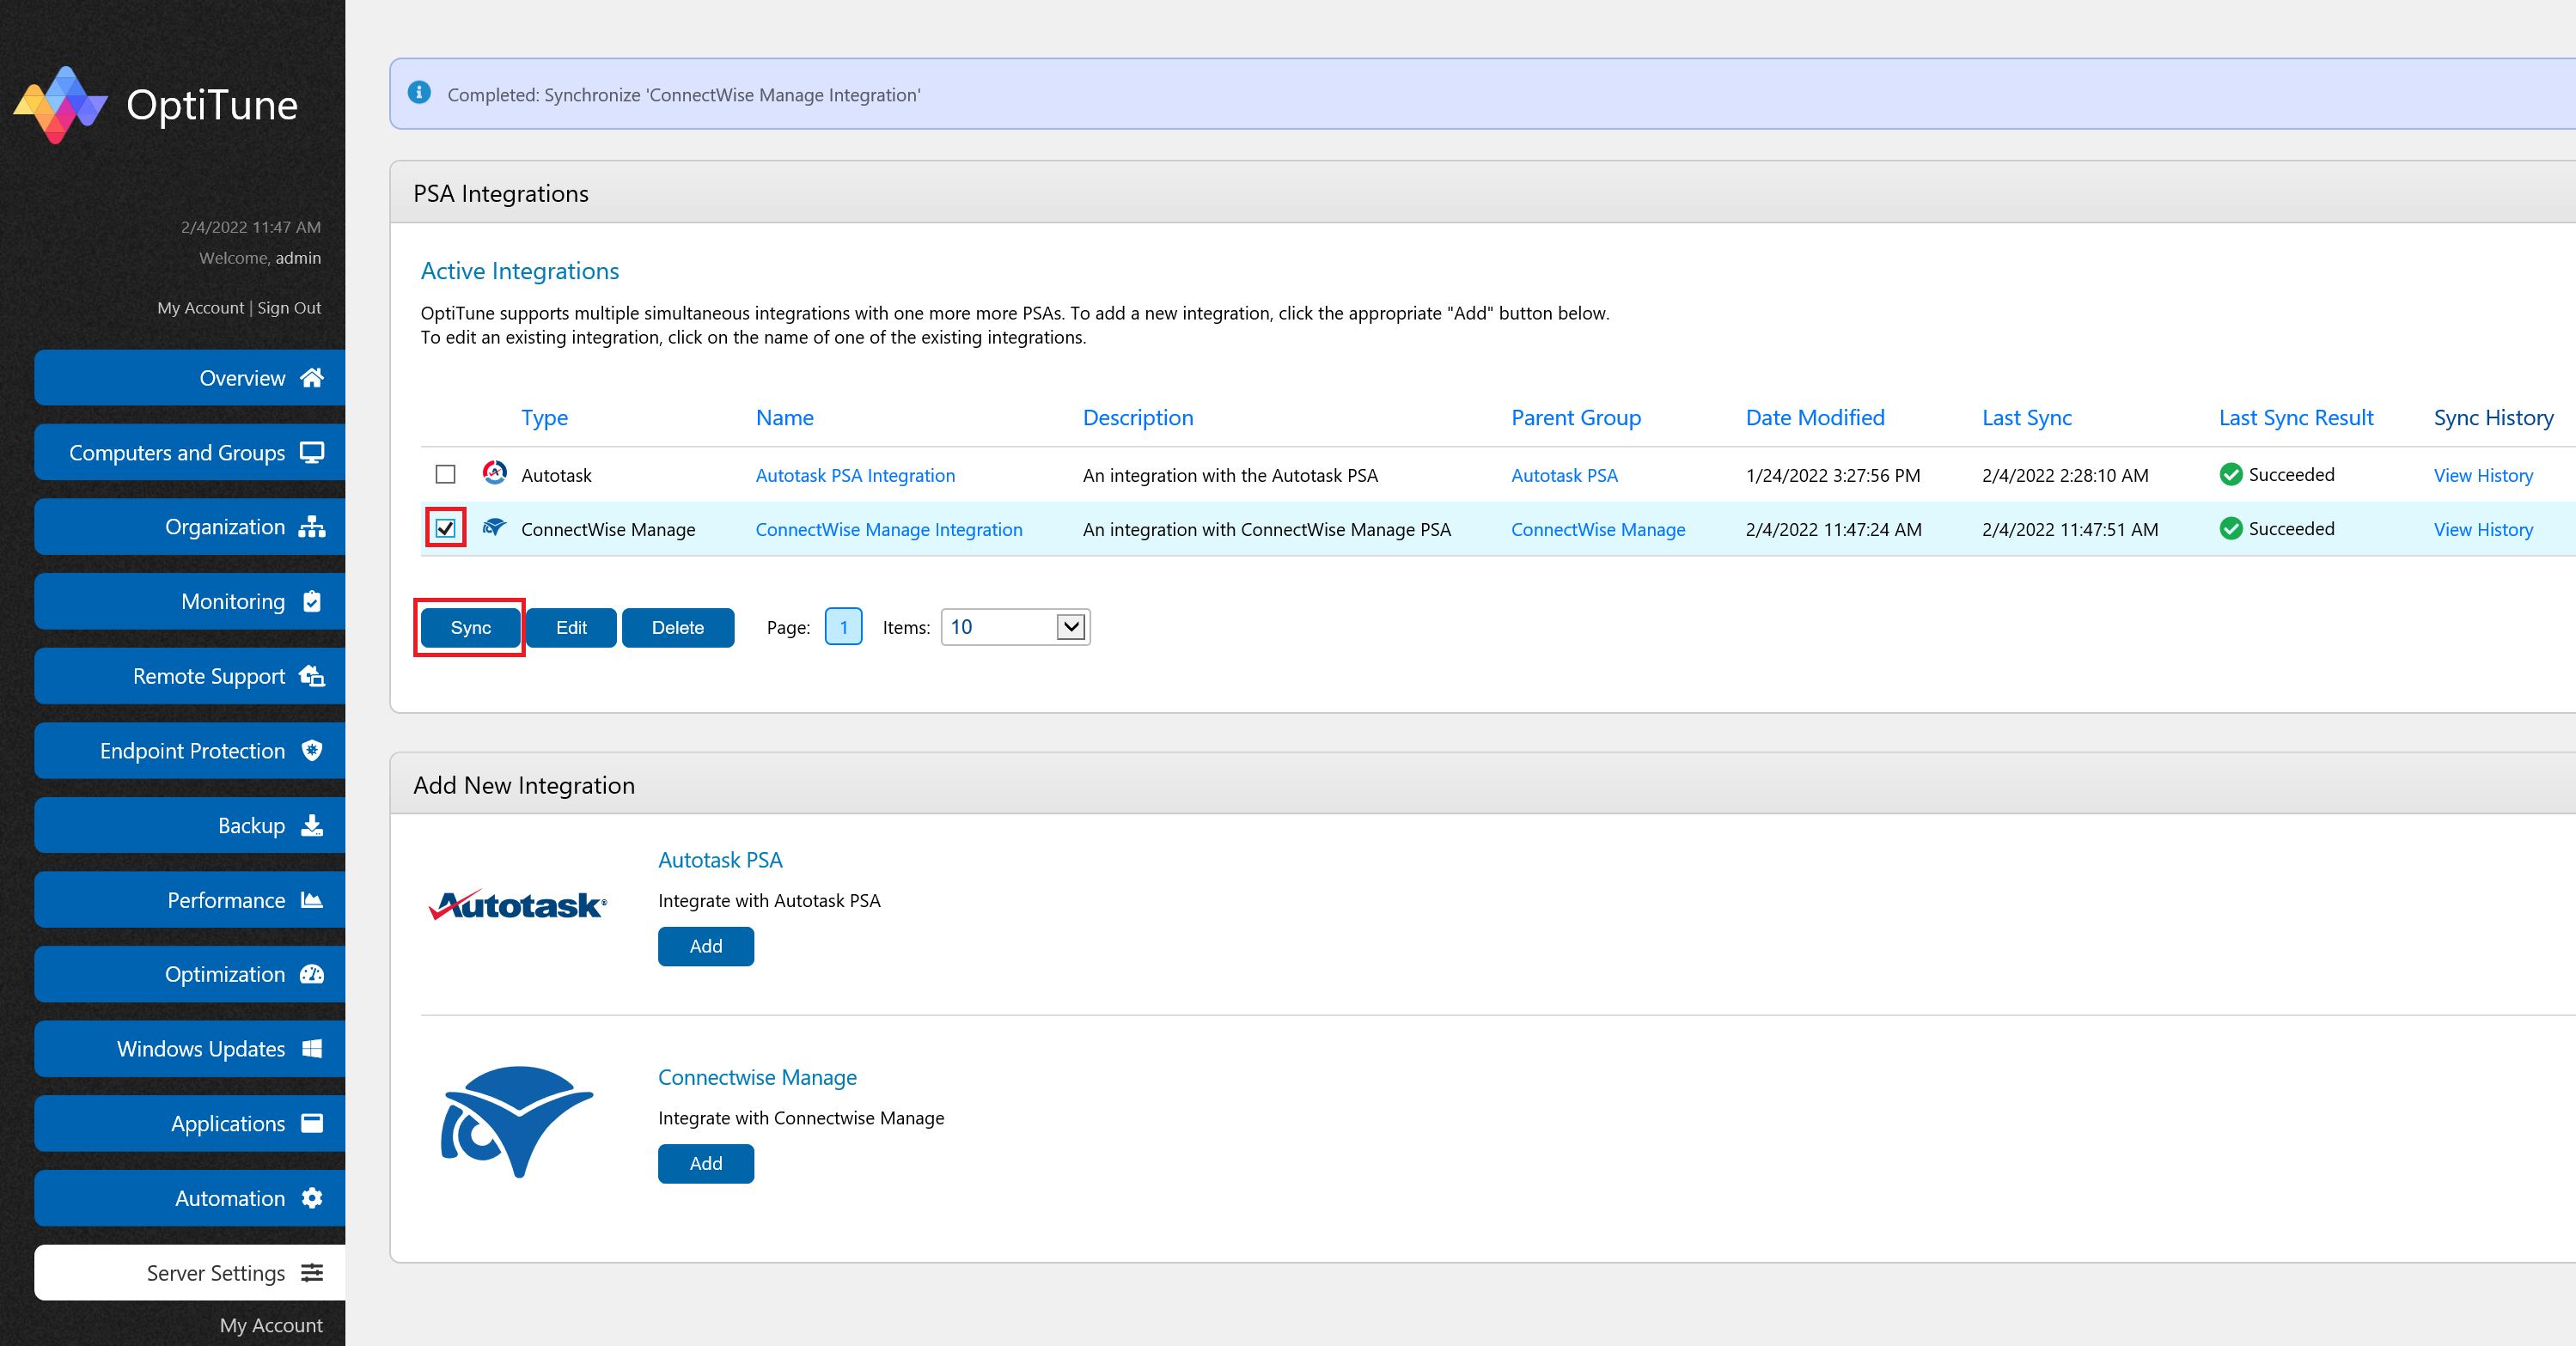
After saving your integration, click on the integration's checkbox, and then click "Sync". This will run the first synchronization for ConnectWise Manage. You can then browse the business entities that were imported from ConnectWise, and add computers to them as needed directly in OptiTune. The sync process will automatically run every 4 hours, but you can also run it manually as shown below.
Creating Tickets in ConnectWise Manage
If you have enabled the ticketing feature for your ConnectWise Manage integration, in order to get tickets created in ConnectWise,
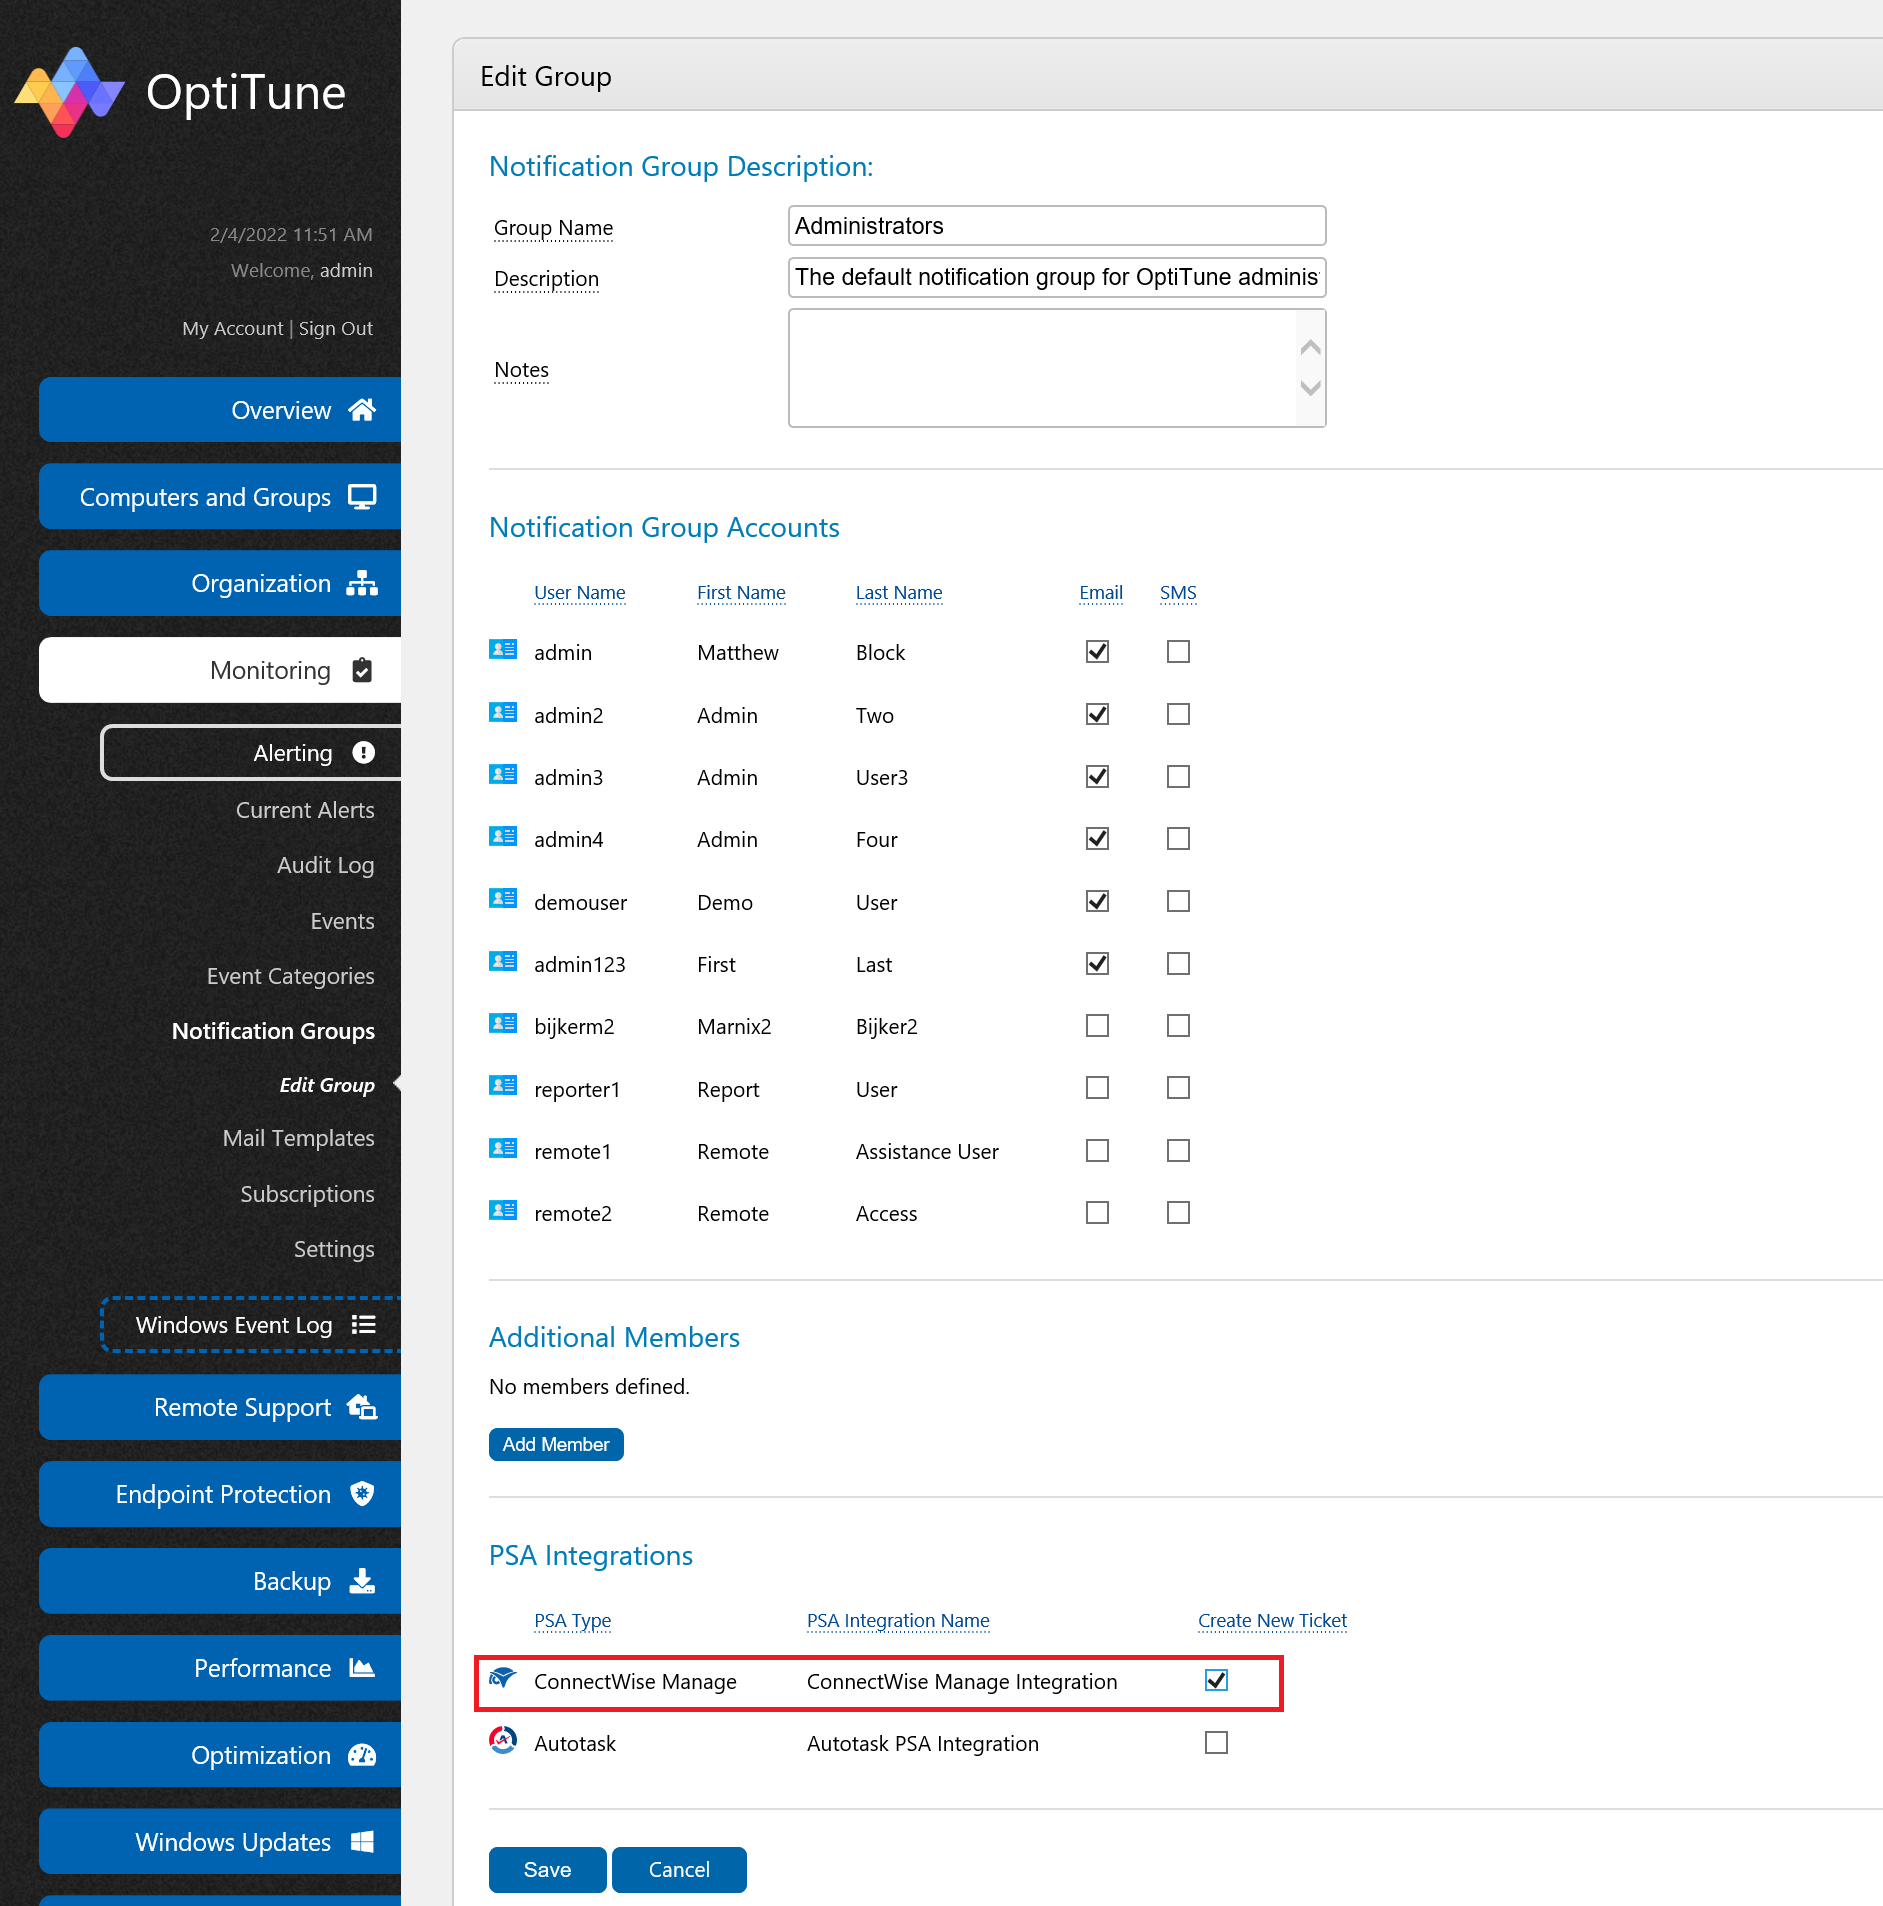
you will also need to associate the "integration" with one or more notification groups in OptiTune.
Learn more about how monitoring works in OptiTune.
Basically, OptiTune treats the PSA integration as another receipient in a notification group for an alert subscription, so you have to also add the PSA integration as a member of a notification group by clicking on its checkbox in the notification group page. Once you have done so, if there is an alert subscription that uses this notification group, tickets will be created in ConnectWise when alerts are activated for the alert subscription.
