Autotask Integration
Introduction
On this page, you can create a new Autotask integration, or edit an existing Autotask integration. As a prerequisite, you need to have a working Autotask account and an Autotask API user that is setup correctly with appropriate access, and the Integration Vendor set as "OptiTune - RMM".
When adding a new Autotask Integration in OptiTune, you will first be prompted to enter the logon credentials for your Autotask API User. Follow the steps outlined in the next section to create the Autotask API User, and copy and paste the API credentials back in OptiTune.
Create the Autotask API User
Login to your Autotask account, and from the main menu, select "Admin" > "Resources (Users)".
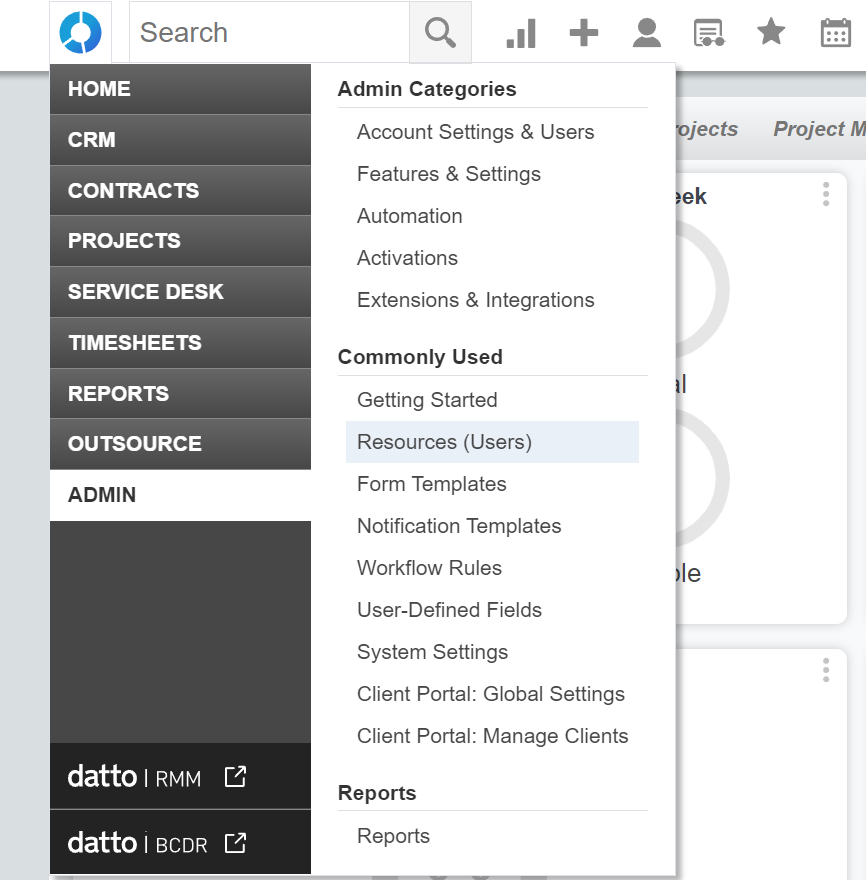
Select New API User
Click on the down arrow next to "New", and select "New API User"
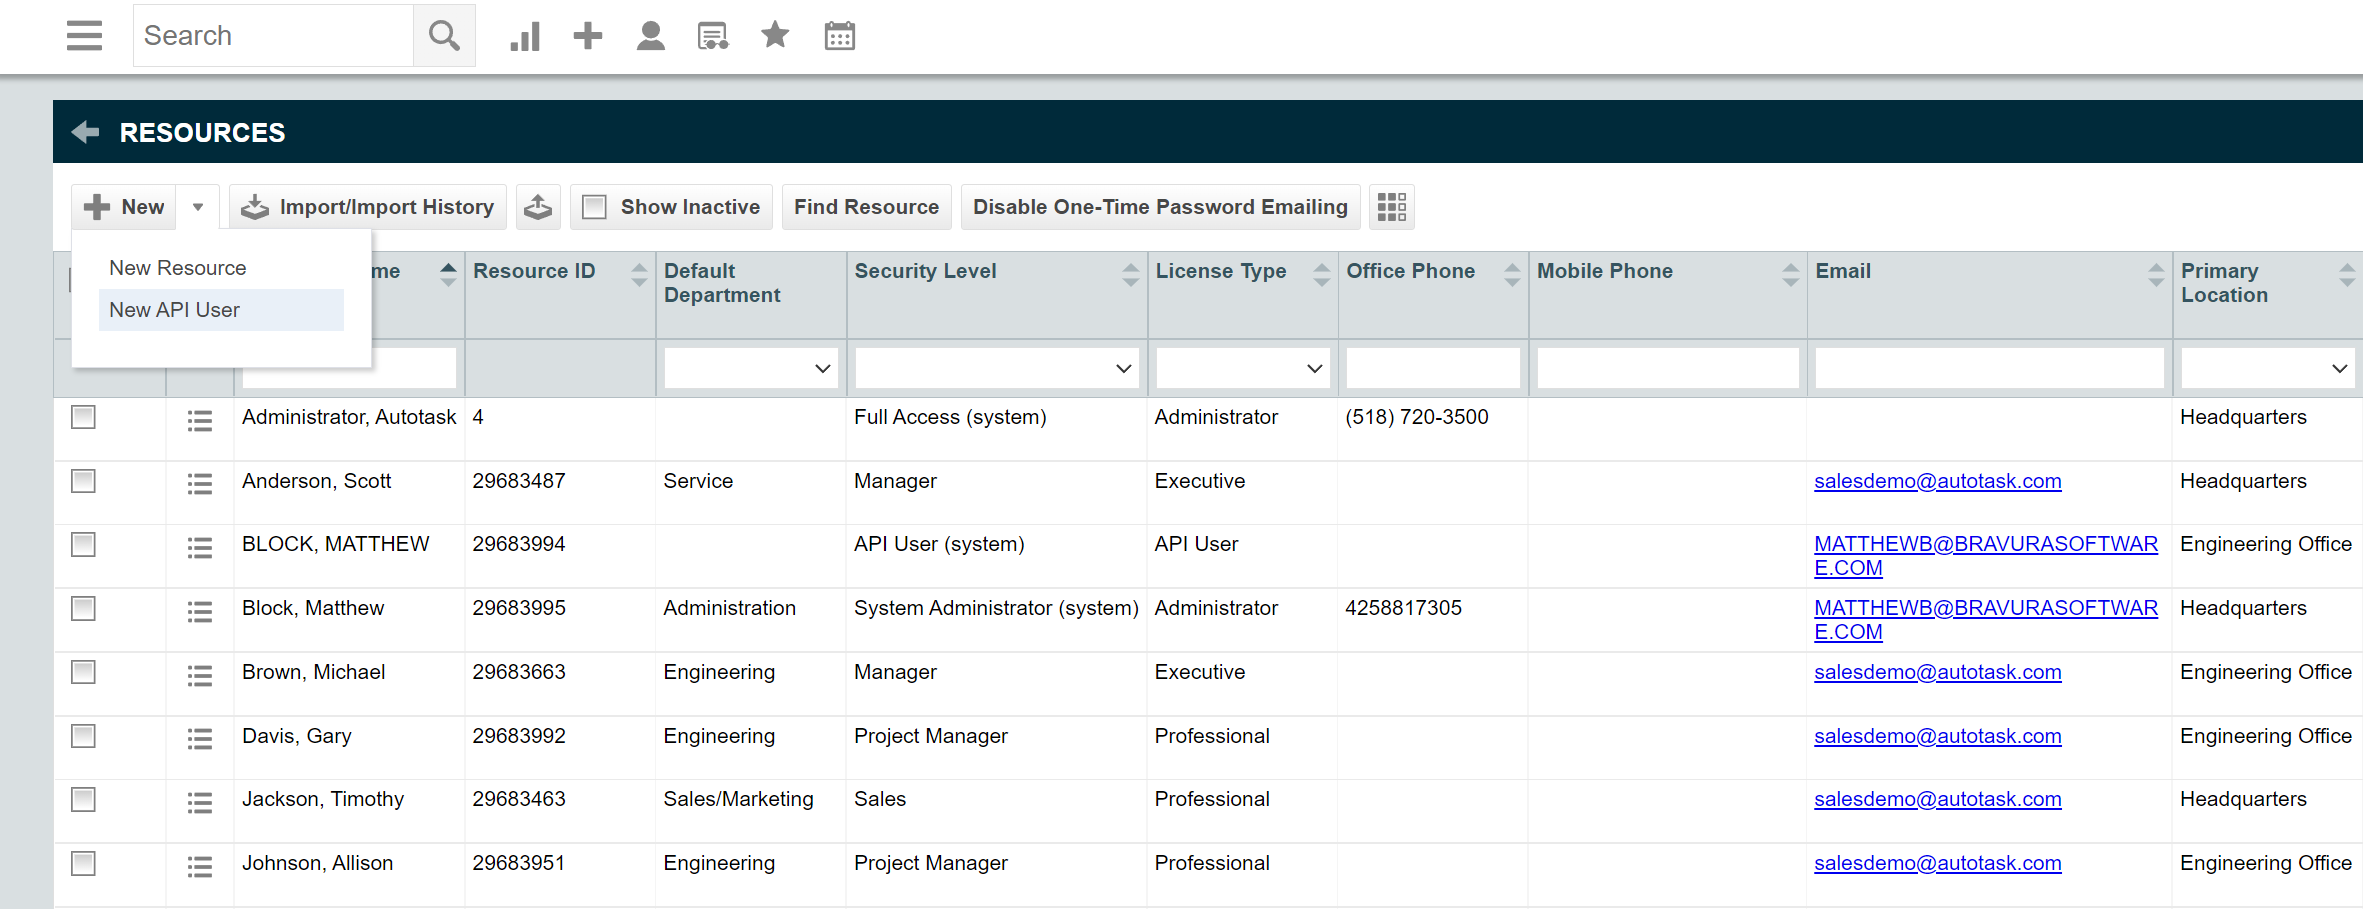
Fill in the API User details
You will need to fill in:
- First Name
- Last Name
- Email Address
- Primary Internal Location
- Security Level - must be API User (system)
- Integration Vendor - must be OptiTune - RMM
Finally, click on Generate Key and Generate Secret, and store the key and secret securely. You will need to enter these values when creating the Autotask Integration in OptiTune.
Don't forget to click "Save & Close" at the top left when you are done.
Setup Protected Data Access
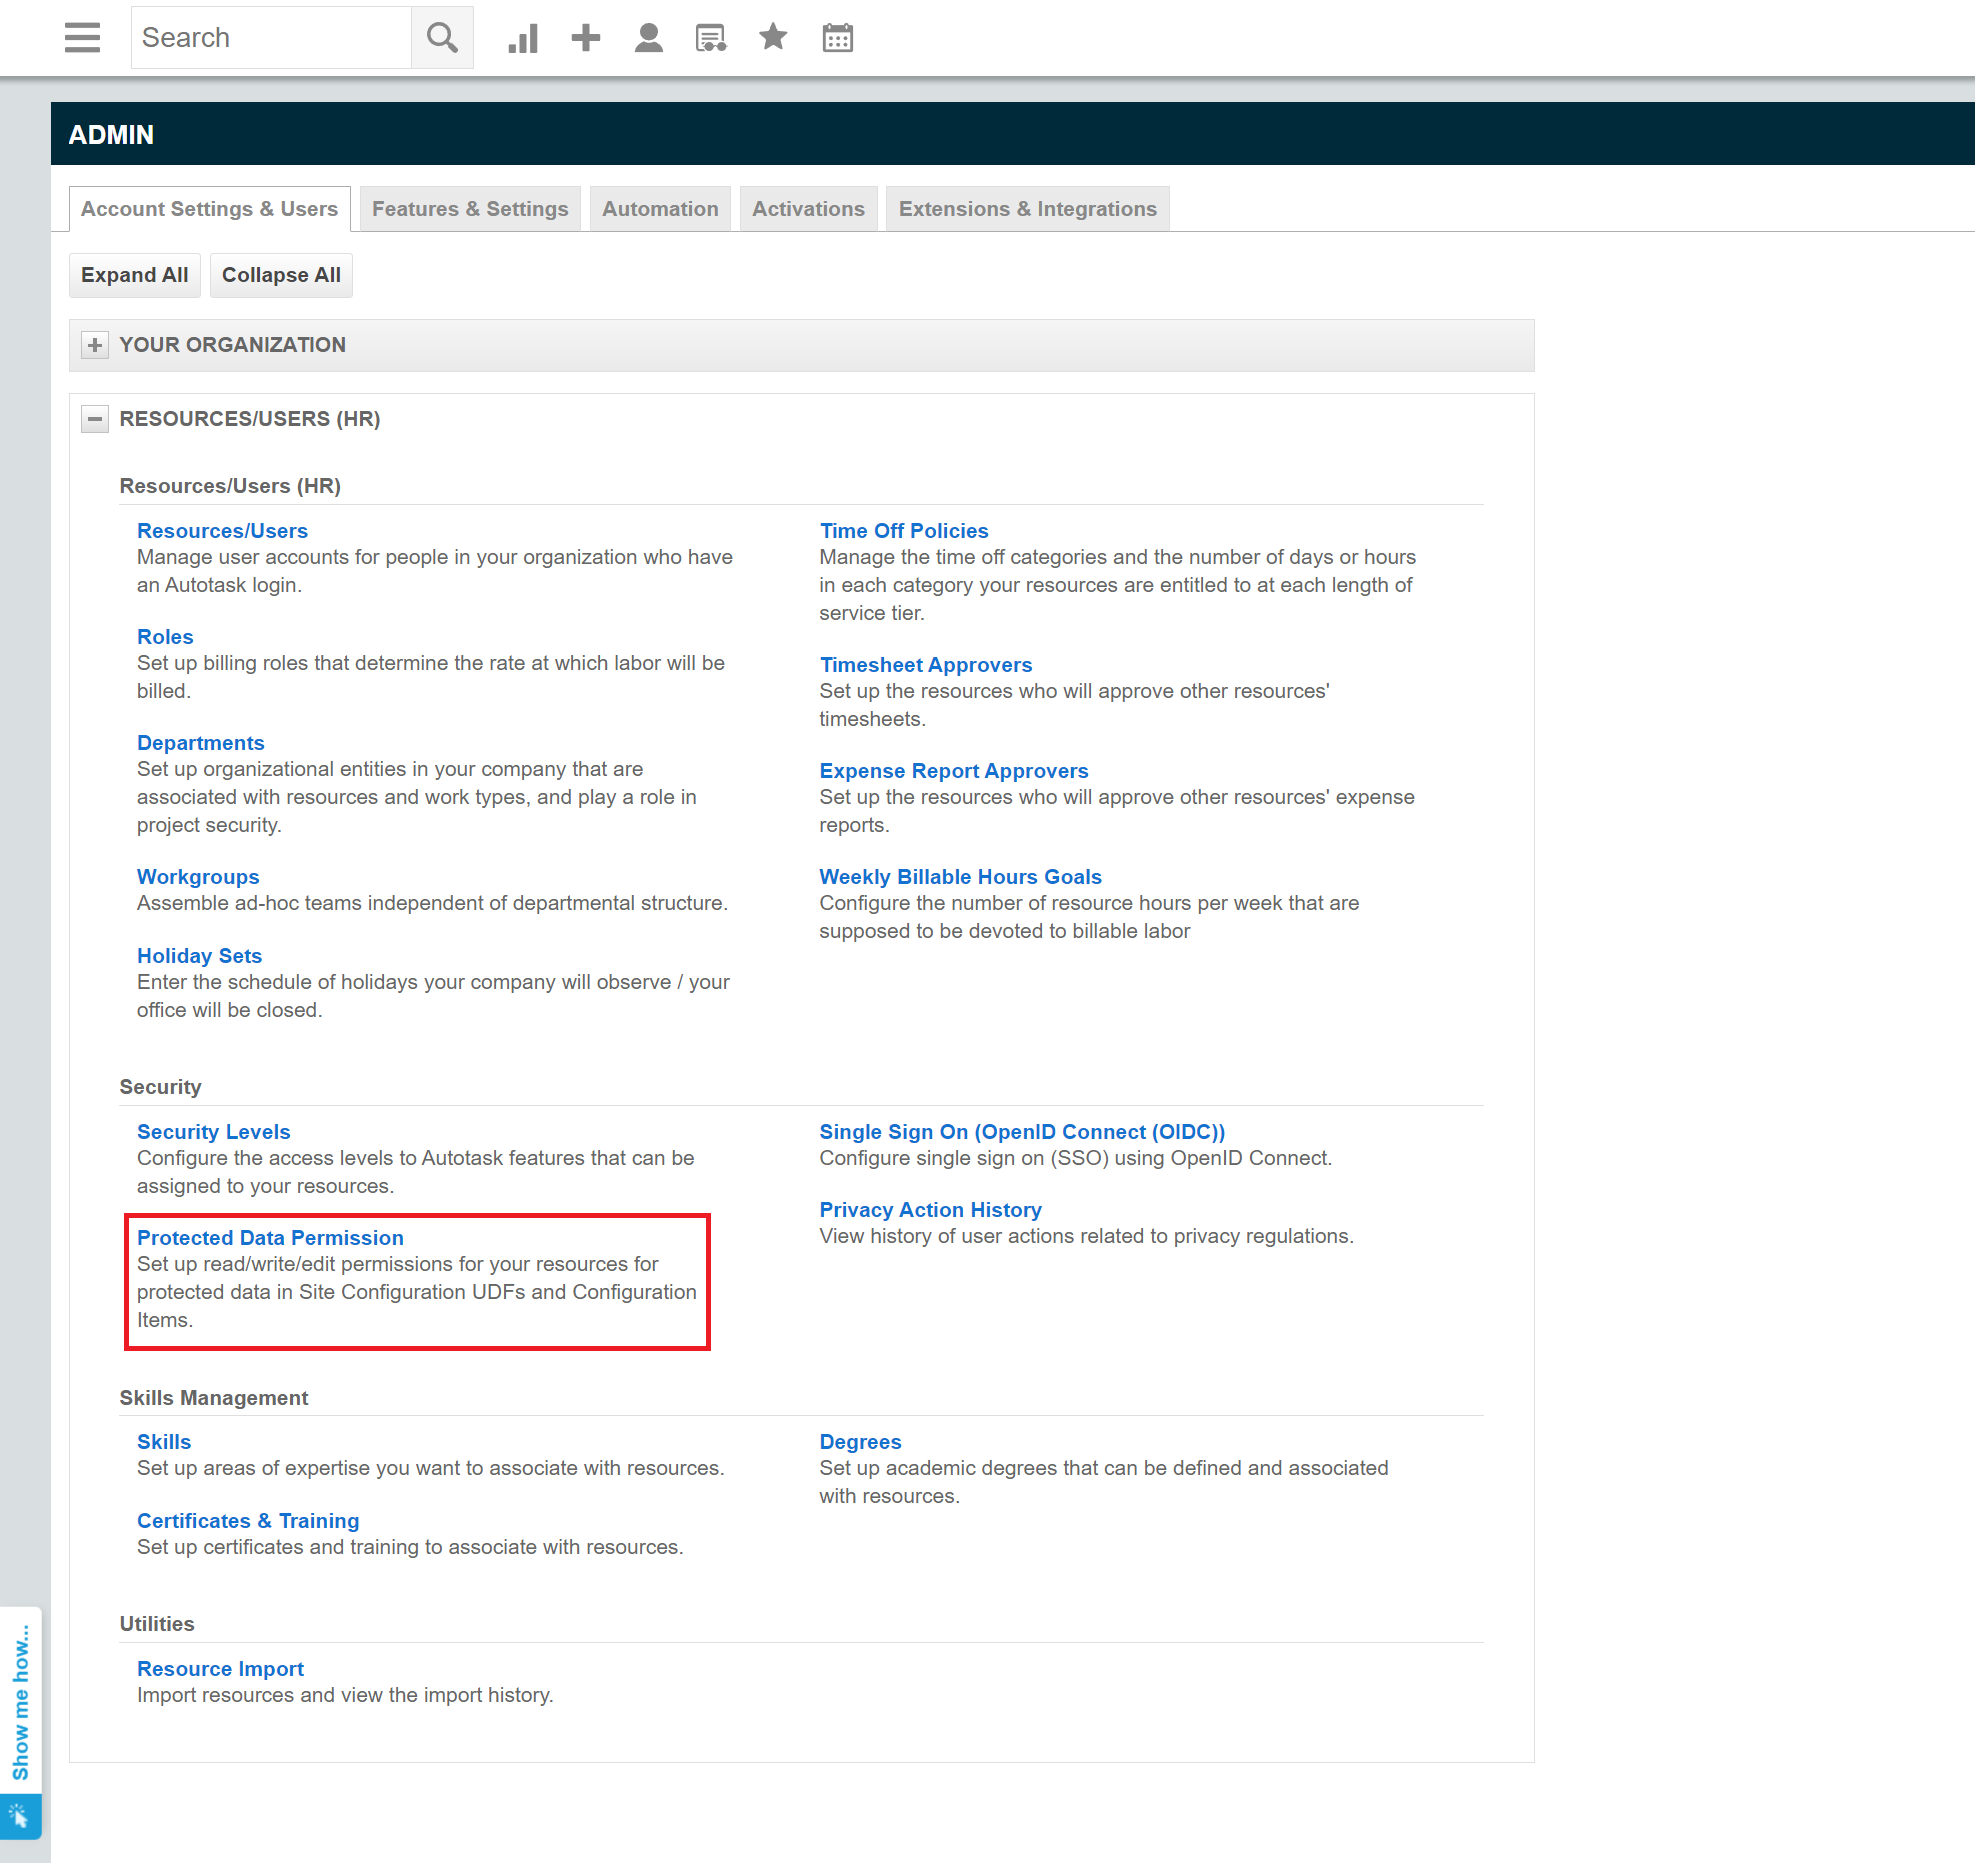
Go back to the "Admin" menu in Autotask, and under "Account Settings & Users", click on "Protected Data Permission".
Enable Protected Data Access for the new API User
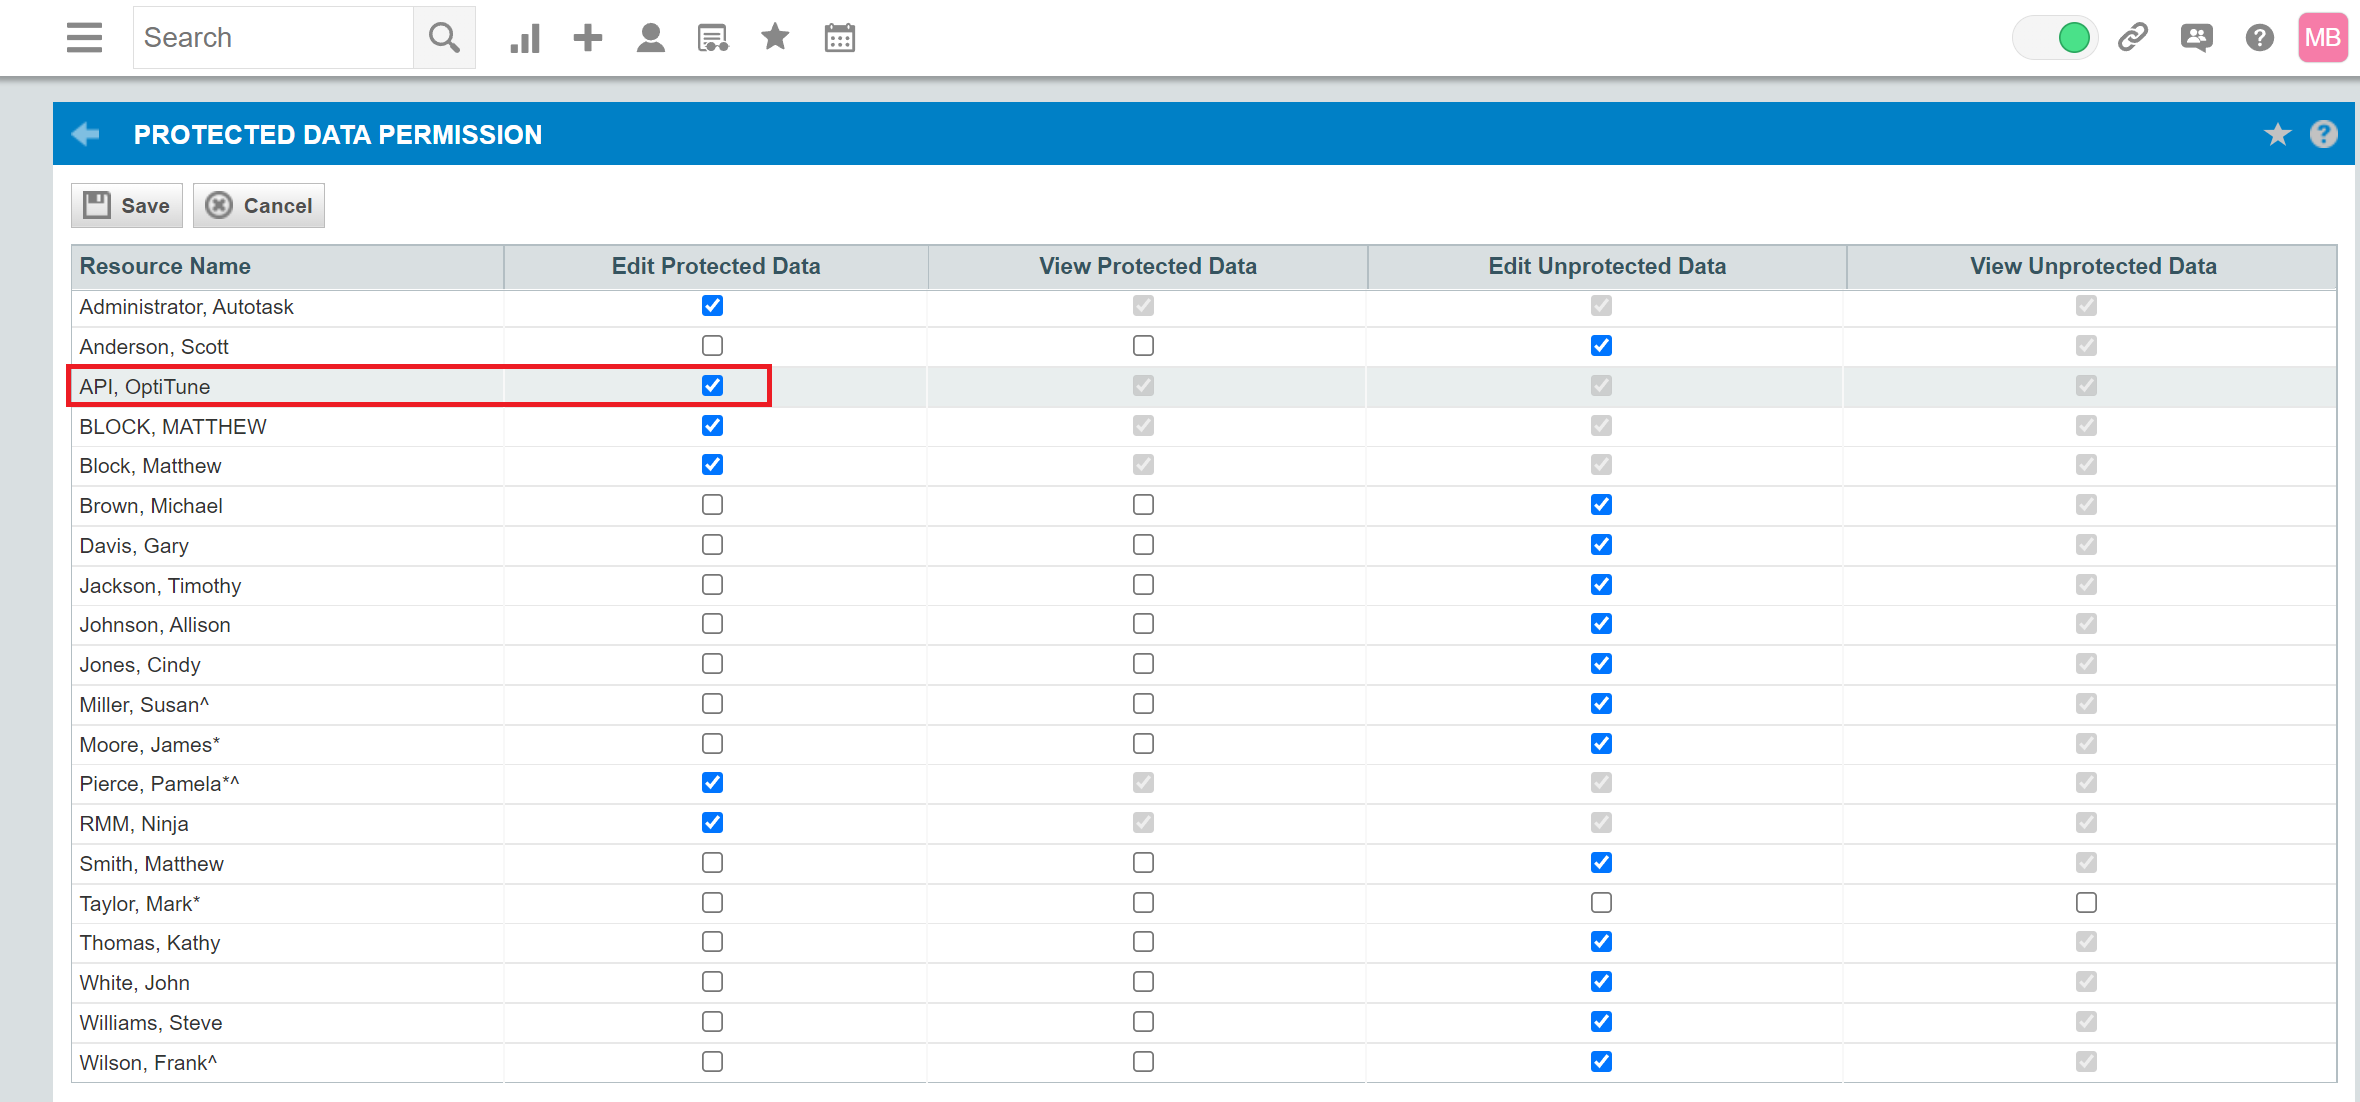
Find the API User that you just created, and check the checkbox for "Edit Protected Data", to allow that new user to edit protected data in Autotask. Don't forget to click on "Save".
Create the Integration in OptiTune
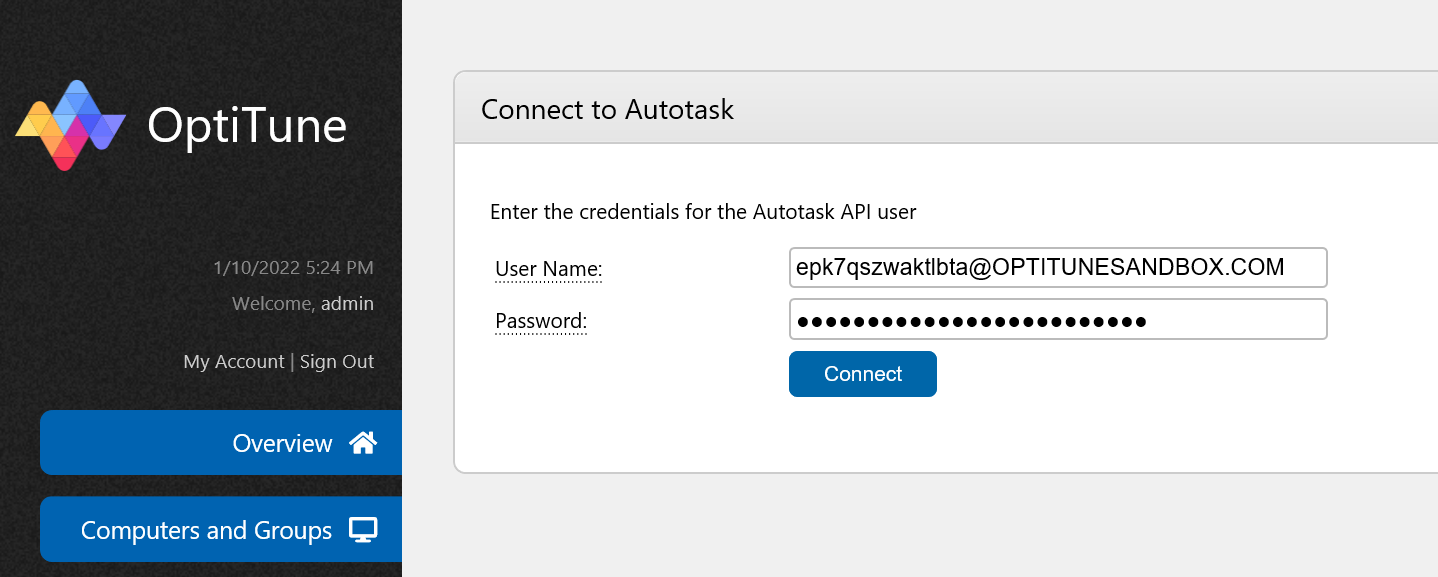
Back in OptiTune, enter the Username (Key) and Password (Secret) for the Autotask API User, and click "Connect".
Integration Details
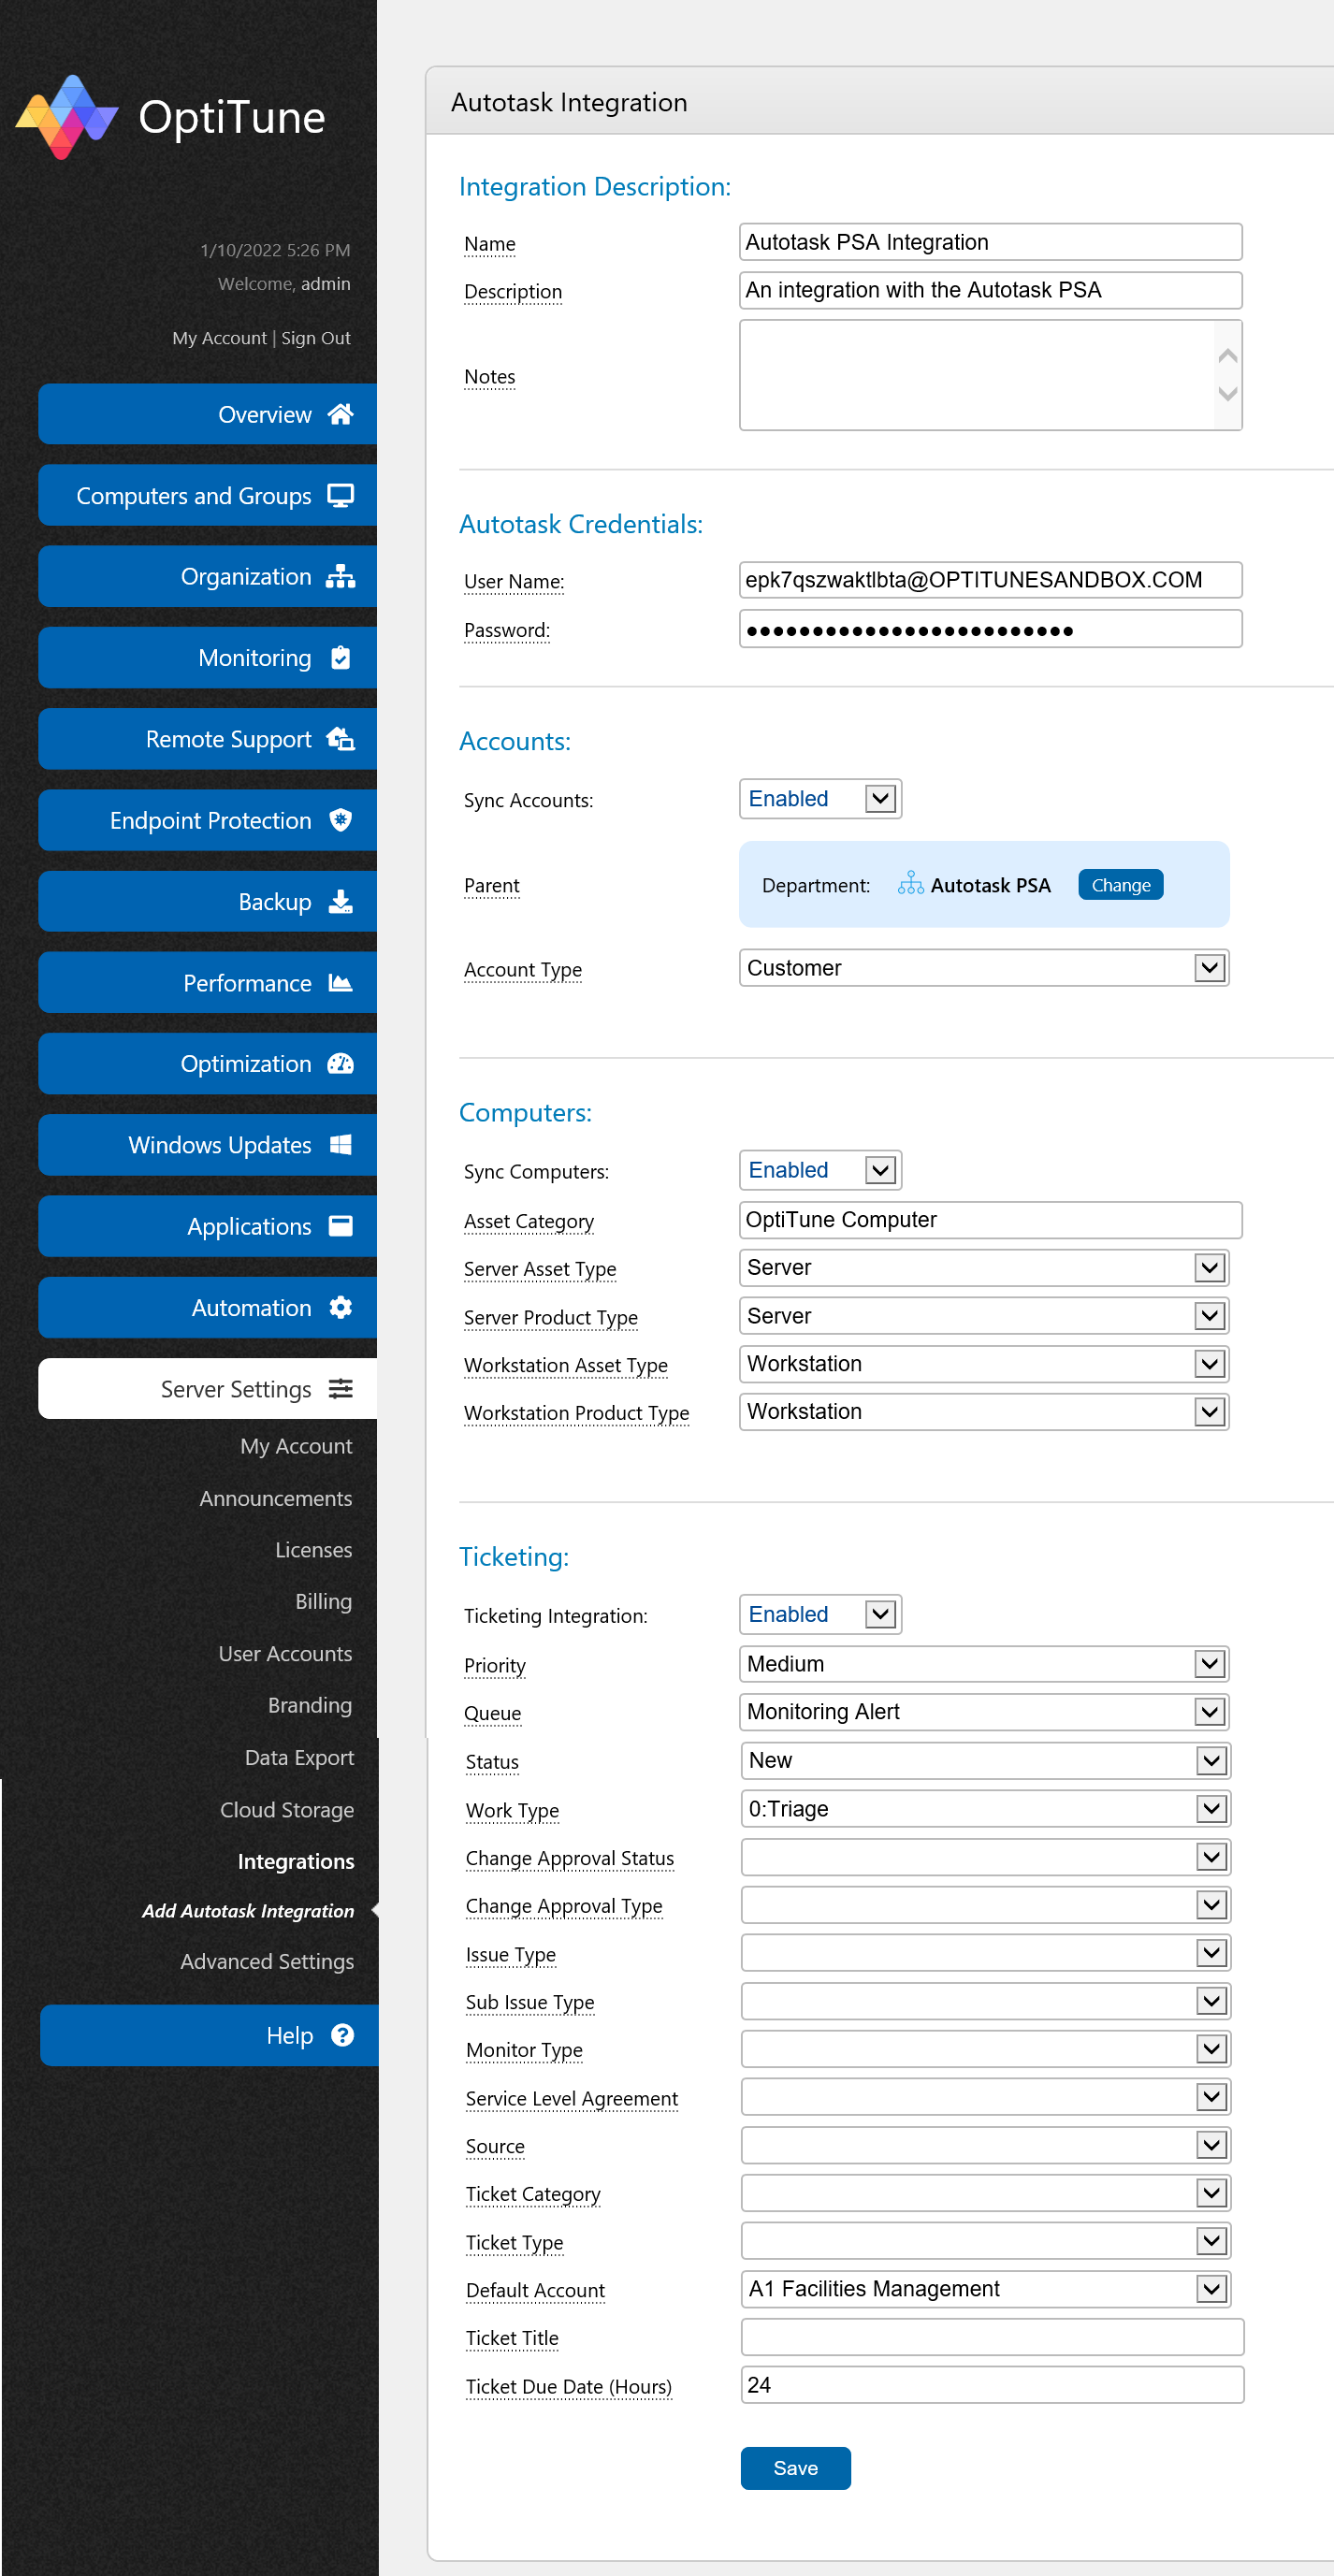
If this is your first Autotask Integration, a new business entity called "Autotask PSA" will automatically be created for you, and selected as the parent business entity. If everything looks good, you can just click "Save" and use all the defaults selected. Mouse over each label for a detailed explanation of each field.
Run Synchronization
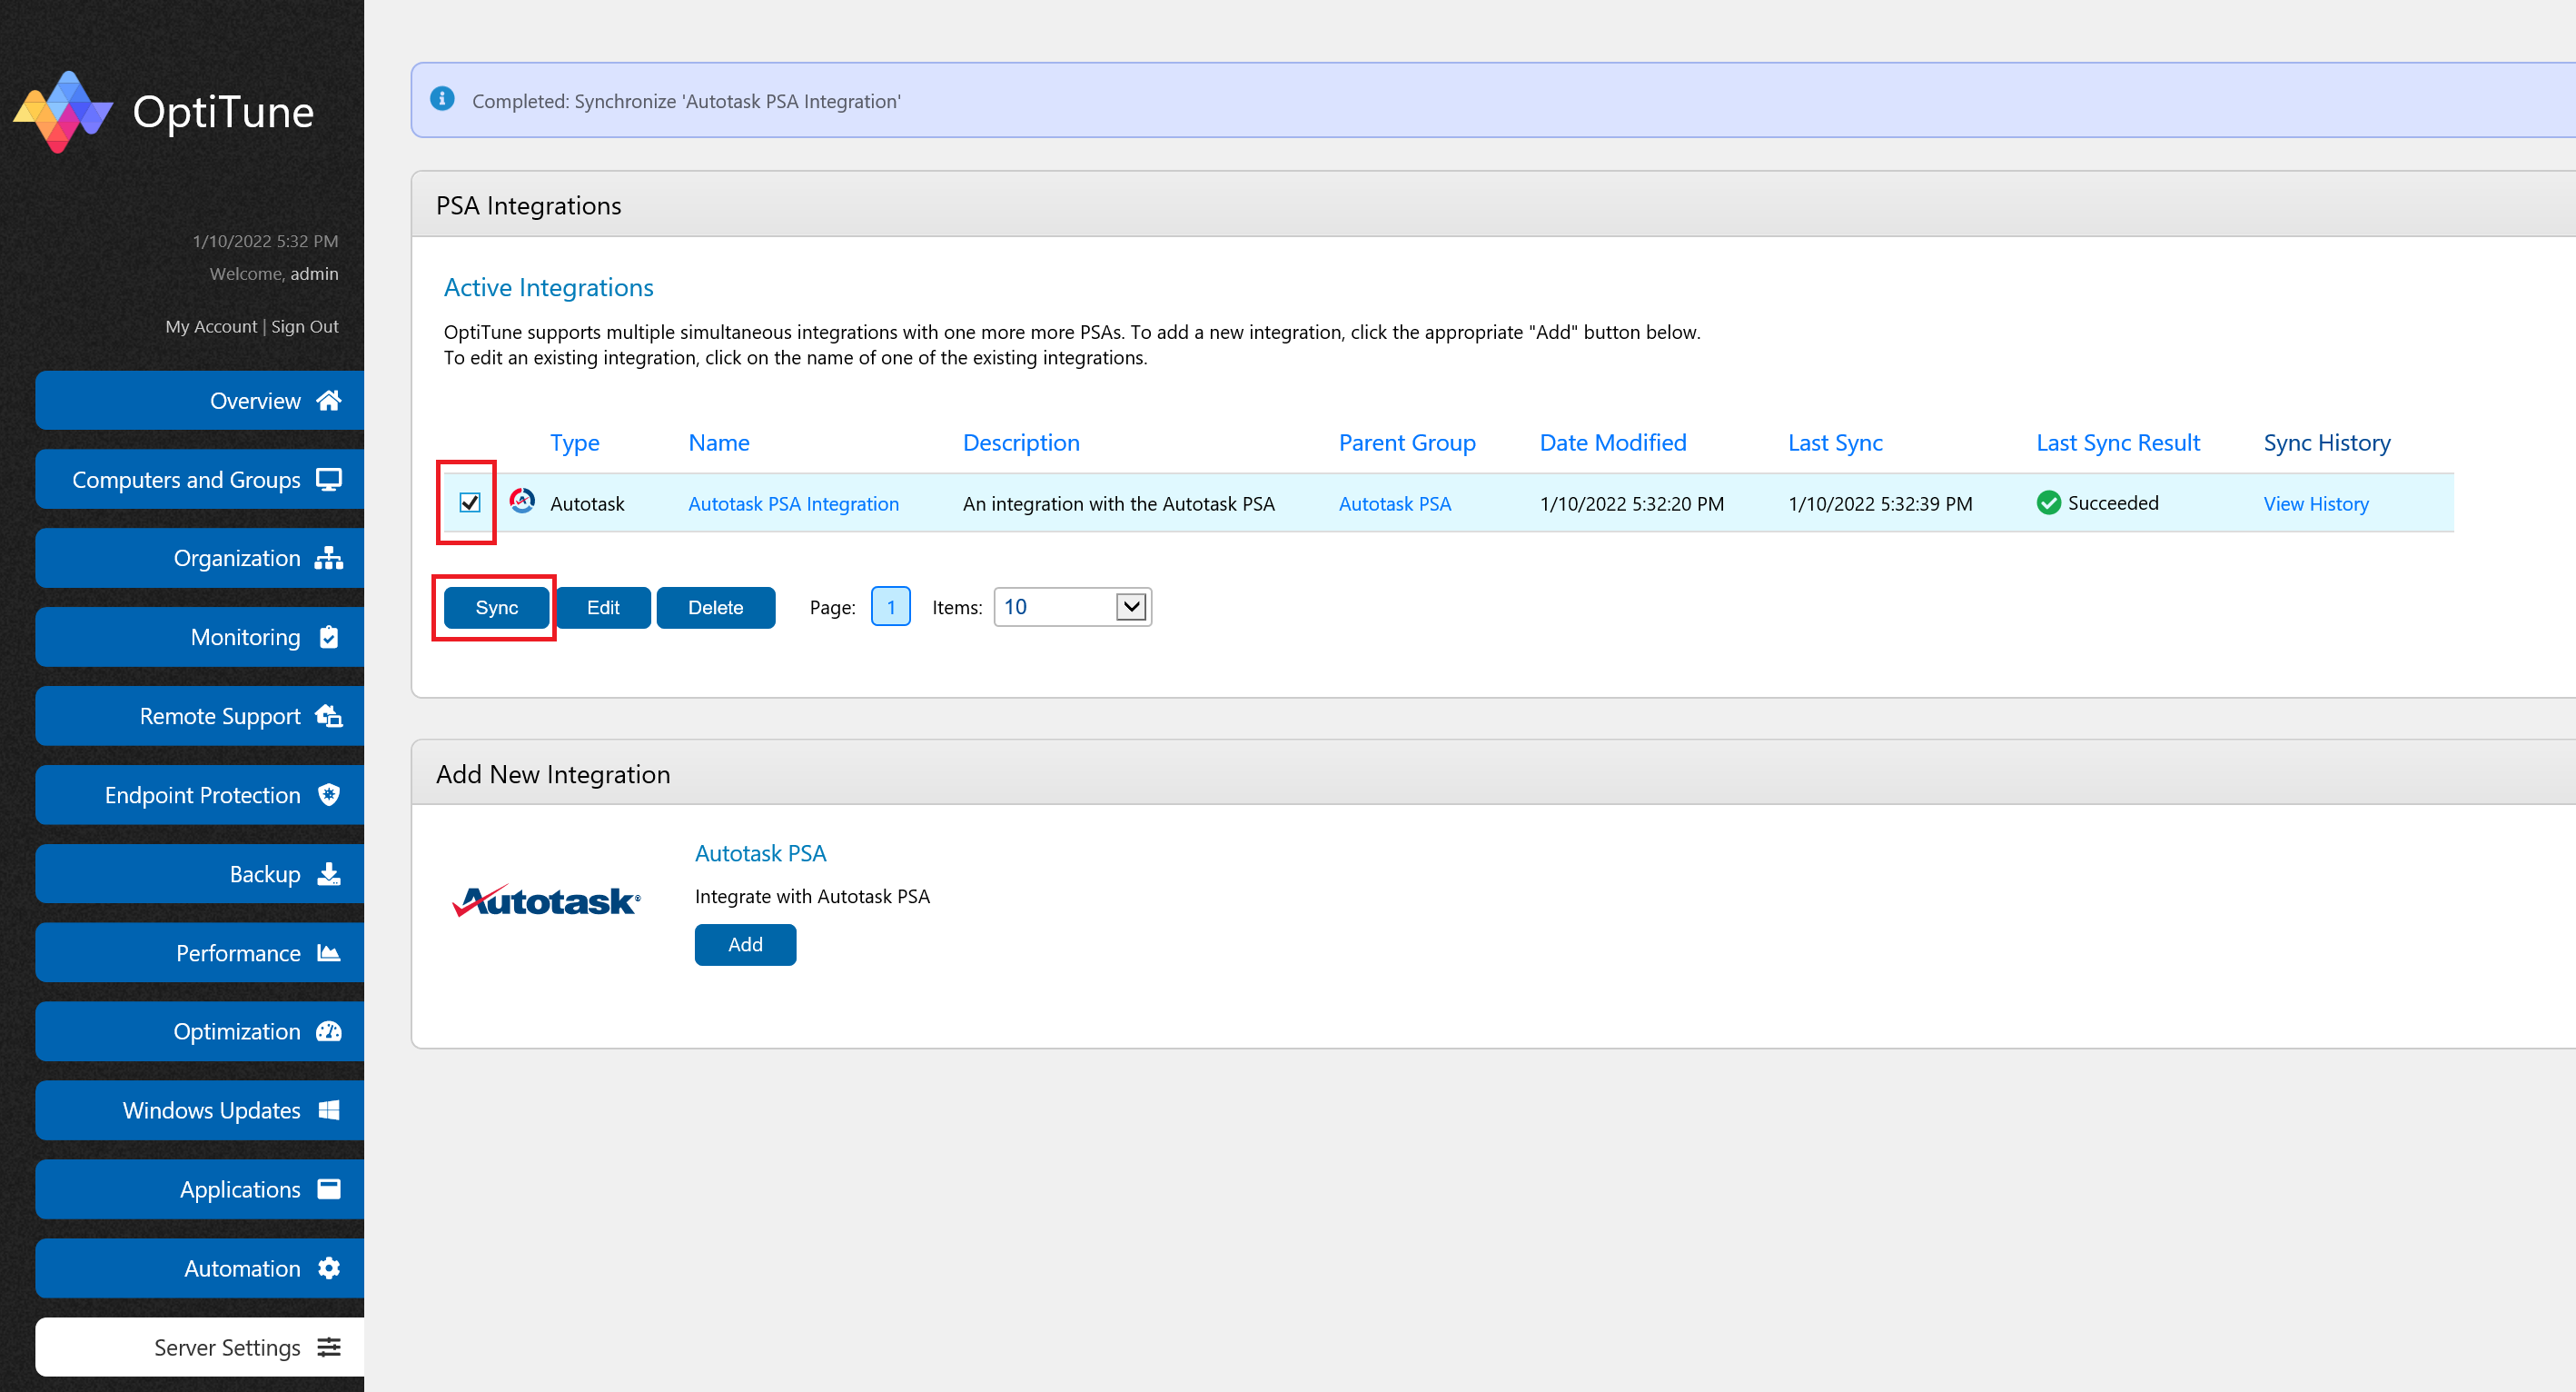
After saving your integration, click on the integration's checkbox, and then click "Sync". This will run the first synchronization for Autotask. You can then browse the business entities that were imported from Autotask, and add computers to them as needed directly in OptiTune. The sync process will automatically run every 4 hours, but you can also run it manually as shown below.
Creating Tickets in Autotask
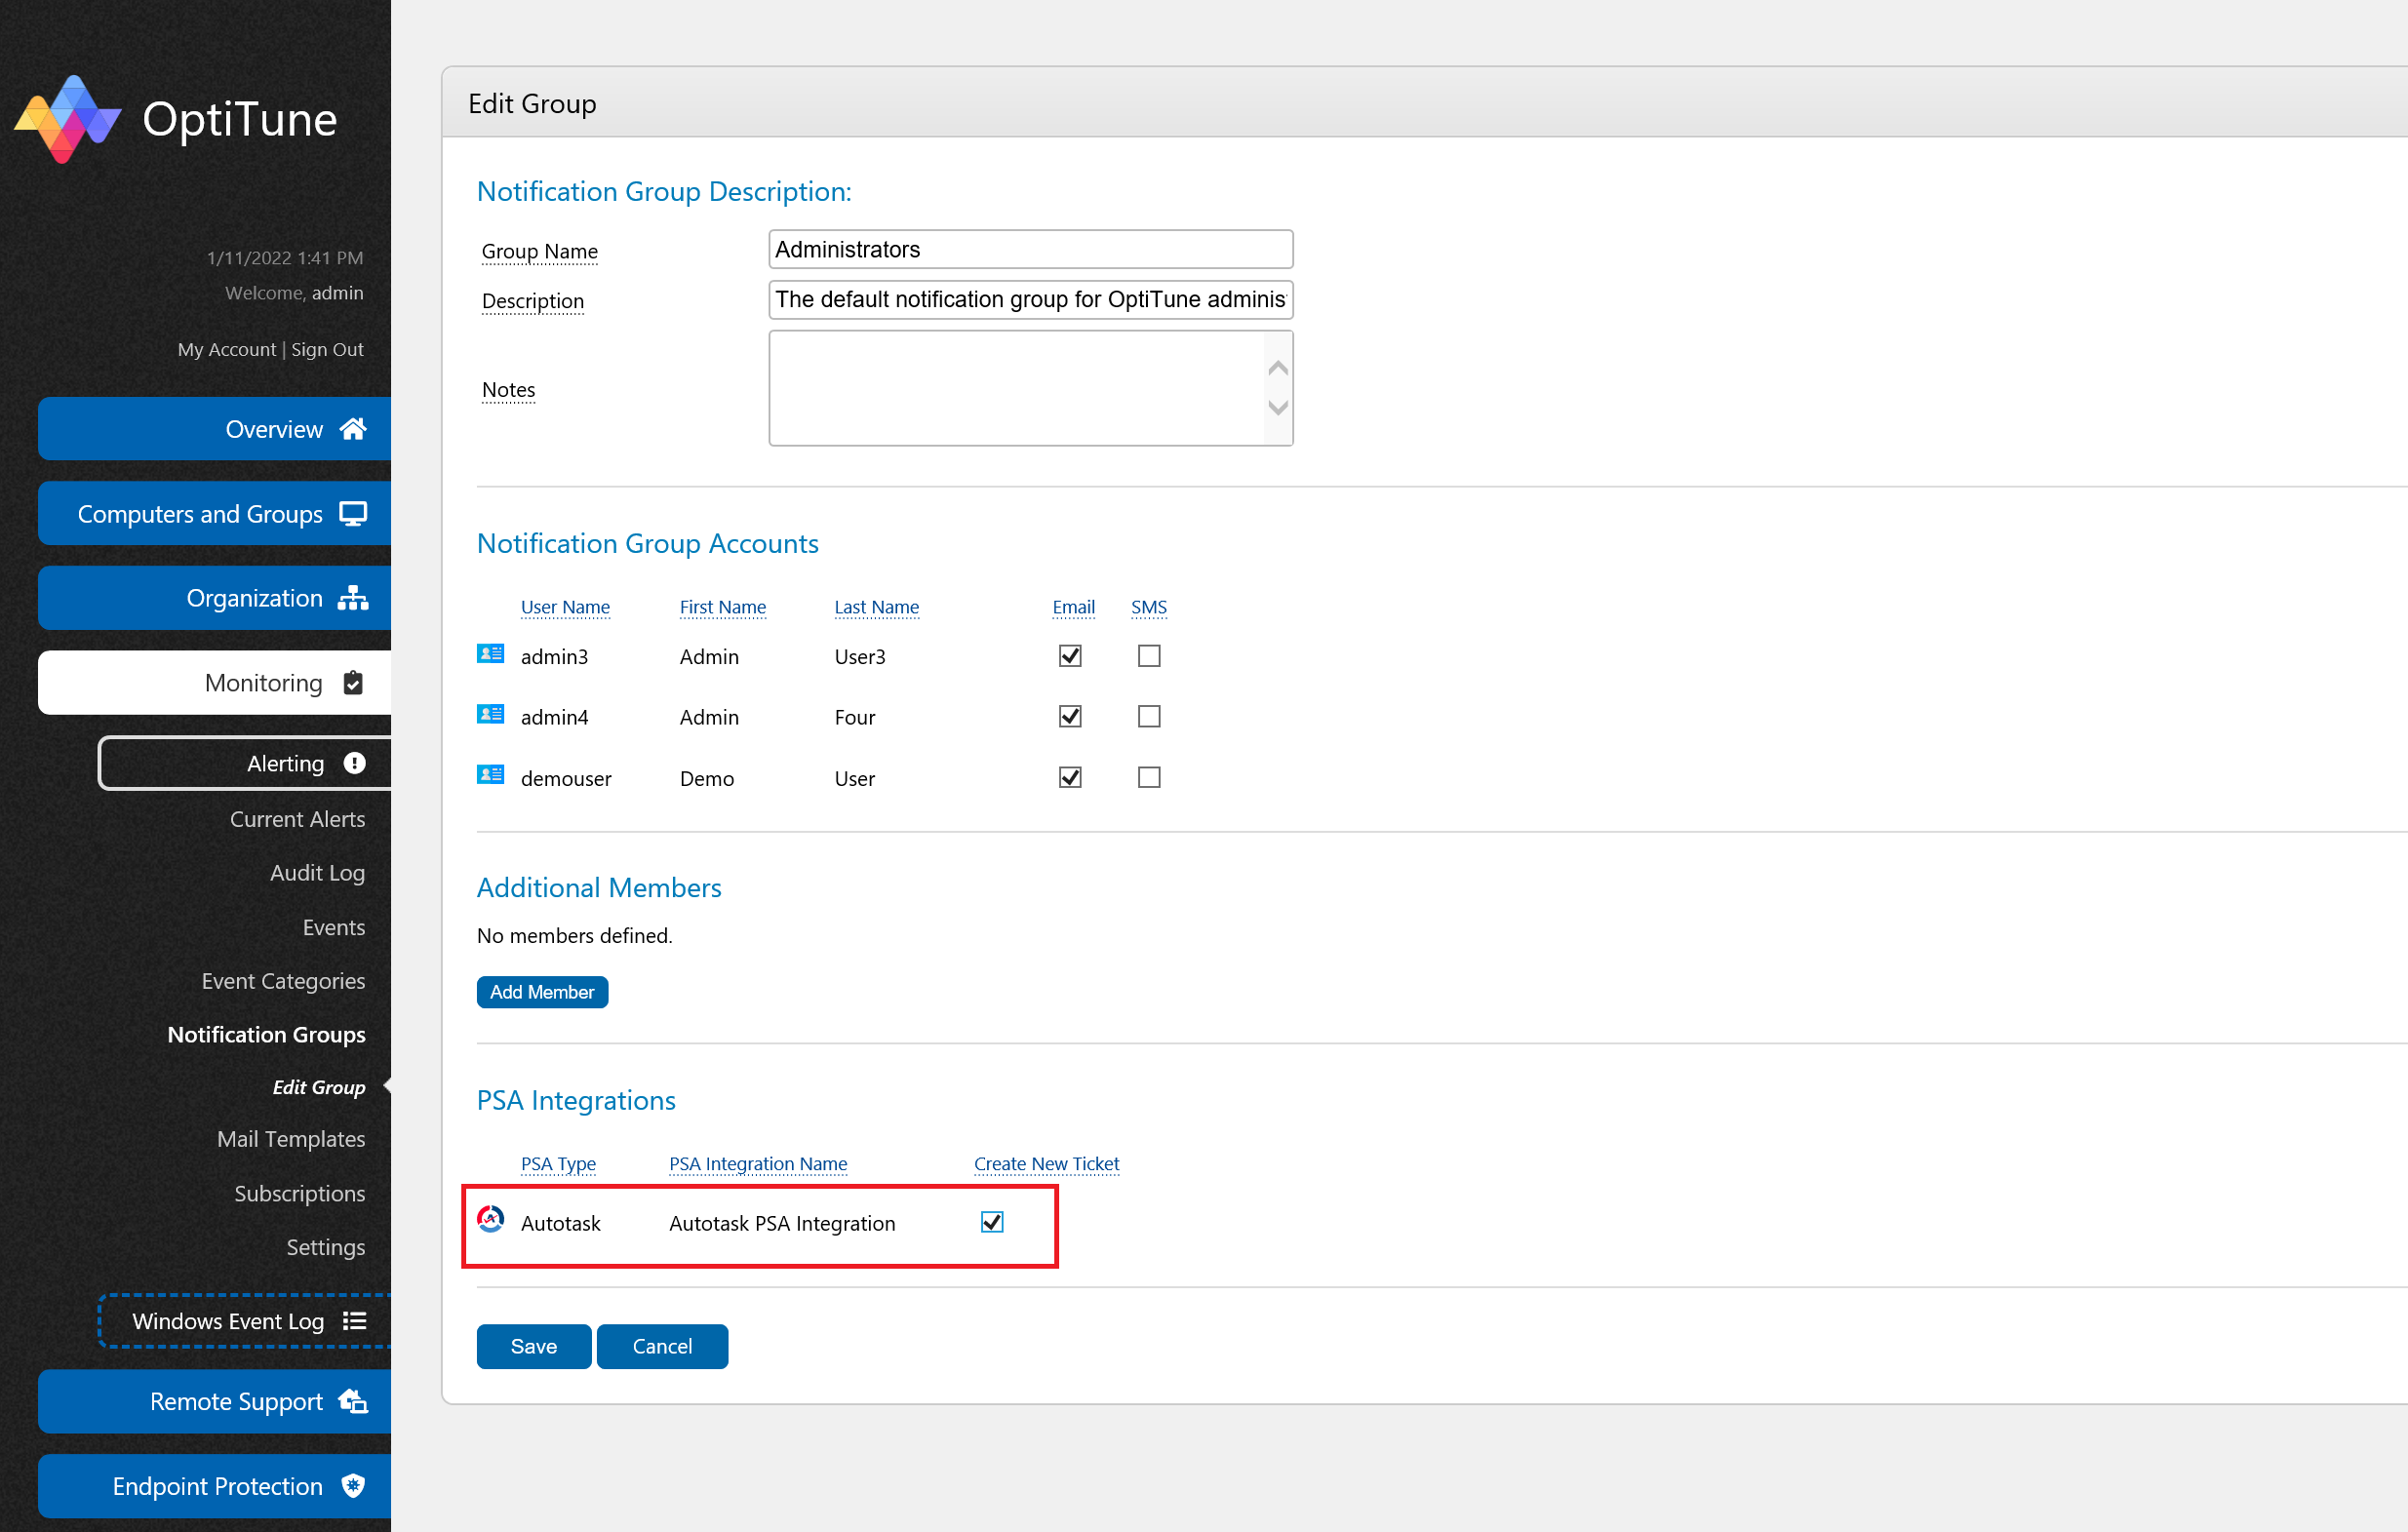
If you have enabled the ticketing feature for your Autotask integration, in order to get tickets created in Autotask,
you will also need to associate the "integration" with one or more notification groups in OptiTune.
Learn more about how monitoring works in OptiTune.
Basically, OptiTune treats the PSA integration as another receipient in a notification group for an alert subscription, so you have to also add the PSA integration as a member of a notification group by clicking on its checkbox in the notification group page. Once you have done so, if there is an alert subscription that uses this notification group, tickets will be created in Autotask when alerts are activated for the alert subscription.
