Endpoint Protection Settings
To view the current endpoint protection settings, click on the "Endpoint Protection" tab, then select "Settings".
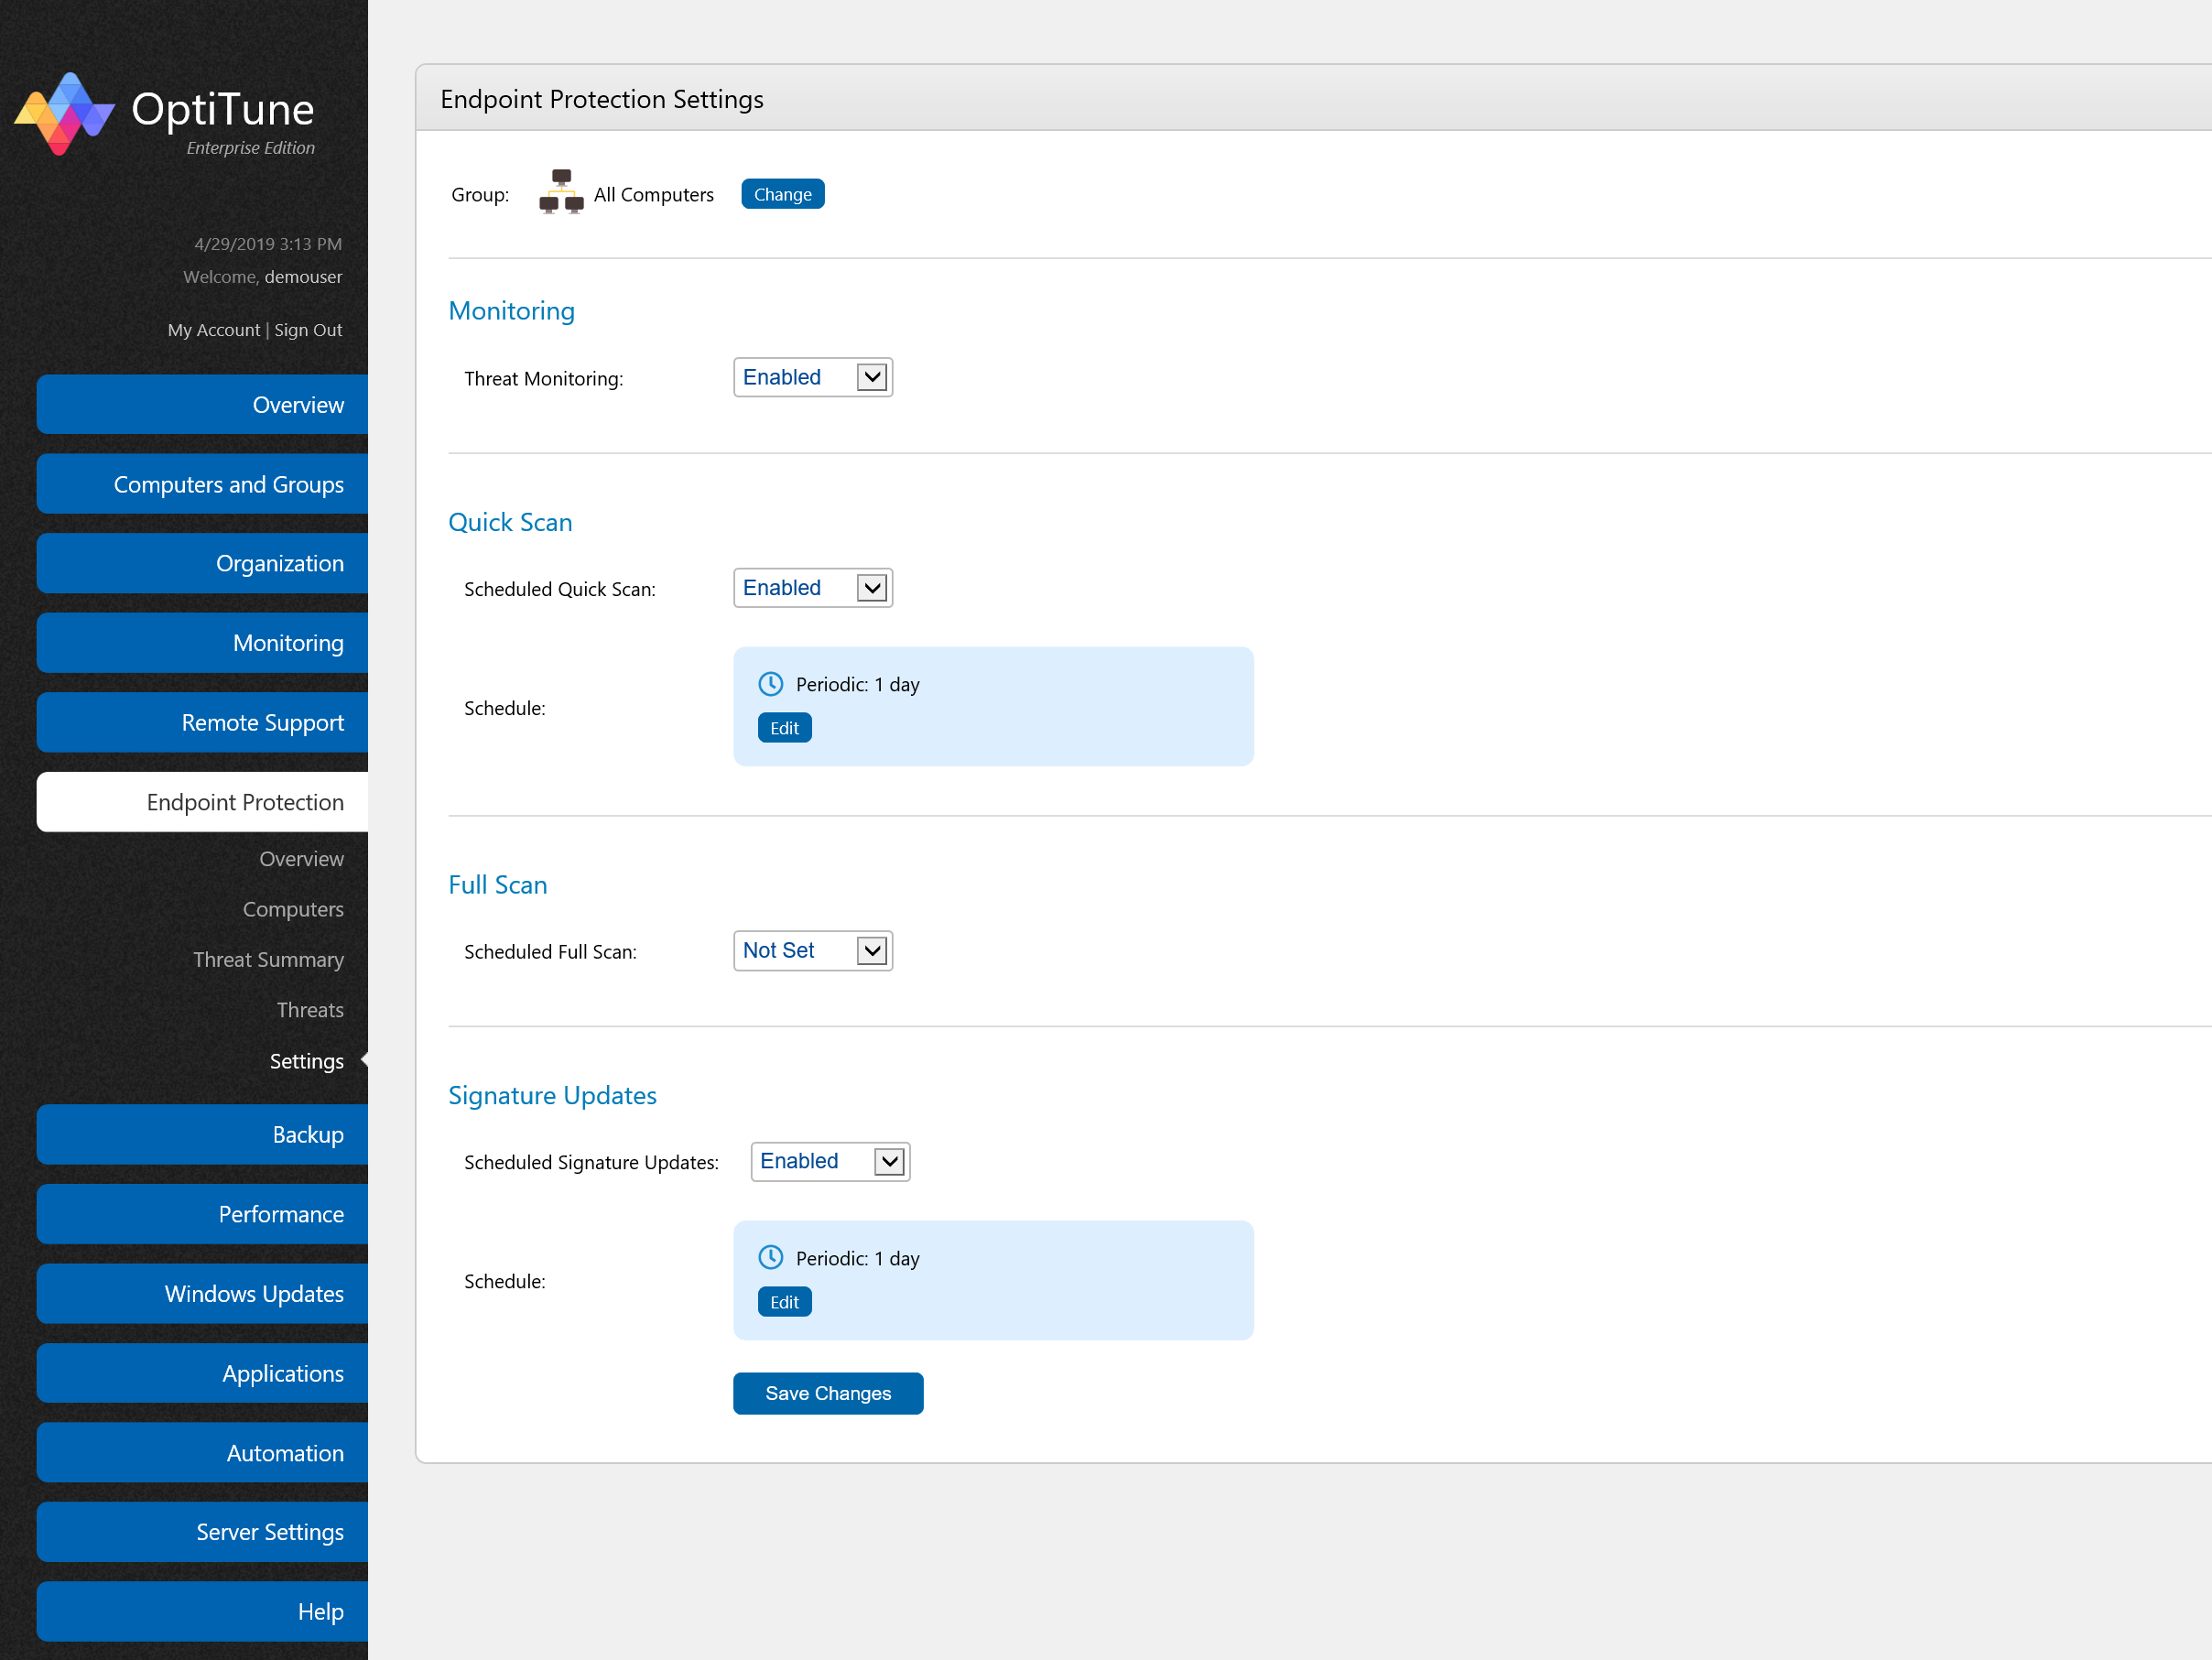
At the top of the page is a "Computer/Group" selector, which lets you select the computer or group whose settings you wish to edit. Click on the "Change" button to select a computer or group.
Monitoring
By default, threat monitoring is enabled for the "All Computers" group. Set the monitoring state by selecting values from the "Threat Monitoring" drop down list.
Quick Scan
This section lets you configure automated quick scans, which scan limited but important areas of the file system on a computer (e.g. "C:\Windows", "C:\Program Files", etc...).
Scheduled Quick Scan
This drop down box sets whether or not quick scans are Enabled/Disabled/Not Set. If it is Not Set, then the settings for this group have no effect on the final settings for a computer that belongs to this group.
Schedule
You can define the schedule for the quick scans by pressing the "Edit" button. For more information about setting up a schedule, see Editing a Schedule
Full Scan
This section lets you configure automated full scans, which scan all local drives on the computer.
Scheduled Quick Scan
This drop down box sets whether or not full scans are Enabled/Disabled/Not Set. If it is Not Set, then the settings for this group have no effect on the final settings for a computer that belongs to this group.
Schedule
You can define the schedule for the full scans by pressing the "Edit" button. For more information about setting up a schedule, see Editing a Schedule
Signature Update
This section lets you configure automated signature updates, which update the definition files of the endpoint protection product.
Scheduled Signature Updates
This drop down box sets whether or not signature updates are Enabled/Disabled/Not Set. If it is Not Set, then the settings for this group have no effect on the final settings for a computer that belongs to this group.
Schedule
You can define the schedule for the signature updates by pressing the "Edit" button. For more information about setting up a schedule, see Editing a Schedule