Add/Edit Brand
To add a new brand for your organization, click on the "Server Settings" tab, and select "Branding", and click "Add". To edit an existing brand, click on the title of the brand on the "Brands" page.
Brand Details
To save the new brand, or update an existing one, fill in the fields on the form, and click "Save".
You can also preview what the brand will look like by clicking on the "Preview" button. For example, you can make incremental changes, and test them with the "Preview" button. Once you are satisfied with how the branded website looks, click "Save" to save your changes.
Note: You can mouse over any of the field labels for an explanation.
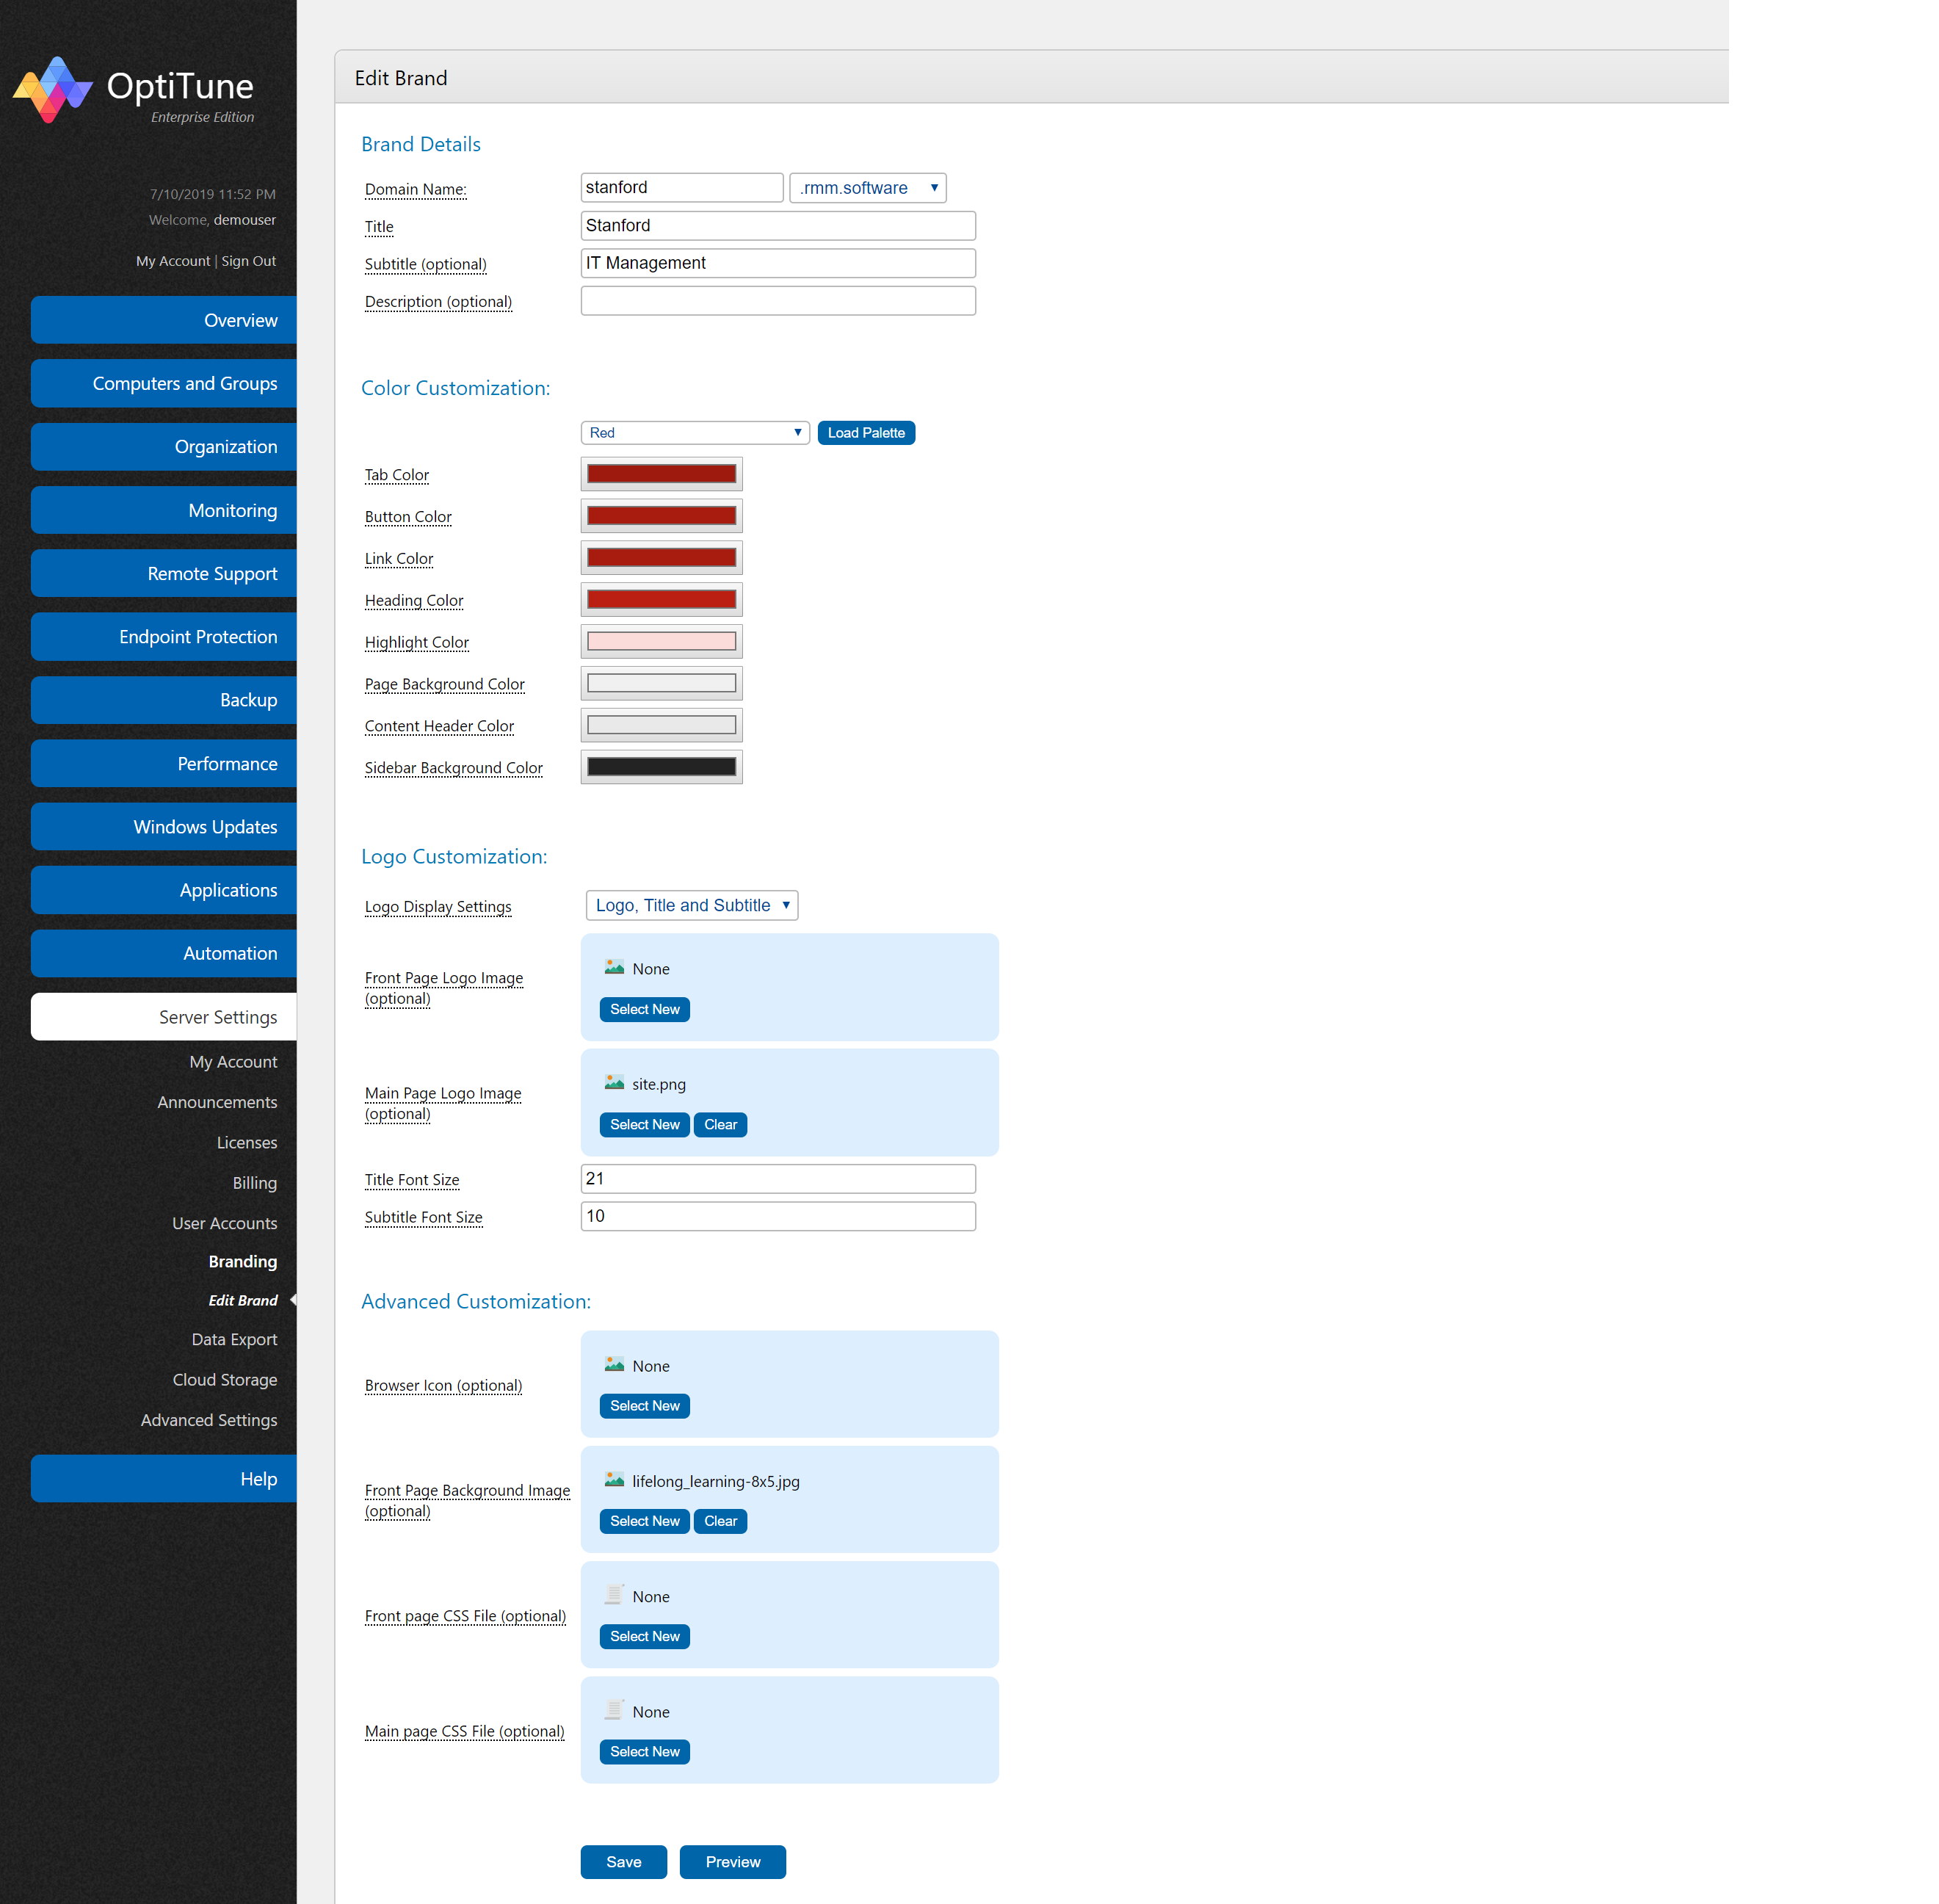
Domain Name
Enter a host name, and pick a root domain name from the drop down list. Once saved, you can navigate to your branded site using the fully qualified domain name, for example, https://myhost.rmmportal.com
Title
Enter a title for the brand. The title is used (optionally) when rendering the logo, and in the HTML page title. For example, if you enter "MyTitle" for the title, and then bookmark the "Overview" page of a branded site, the bookmark in the browser would read "Overview - MyTitle" instead of "Overview - OptiTune".
Subtitle
Enter a subtitle for the brand. The subtitle is used (optionally) when rendering the logo.
Description
Enter a description for the brand. This is for internal, informational purposes, and is not shown anywhere.
Color Customization
Here you can customize the colors used when displaying a branded website. You can customize each individual color, or load colors from a predefined palette.
Loading a Color Palette
Pick a predefined color palette from the drop down list, and click "Load Palette" to load the color palette.
Generating a Color Palette
If you have a specific color in mind for your brand, enter it in the "Tab Color" input field and choose "Generate From Tab Color" in the drop down list. Then click "Load Palette". The color entered in the Tab Color field will be used to generate a range of other similar colors for the other color fields, of similar intensity to the default theme.
If you want the exact color to be used when generating the other colors (for example, if your Tab color is fairly bright), select "Generate From Exact Tab Color" instead.
Brand Colors
Tab Color
Specify a color for the tabs in the sidebar. Note that if your browser supports HTML color selection, it will let you pick a color using the system color picker. Otherwise, enter the color in HTML format, for example "#123456".
Button Color
Specify a color for the website buttons.
Link Color
Specify a color for the website page links.
Heading Color
Specify a color for text headings.
Highlight Color
Specify a color for highlights, used as a lighter background color for small item lists.
Page Background Color
Specify a color for drawing the background of the page.
Content Header Color
Specify a color for drawing the background of each content box's header.
Sidebar Background Color
Specify a color for drawing the background of the sidebar.
Logo Customization
In this area, you can customize the website's logo. You can optionally upload a logo image to use, and specify what combination of title, subtitle, and logo image is used to draw the website logo, both for the login pages, and main pages.
Logo Display Settings
Select how the logo is displayed on the front page and main page. Note that if you add a .css file, it can further alter this behavior.
Choices include:
- Logo, Title and Subtitle
- Logo Only
- Logo and Title
- Title Only
- Title and Subtitle
Front Page Logo Image (optional)
Select a logo image to use in the login page, and other front pages of the site. Must be .png, .jpg, .gif, .svg, or .webp
If you don't also upload a Main Page Logo Image, the Front Page Logo Image will be used for both pages.
Main Page Logo Image (optional)
Select a logo image to use in the main site, after successfully logging in. Must be .png, .jpg, .gif, .svg, or .webp
If you don't also upload a Front Page Logo Image, the Main Page Logo Image will be used for both pages.
Title Font Size
The font size in points (pt) used to display the logo title. It can be a decimal number, e.g. "16.5"
Subtitle Font Size
The font size in points (pt) used to display the logo subtitle. It can be a decimal number, e.g. "16.5"
Advanced Customization
In this area, you can customize more advanced items of the brand. You can upload a browser page icon (shown in the brower page tab), or even upload complex .CSS files to further customize the branded site.
To create custom .CSS files for the branded site, you will likely need a graphic designer or someone with web development experience to help, since it is not a trivial task.
Browser Icon (optional)
Select a .png file for the icon the browser uses to represent the site. It will be displayed in the browser tab, next to the title, and often as a bookmark icon for the site.
Front Page Background Image (optional)
Select a background image to use in the login page, and other front pages of the site. Must be .png, .jpg, .gif, .svg, or .webp
Front page CSS File (optional)
Select a custom .CSS file for further customizing the appearance of the login page, and other front pages of the site. This is for advanced users only.
The contents of the uploaded .CSS file will be rendered as a "style" tag at the end of the page header element, allowing you to override all existing styles. Almost any element of the website can be customized this way.
Main page CSS File (optional)
Select a custom .CSS file for further customizing the appearance of the main site, after successfully logging in. This is for advanced users only.
The contents of the uploaded .CSS file will be rendered as a "style" tag at the end of the page header element, allowing you to override all existing styles. Almost any element of the website can be customized this way.